Grav Course Hub with Git Sync is designed for tech-savvy educators to support an open and collaborative flipped-LMS approach for one or more courses.
Why Use the Grav Course Hub Project?
- To make online course materials more open and accessible
- To support collaboration and version control of online course materials
- To integrate a broader range of online course materials
- To provide multi-device access for online course materials
- To more quickly and easily update online course materials
The Grav Course Hub, along with my other Grav open education projects ePortfolio Blog and OER Content Space, are also documented at learn.hibbittsdesign.org.
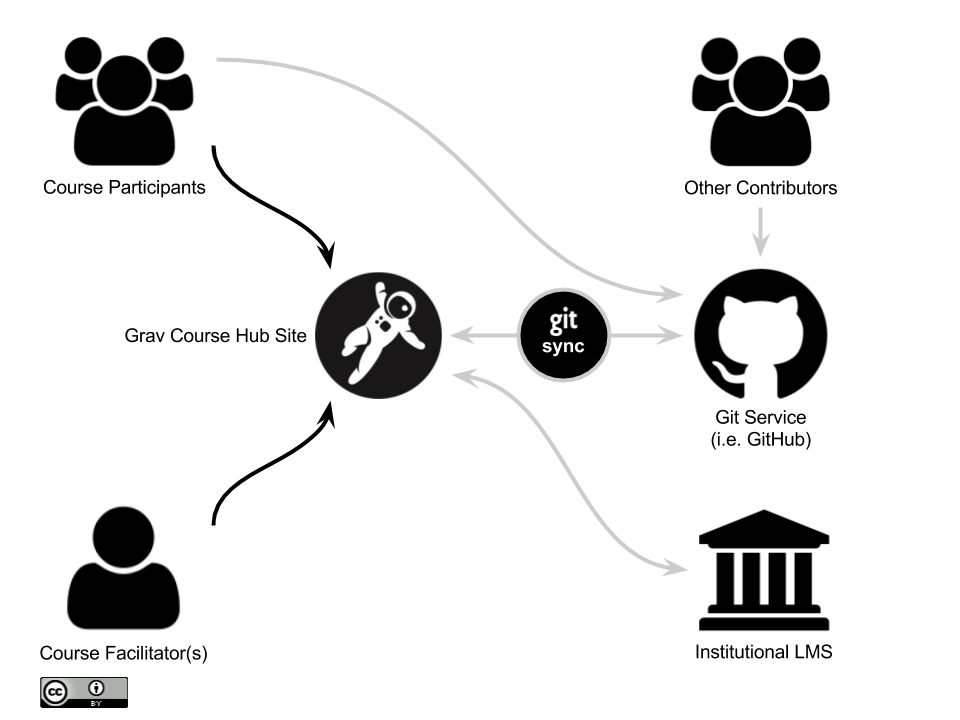
Example Flipped LMS Approach with Grav Course Hub workflow
Step-by-Step Video (no audio)

The following install and configuration process usually takes under 5 minutes.
Course Hub with Git Sync - Install and Configure on Reclaim Hosting
1. Getting Ready
1.1 If you do not already have a Git service account (i.e. GitHub, GitLab, BitBucket, etc.) then sign up for one
1.2 Download Course Hub skeleton package
From the getgrav.org site at https://getgrav.org/downloads/skeletons or via this direct link: http://hibbittsdesign.org/blog/downloads/grav-skeleton-course-hub-site.zip
1.3 Log into your Reclaim Hosting cPanel and go to the File Manager area
2. Installing the Course Hub
2.1 Tap "Upload"

2.2 Tap "Select File"

2.3 Choose the downloaded Course Hub ZIP file

2.4 Return to the file listing view

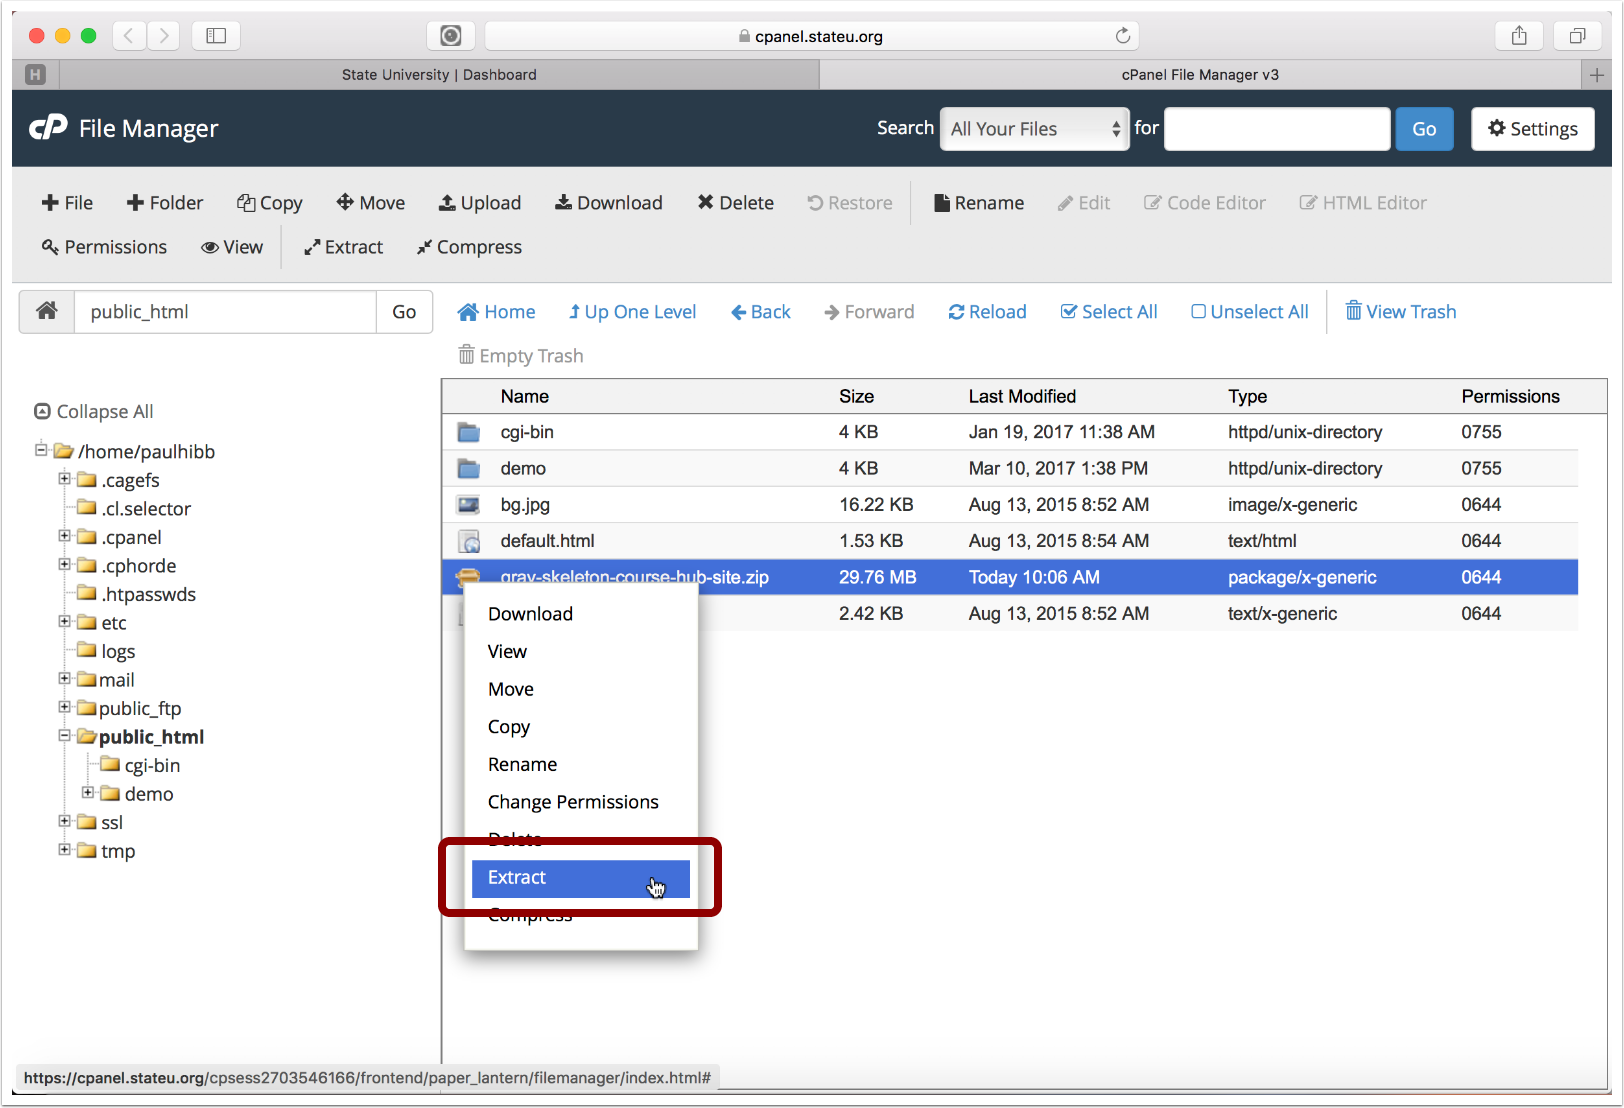
2.5 Right-tap on the Course Hub ZIP file and choose "Extract"
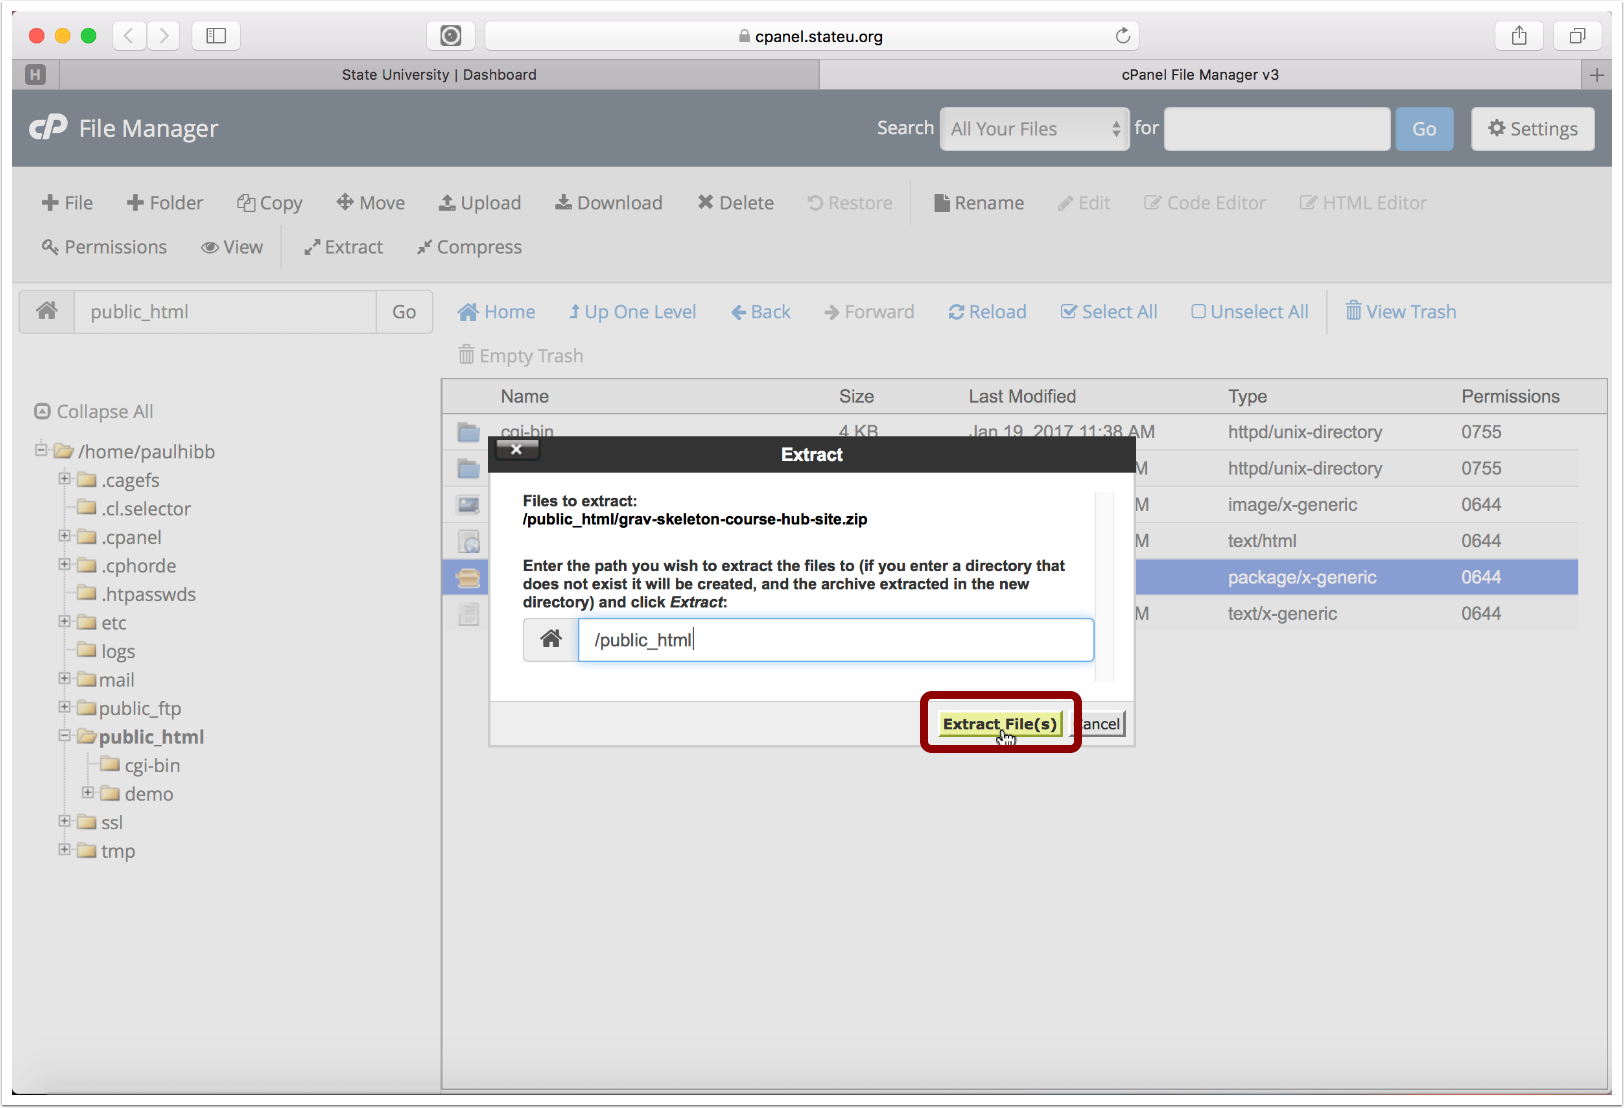
2.6 Tap "Extract File(s)" button
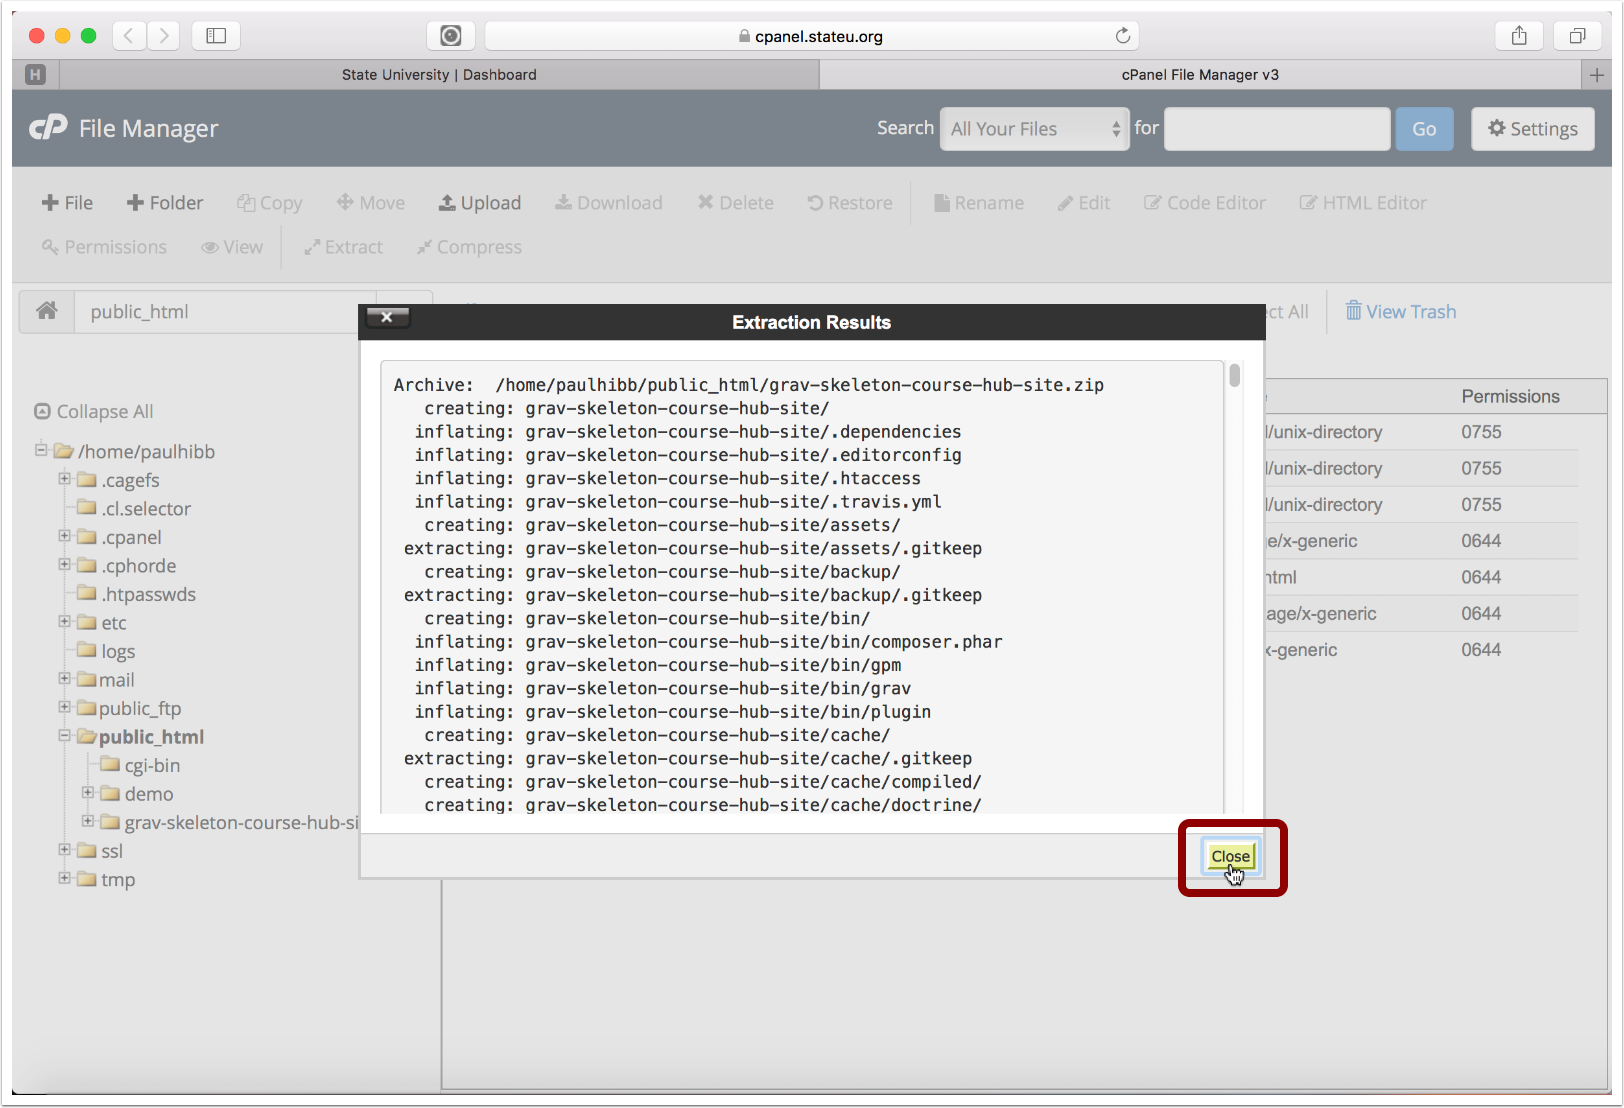
2.7 Tap "Close" button
2.8 Copy the folder name to your clipboard (but first, change it to what you would like)

2.9 Enter the URL to your Course Hub

2.10 Complete the Admin config form

2.11 Tap on the arrow-circle to preview site
3. Configure Git Sync Plugin
3.1 Tap the "Setup Git Sync Plugin (Step 1 of 2)" link

3.2 Tap the "Next" button

3.3 Choose the Git service and enter your username and password for it

3.4 Scroll down (if needed) and Tap the "Next" button

3.5 Before continuing, you will need to create a repository on your Git service.
If you have already created a Git repository (with at least one commit, for example a ReadMe file) you may skip to step 3.10

3.6 Create a new repository in your chosen Git service (GitHub example shown)
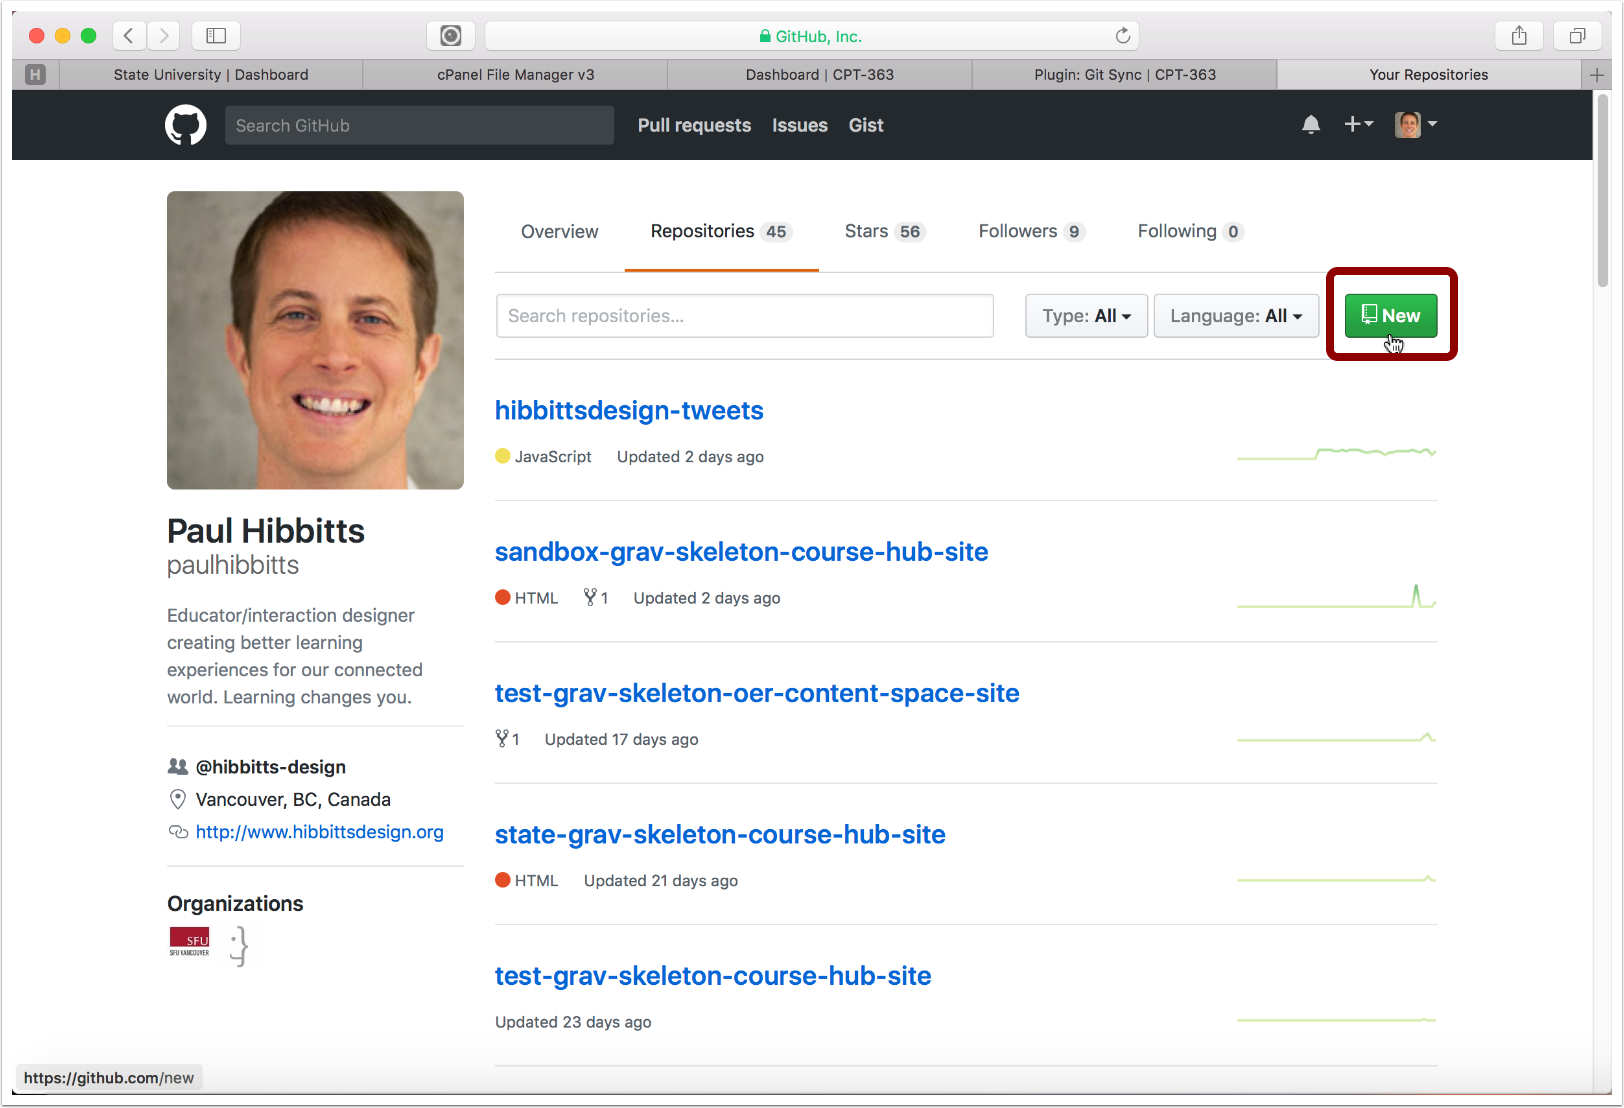
3.7 Enter repository name

3.8 Choose to include a ReadMe file
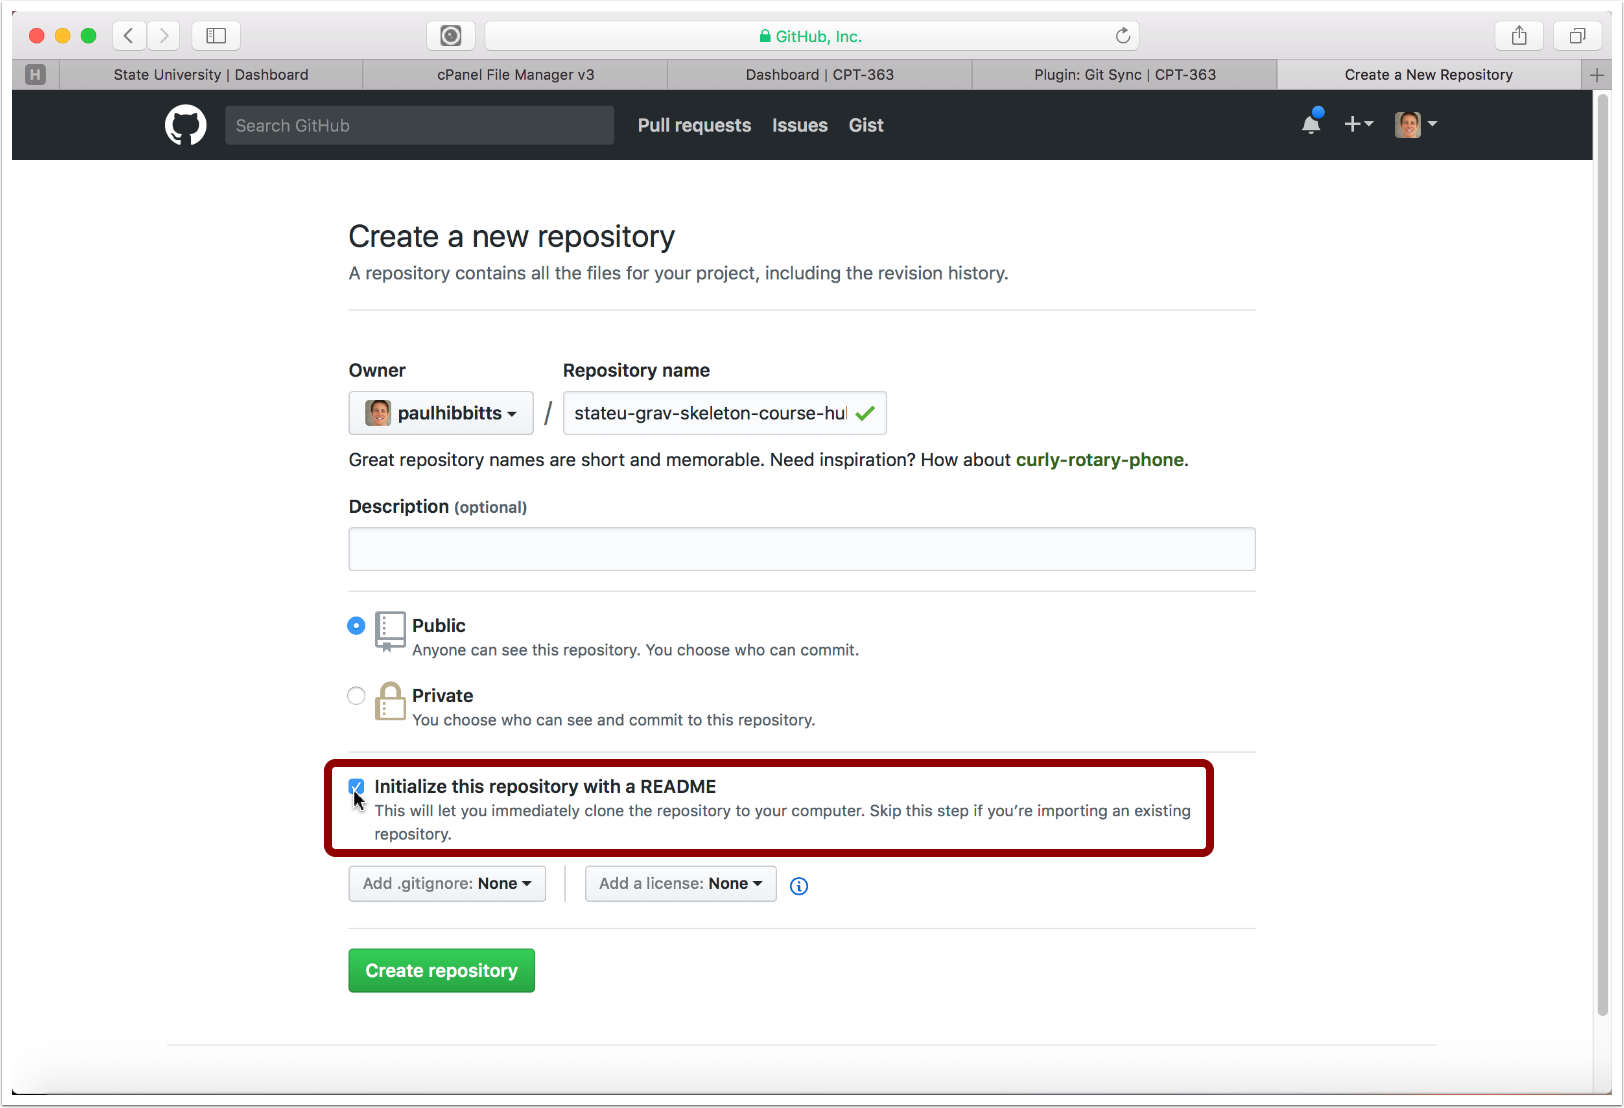
3.9 Create the new repository

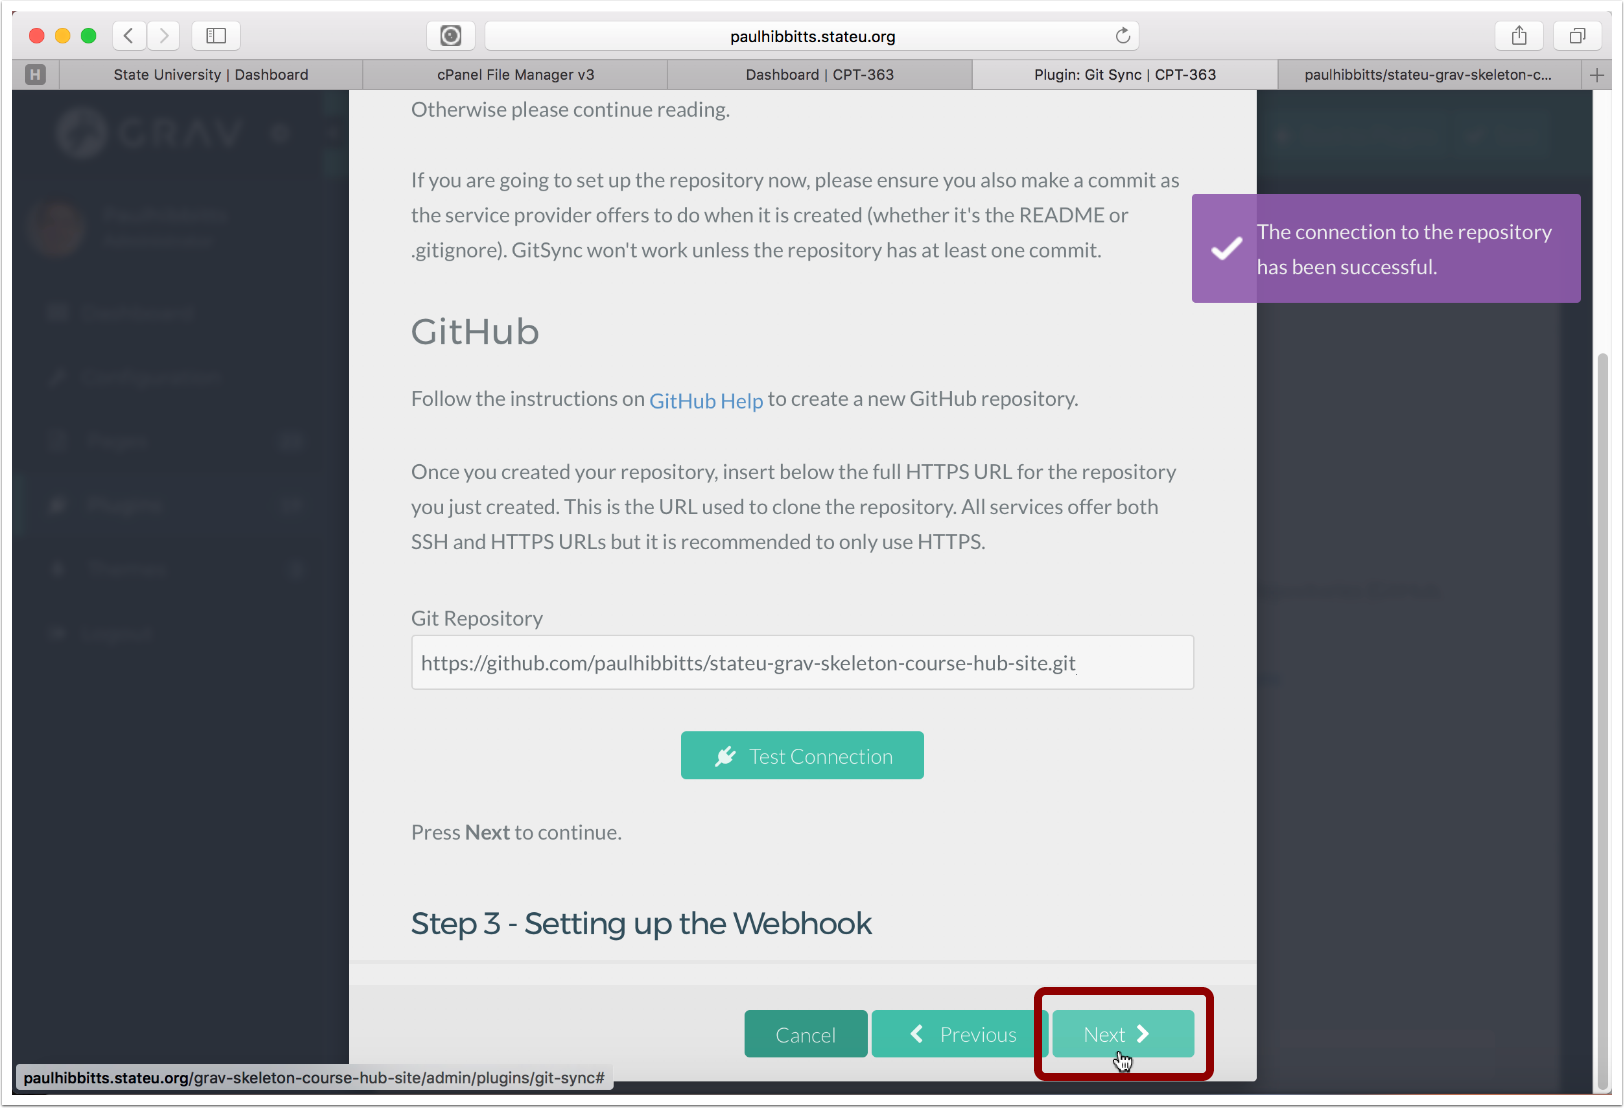
3.10 Copy the HTTPS URL of the repository to your clipboard

3.11 Paste the Git repository HTTPS URL into the "Git Repository" field and tap "Test Connection"

3.12 Tap the "Next" button
3.13 Select the displayed Webhook URL and copy it to your clipboard
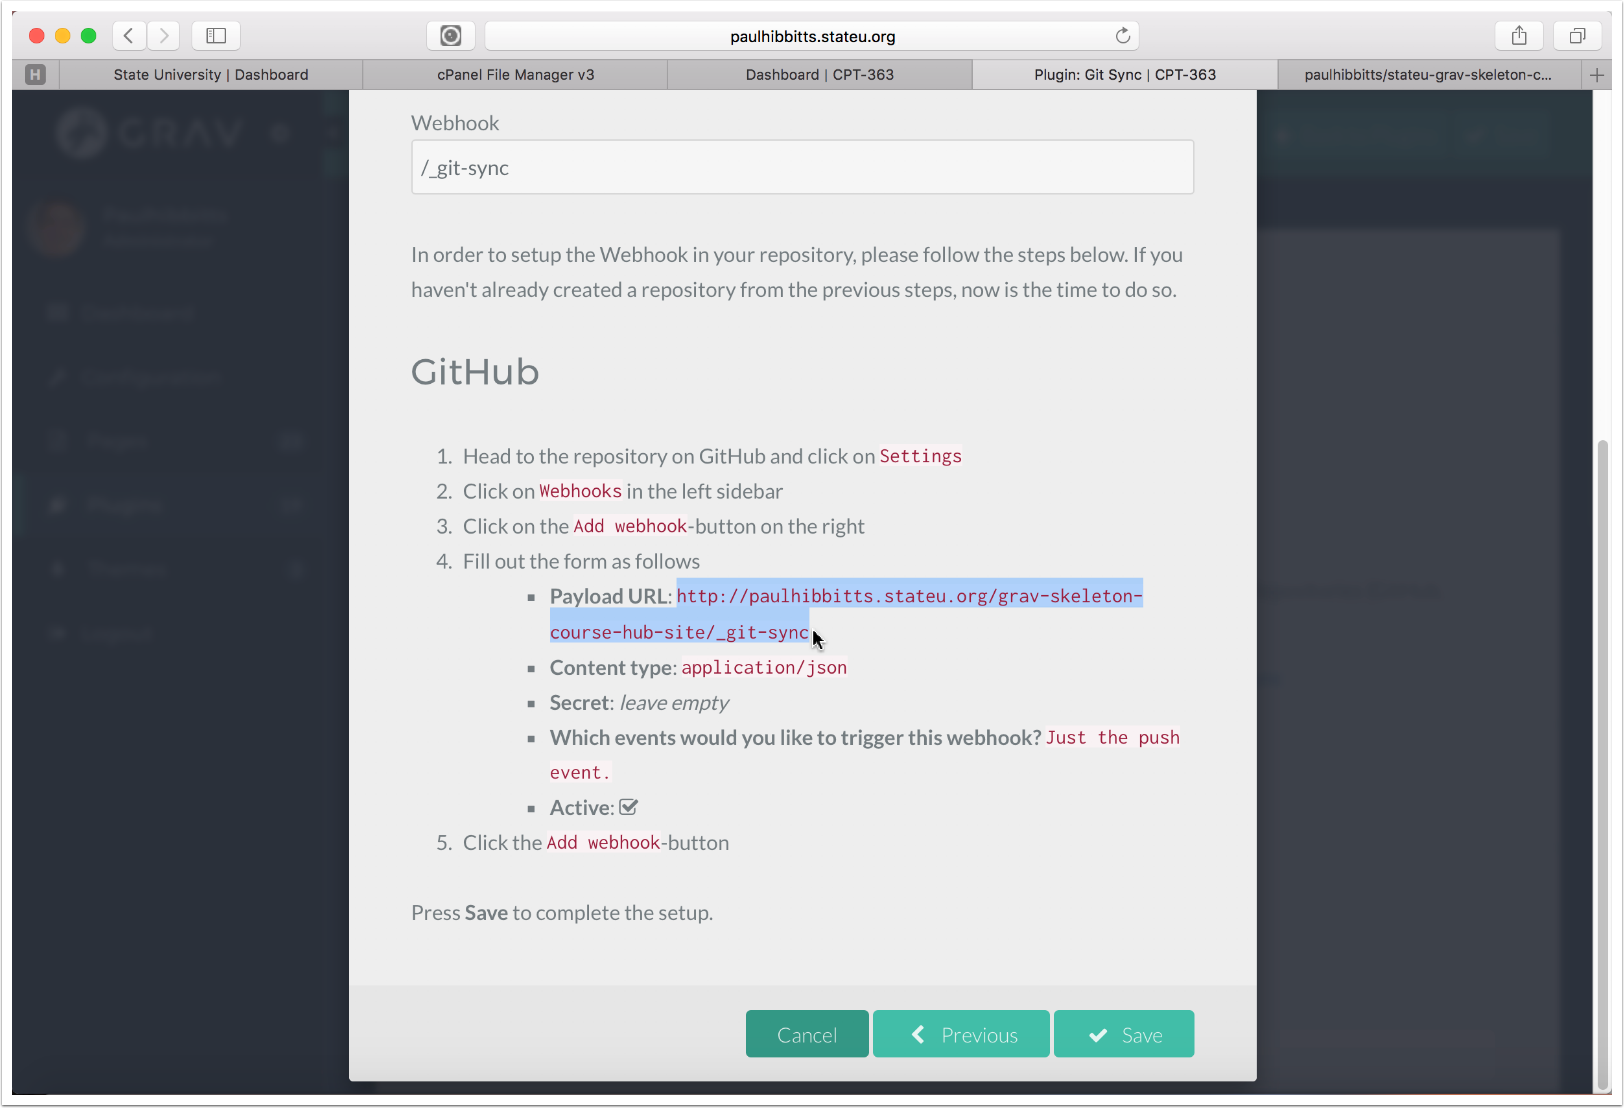
3.14 Add the Webhook to your Git repository settings, in GitHub tap "Settings"

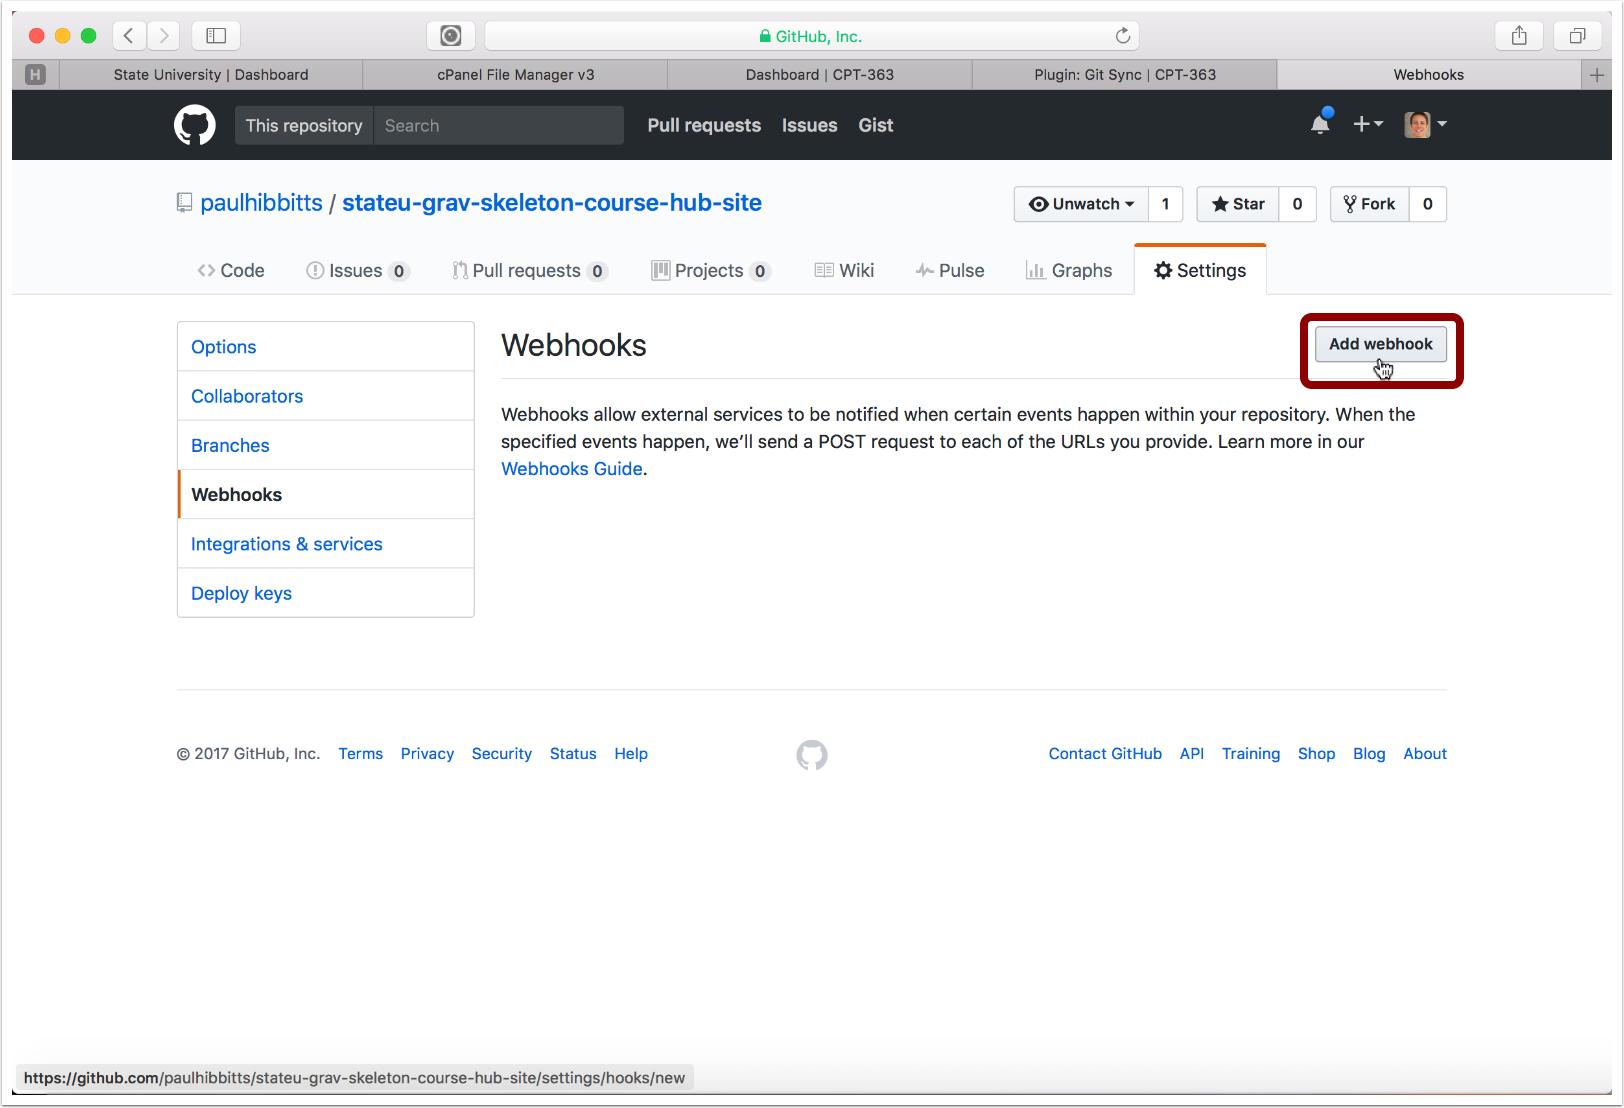
3.15 Tap "Webhooks"

3.16 Tap "Add Webhook"
3.17 Paste the copied Course Hub Webhook URL into the "Payload URL" field
Note: if you change the folder name or location of your Grav OER Content Space site you will also need to update the "Payload URL" field.

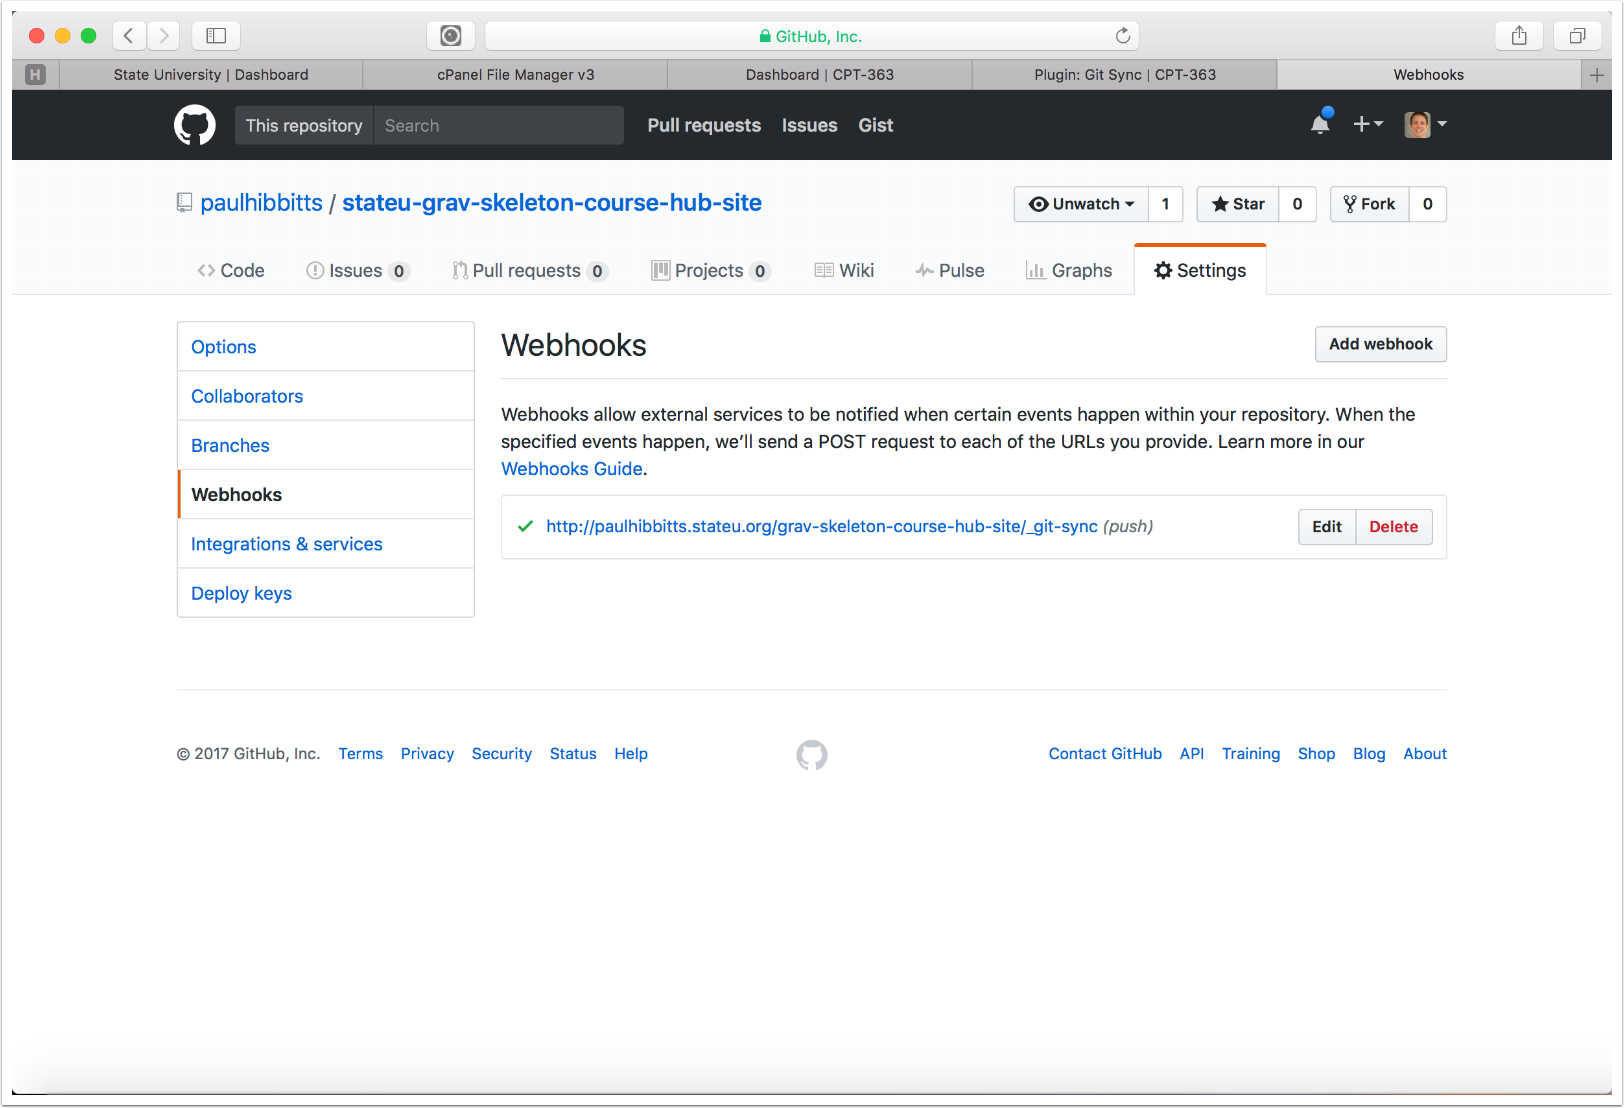
3.18 Scroll down, and tap "Add Webhook"

3.19 Once the new Webhook is displayed, return to your Course Hub site
3.20 Tap the "Save" button

3.21 Tap the arrow-circle button to once again preview the site
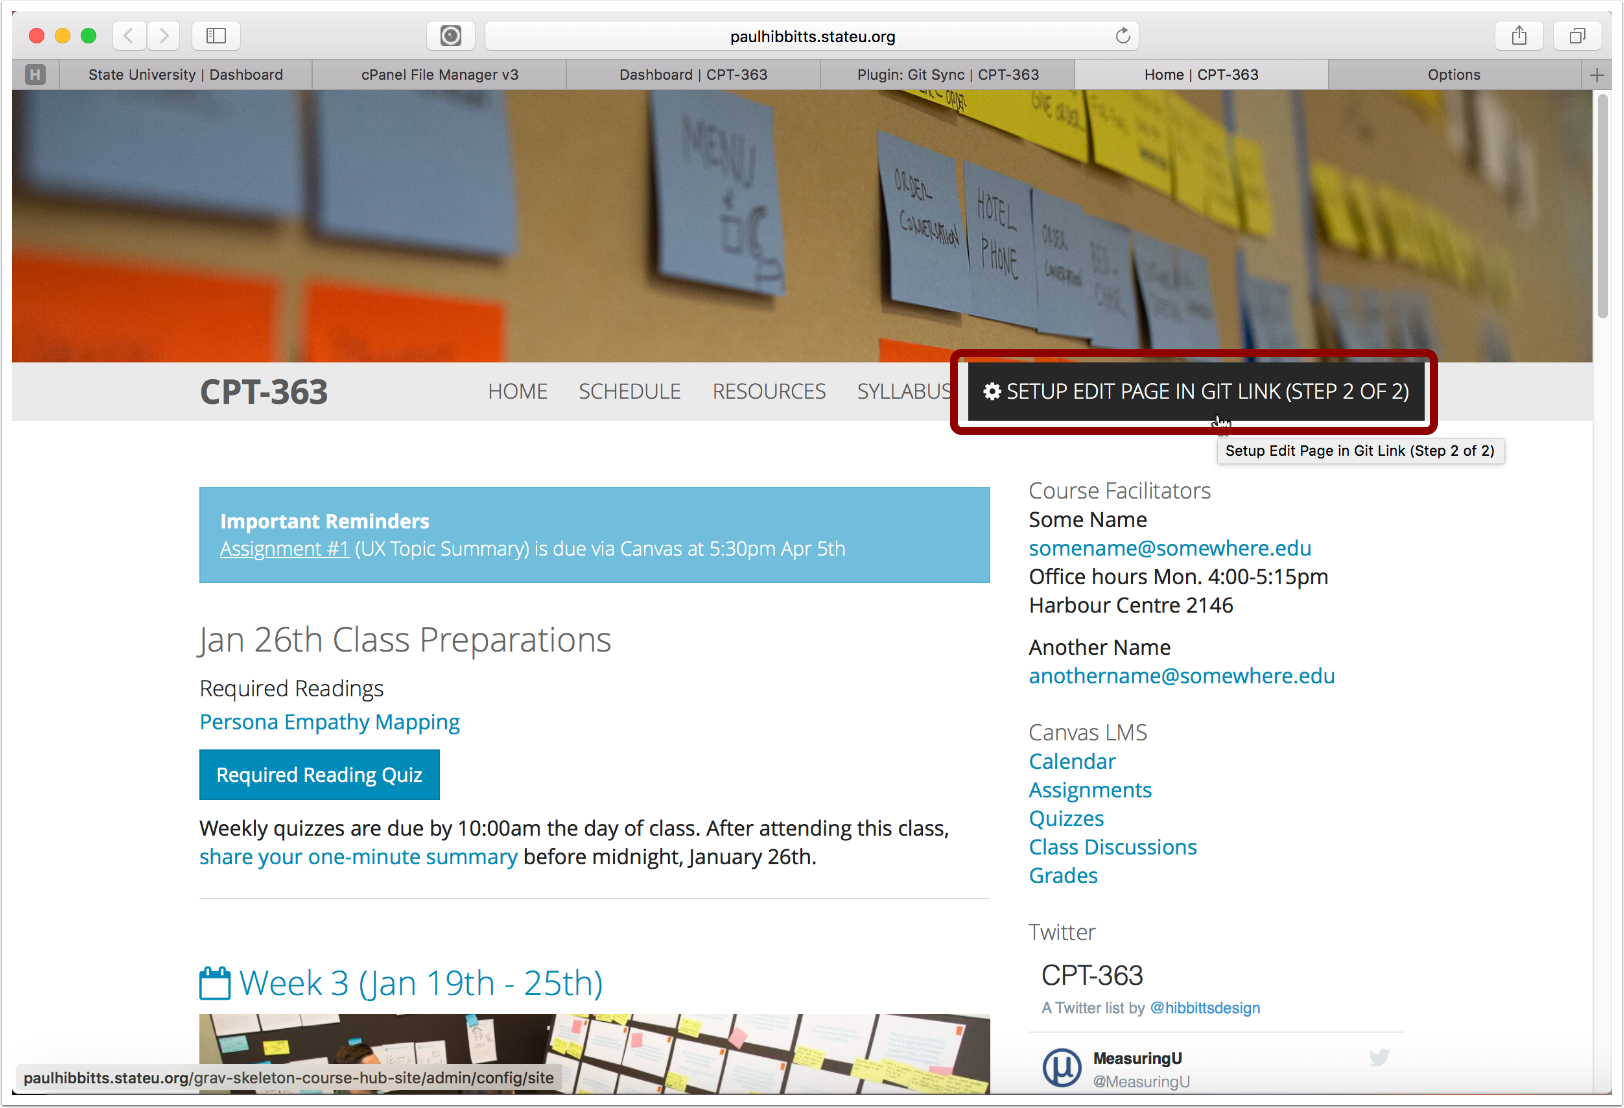
4. Configure the Edit Page in Git link
4.1 Tap the "Setup Edit Page in Git Link (Step 2 of 2)" link
4.2 Scroll down the page and locate the "Git Repository Tree URL" field, and then return to your previously created Git repository

4.3 Open the "pages" folder within your Git repository

4.4 When viewing your "pages" folder, copy the entire URL from your Browser

4.5 Paste the URL of your Git repository, but remove '/pages/' and any other text after that

4.6 Tap the "Save" button

4.7 Tap on the arrow-circle button once again to preview the site
4.8 For your final test, tap on the "Schedule" page

4.9 Tap on the "Edit this Page" link

4.10 The Course Hub site schedule page is displayed in GitHub


