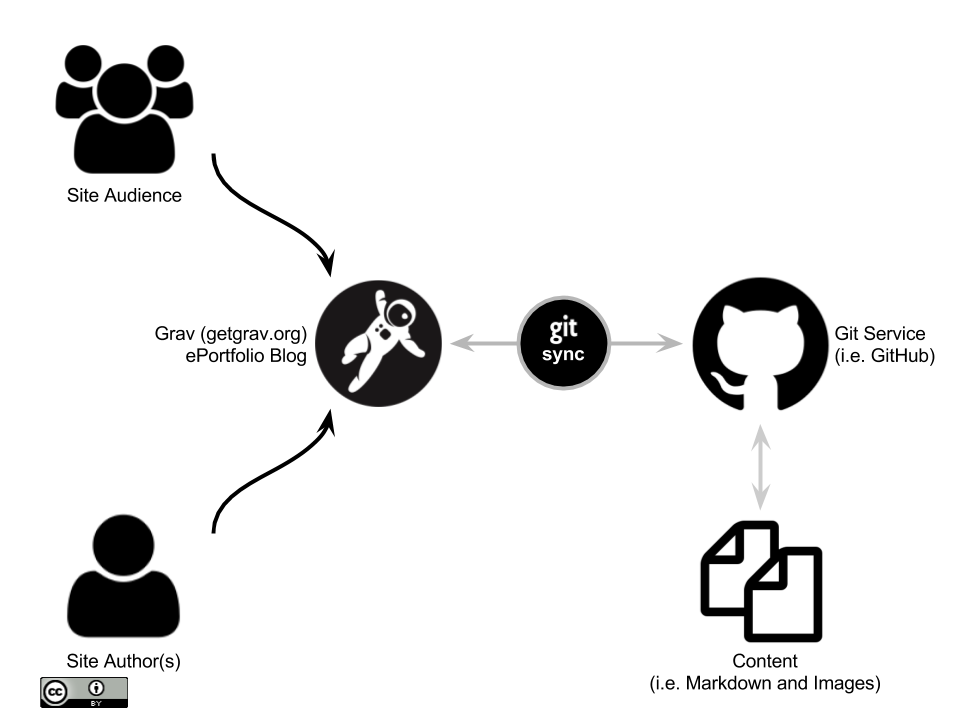
Grav CMS ePortfolio Blog with Git Sync is designed to give tech-savvy students control of their content and publishing workflow using modern open Web services.
Why use the Grav OER Content Space Project?
- To quickly leverage a modern flat-file CMS (i.e. Grav) for the creation and presentation of OER content
- To make OER content future-ready by keeping it always directly accessible (vs. within a specific platform)
- To provide direct access to OER content for site visitors (in Markdown or HTML format) to facilitate easier reuse
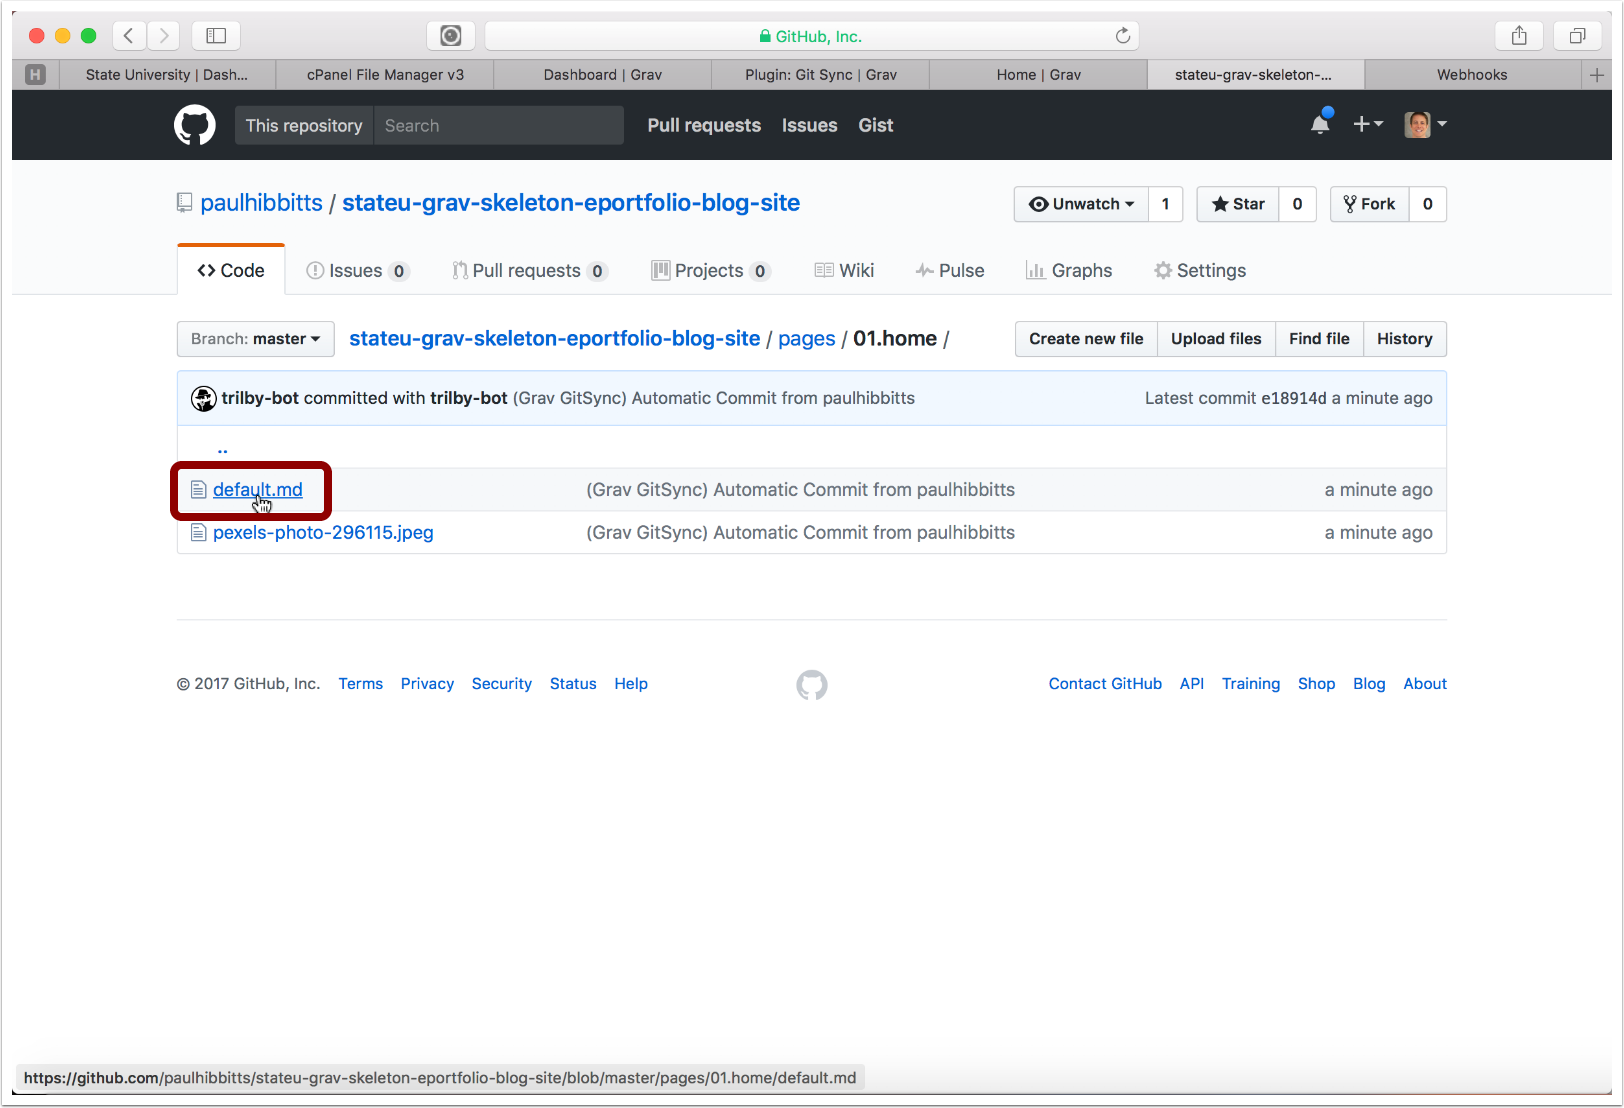
- To support collaboration and version control of OER content with the Git service (e.g. GitHub) of your choice
- To quickly and easily update OER content online or locally using the tools of your choice
- To provide a mobile and multi-device friendly visual presentation of your OER content
- To easily customize the presentation of your OER content using a visual theme builder (i.e. Gantry 5)
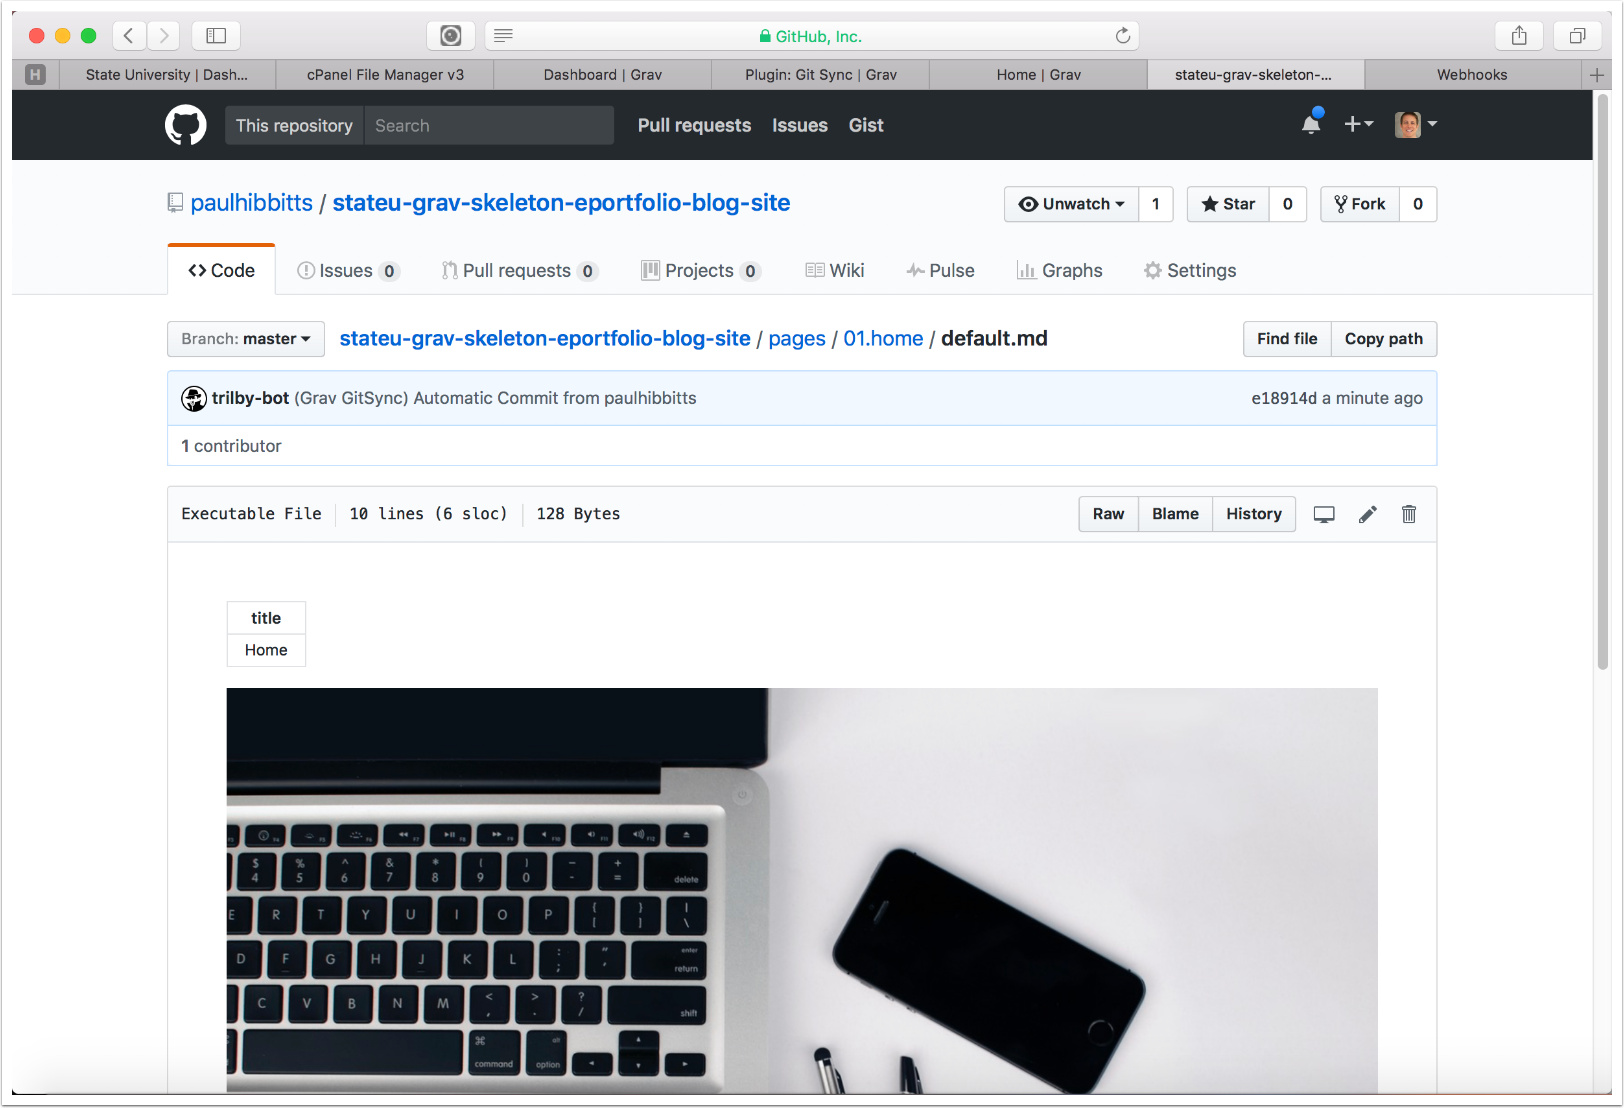
The Grav CMS ePortfolio Blog, along with my other Grav open education projects Course Hub and OER Content Space, are also documented at learn.hibbittsdesign.org.
Example ePortfolio Blog workflow
Step-by-Step Video (no audio)

The following install and configuration process usually takes under 5 minutes.
Grav CMS ePortfolio Blog with Git Sync - Install and Configure on Reclaim Hosting
1. Getting Ready
1.1 If you do not already have a Git service account (i.e. GitHub, GitLab, BitBucket, etc.) then sign up for one
1.2 Download ePortfolio Blog skeleton package
From the getgrav.org site at https://getgrav.org/downloads/skeletons or via this direct link: http://hibbittsdesign.org/blog/downloads/grav-skeleton-course-hub-site.zip
1.3 Log into your Reclaim Hosting cPanel and go to the File Manager area
2. Installing the ePortfolio Blog
2.1 Tap the "Upload" button

2.2 Tap "Select File"
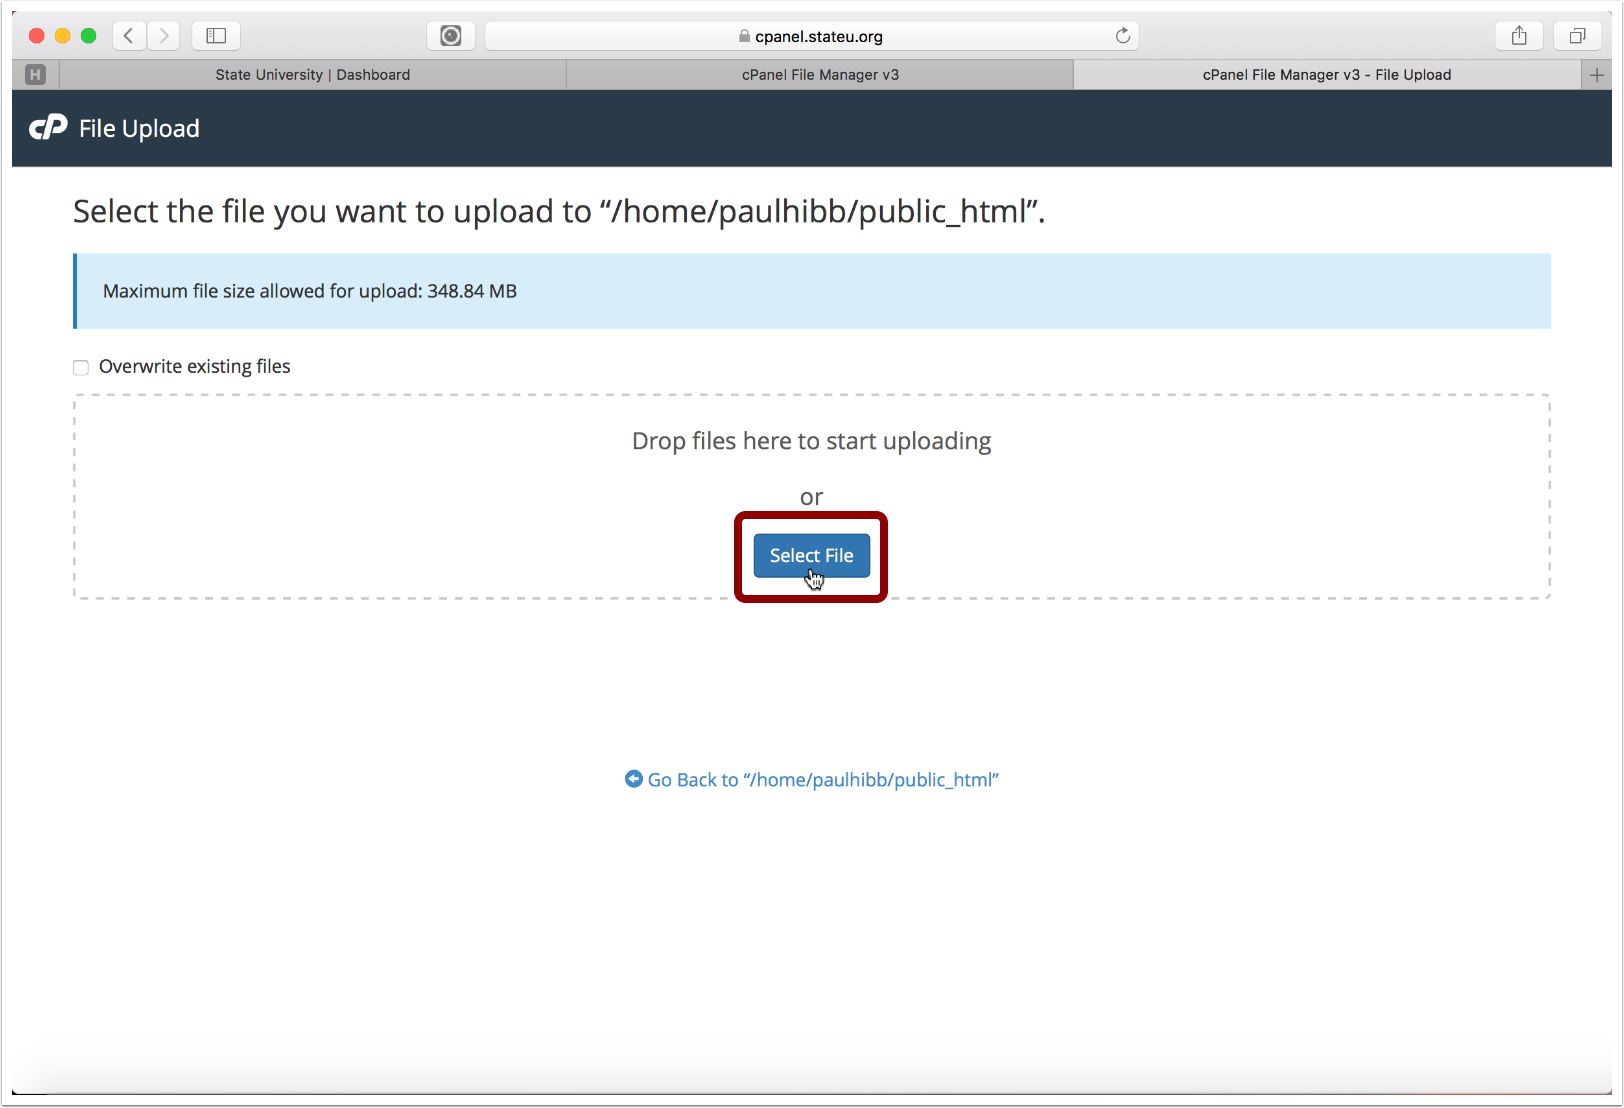
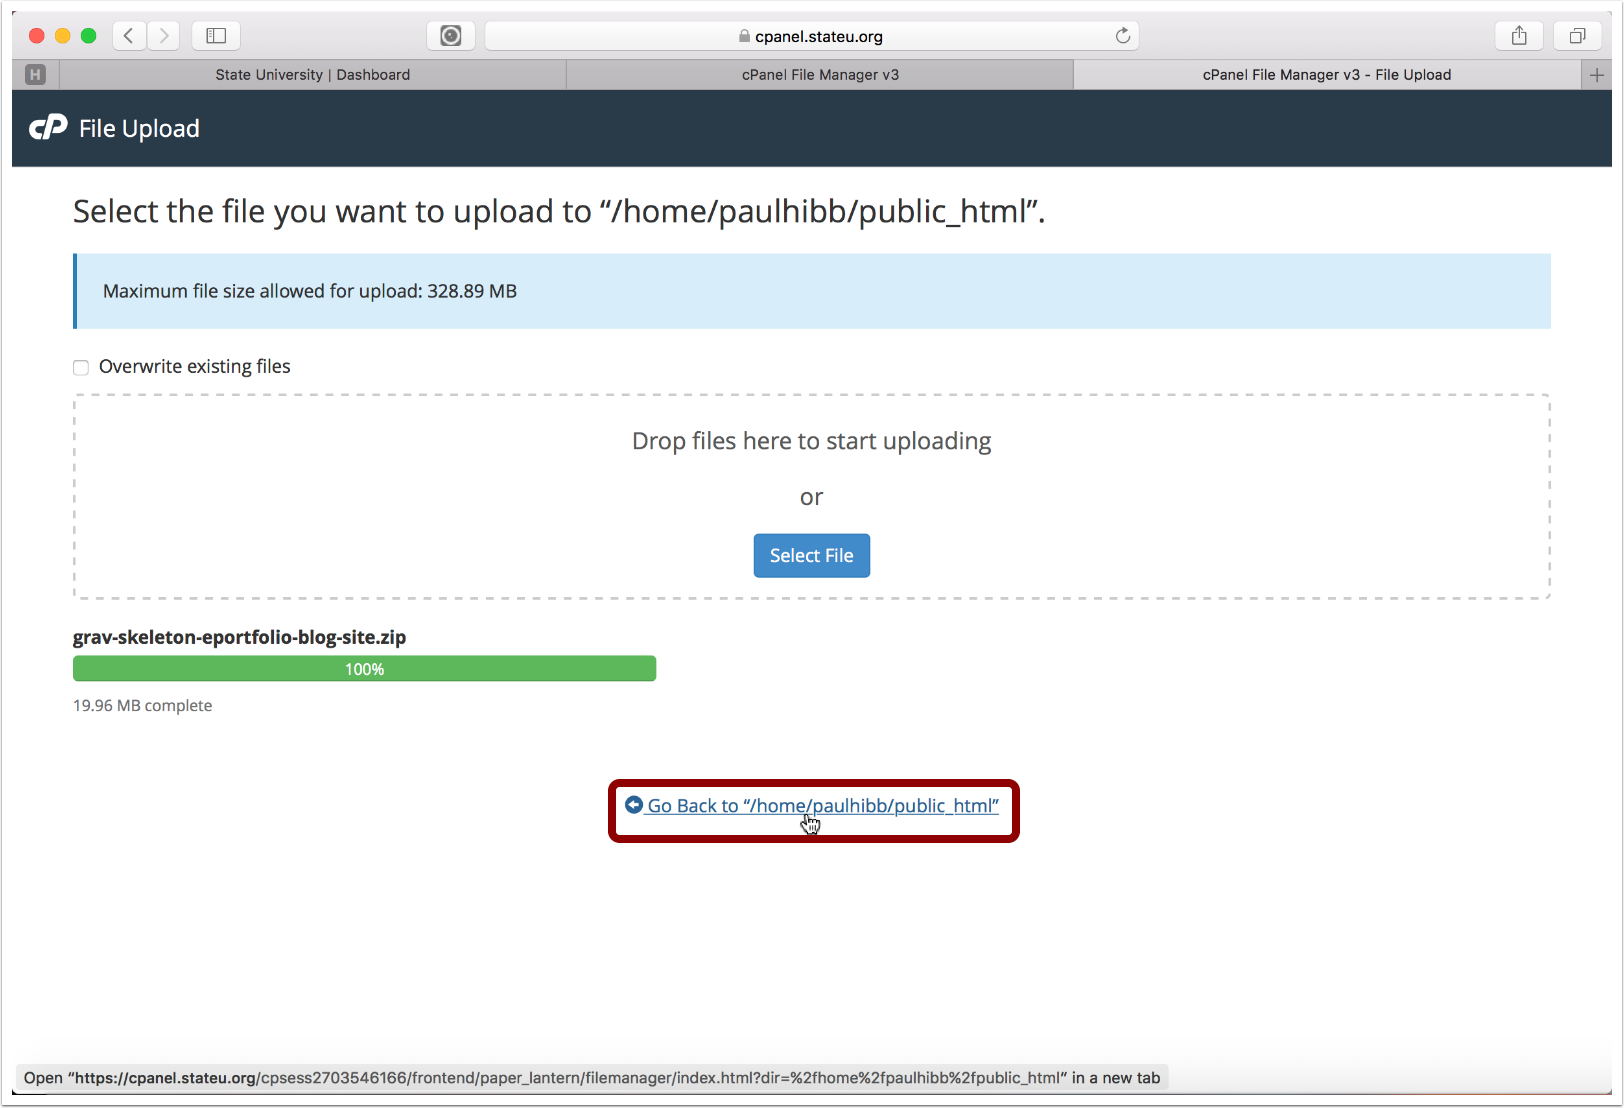
2.3 Choose the downloaded ePortfolio Blog ZIP file

2.4 Return to the file listing view
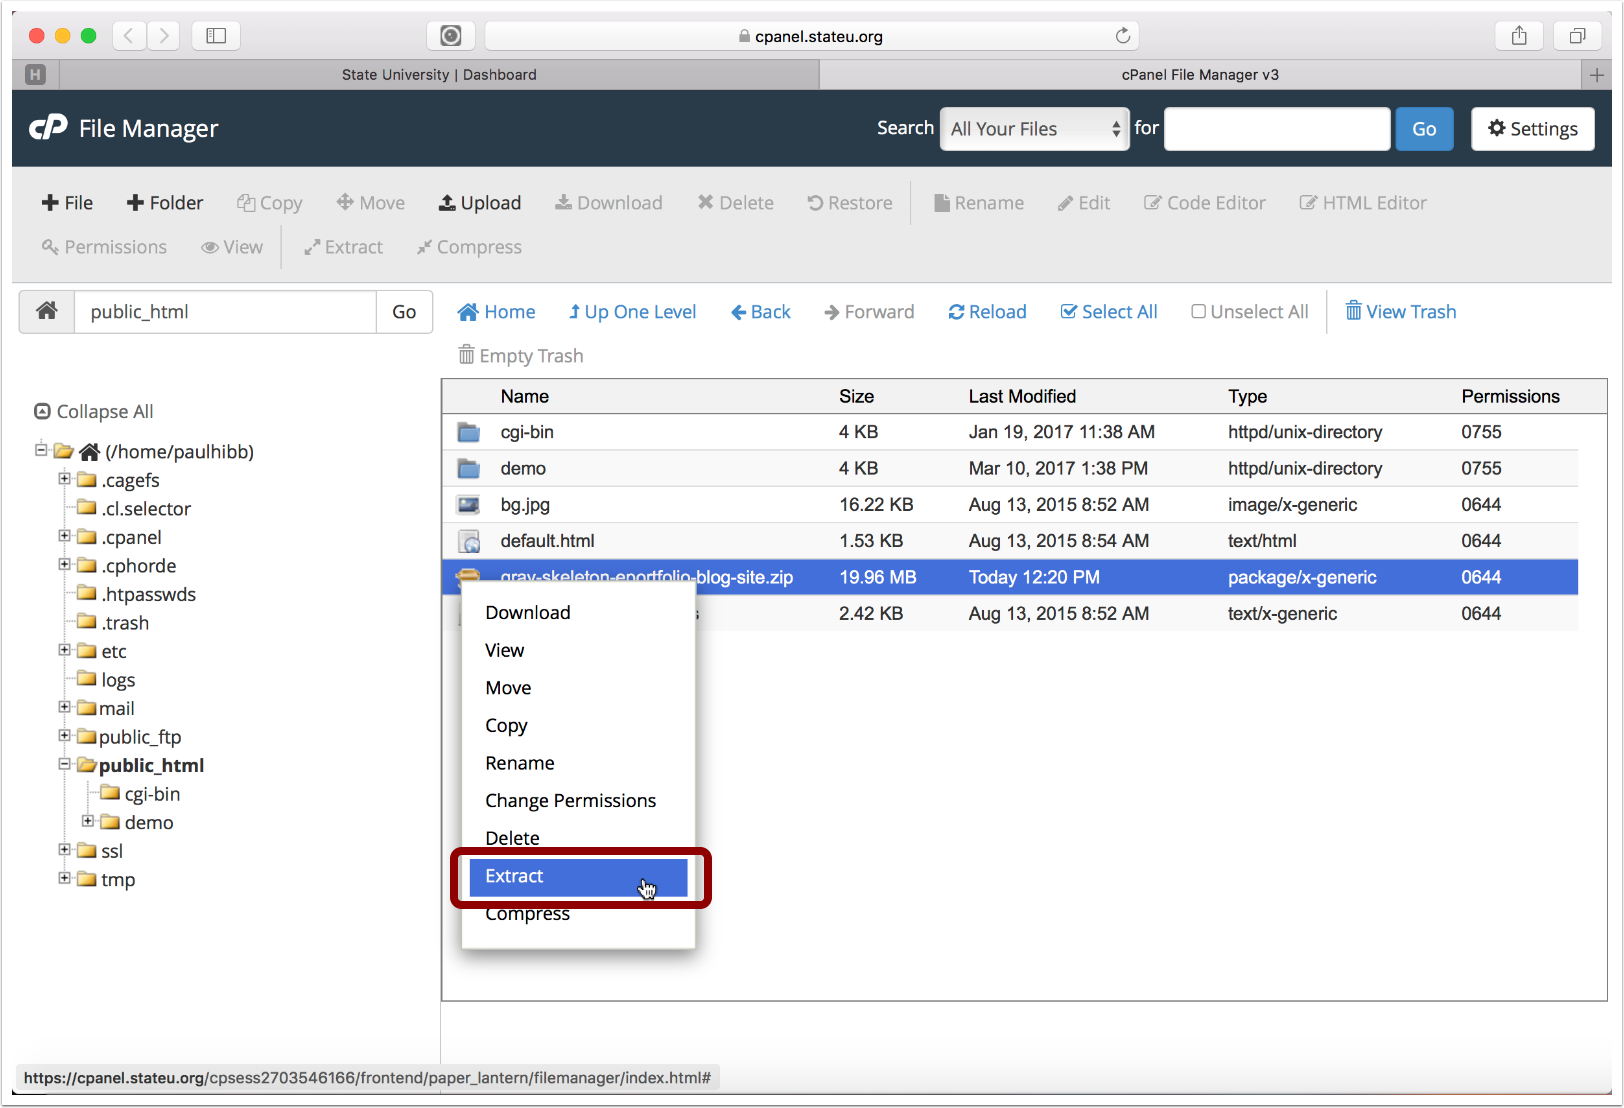
2.5 Right-tap on the Course Hub ZIP file and choose "Extract"
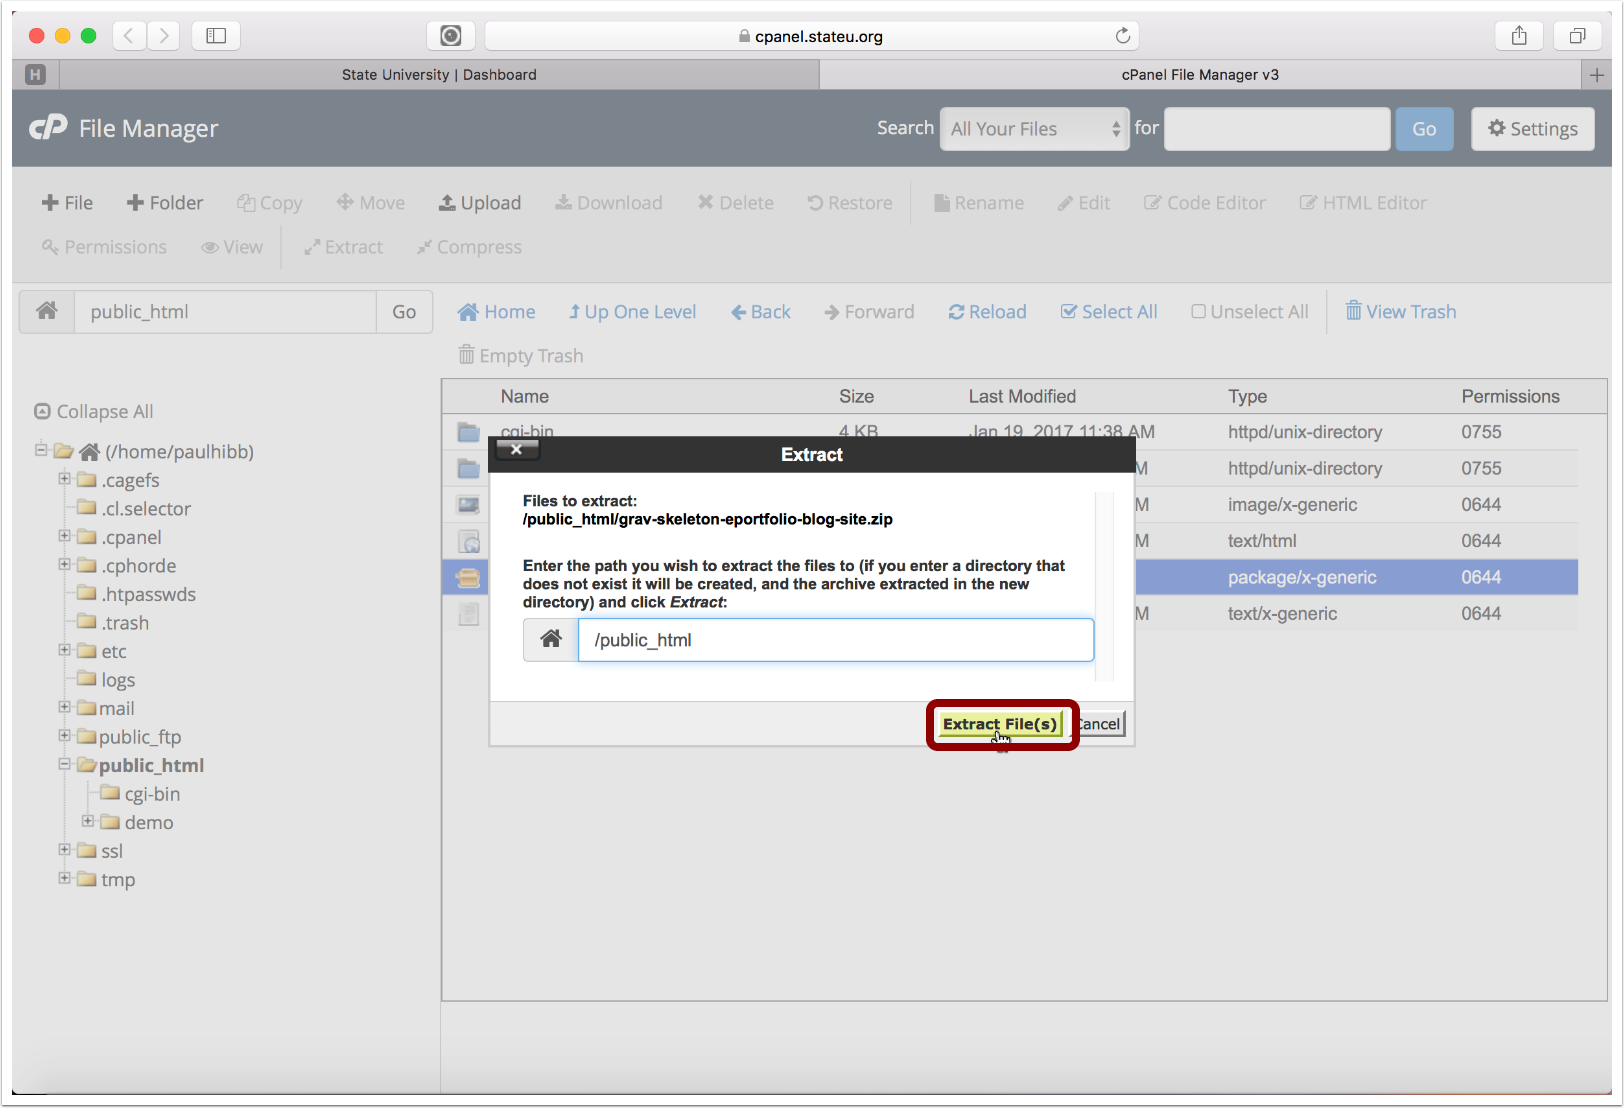
2.6 Tap "Extract File(s)" button
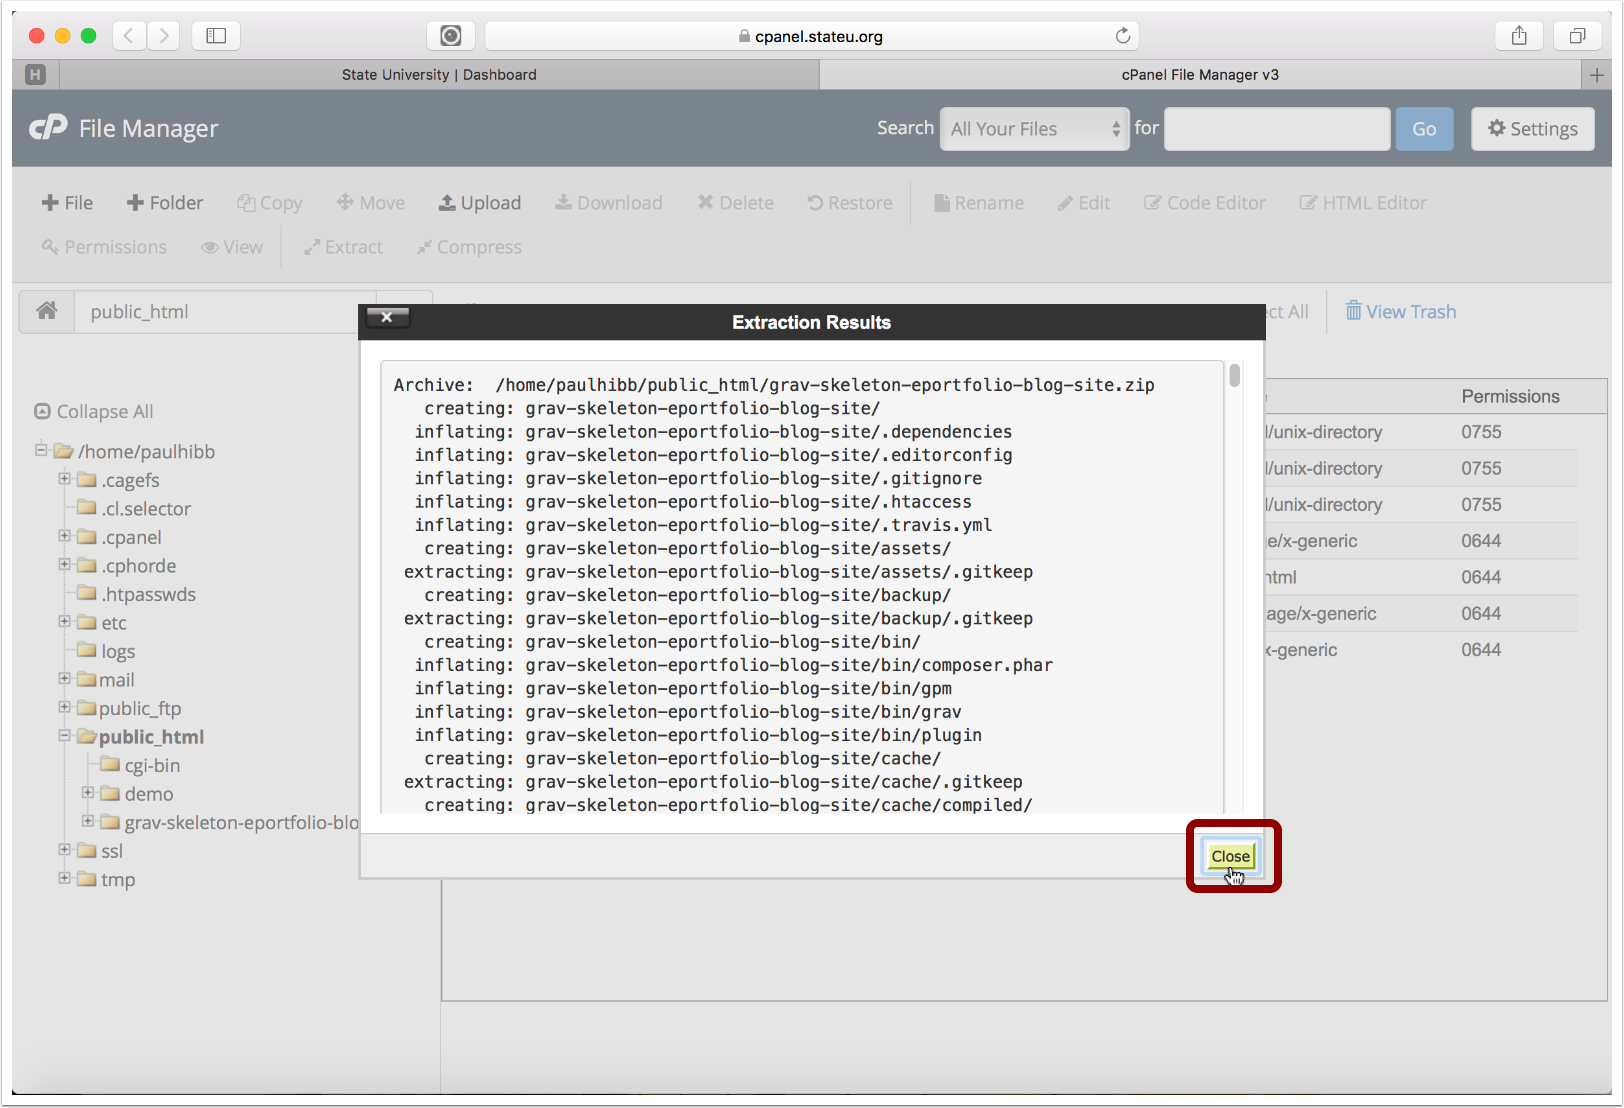
2.7 Tap the "Close" button
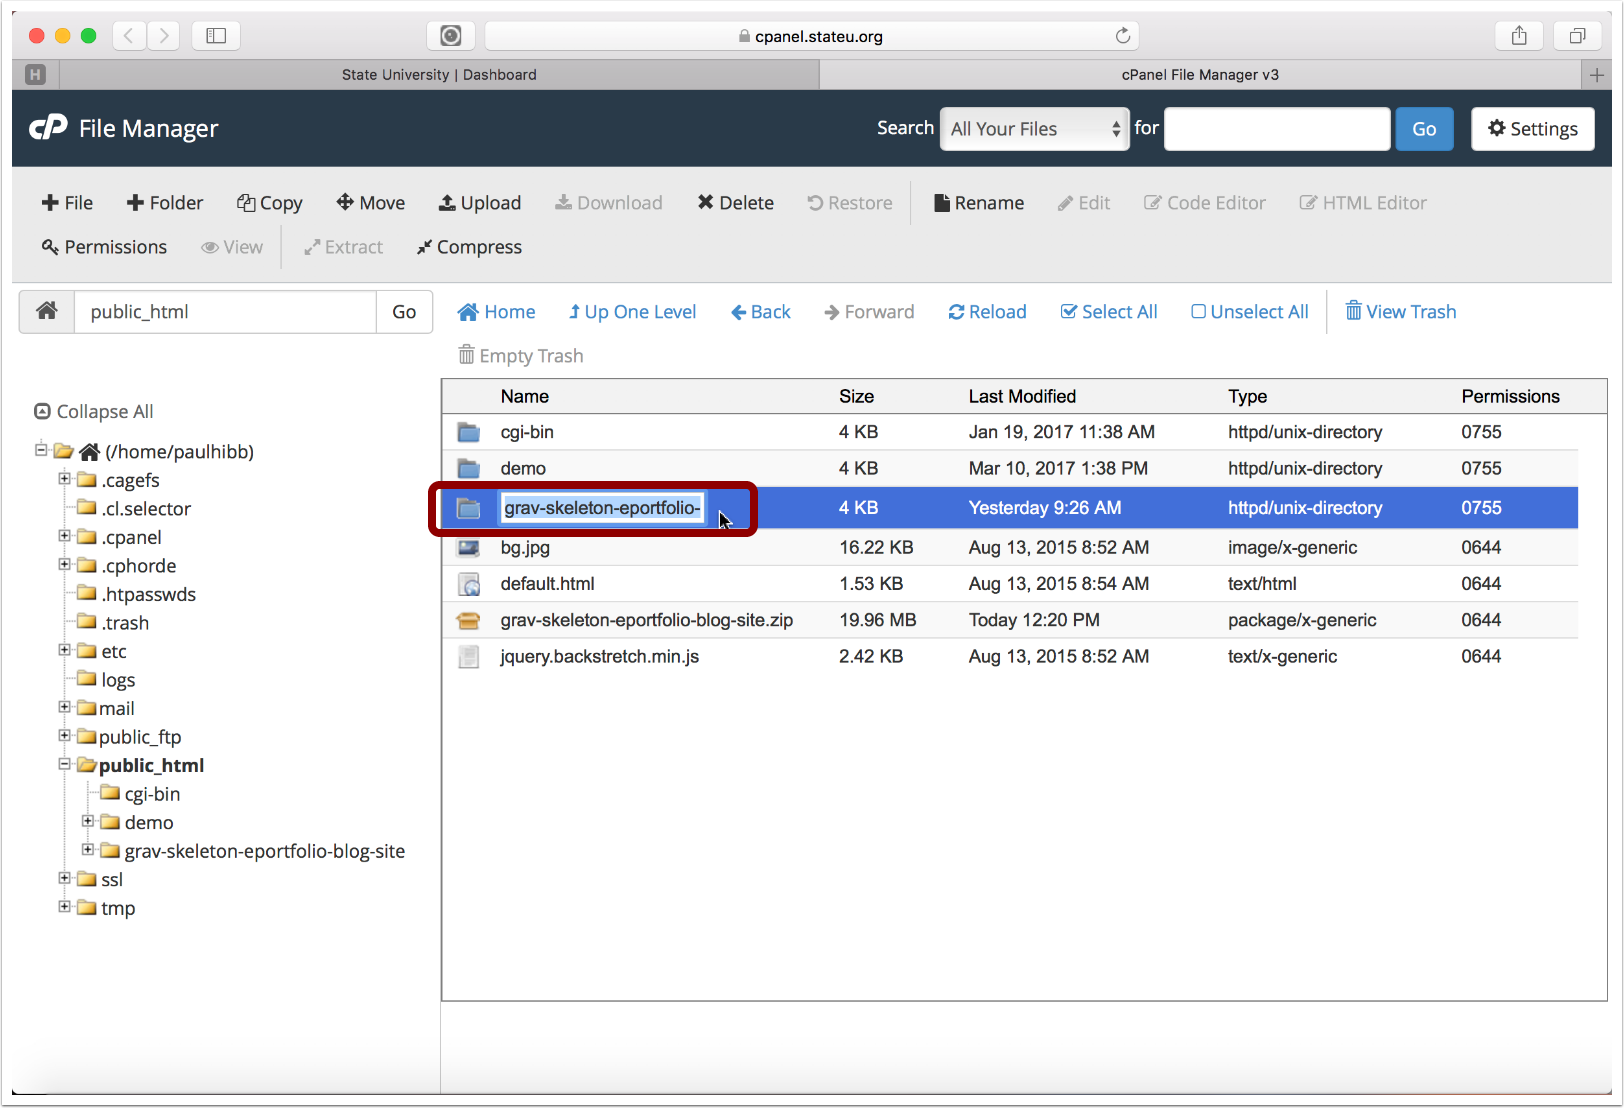
2.8 Copy the folder name to your clipboard (but first, change it to what you would like)
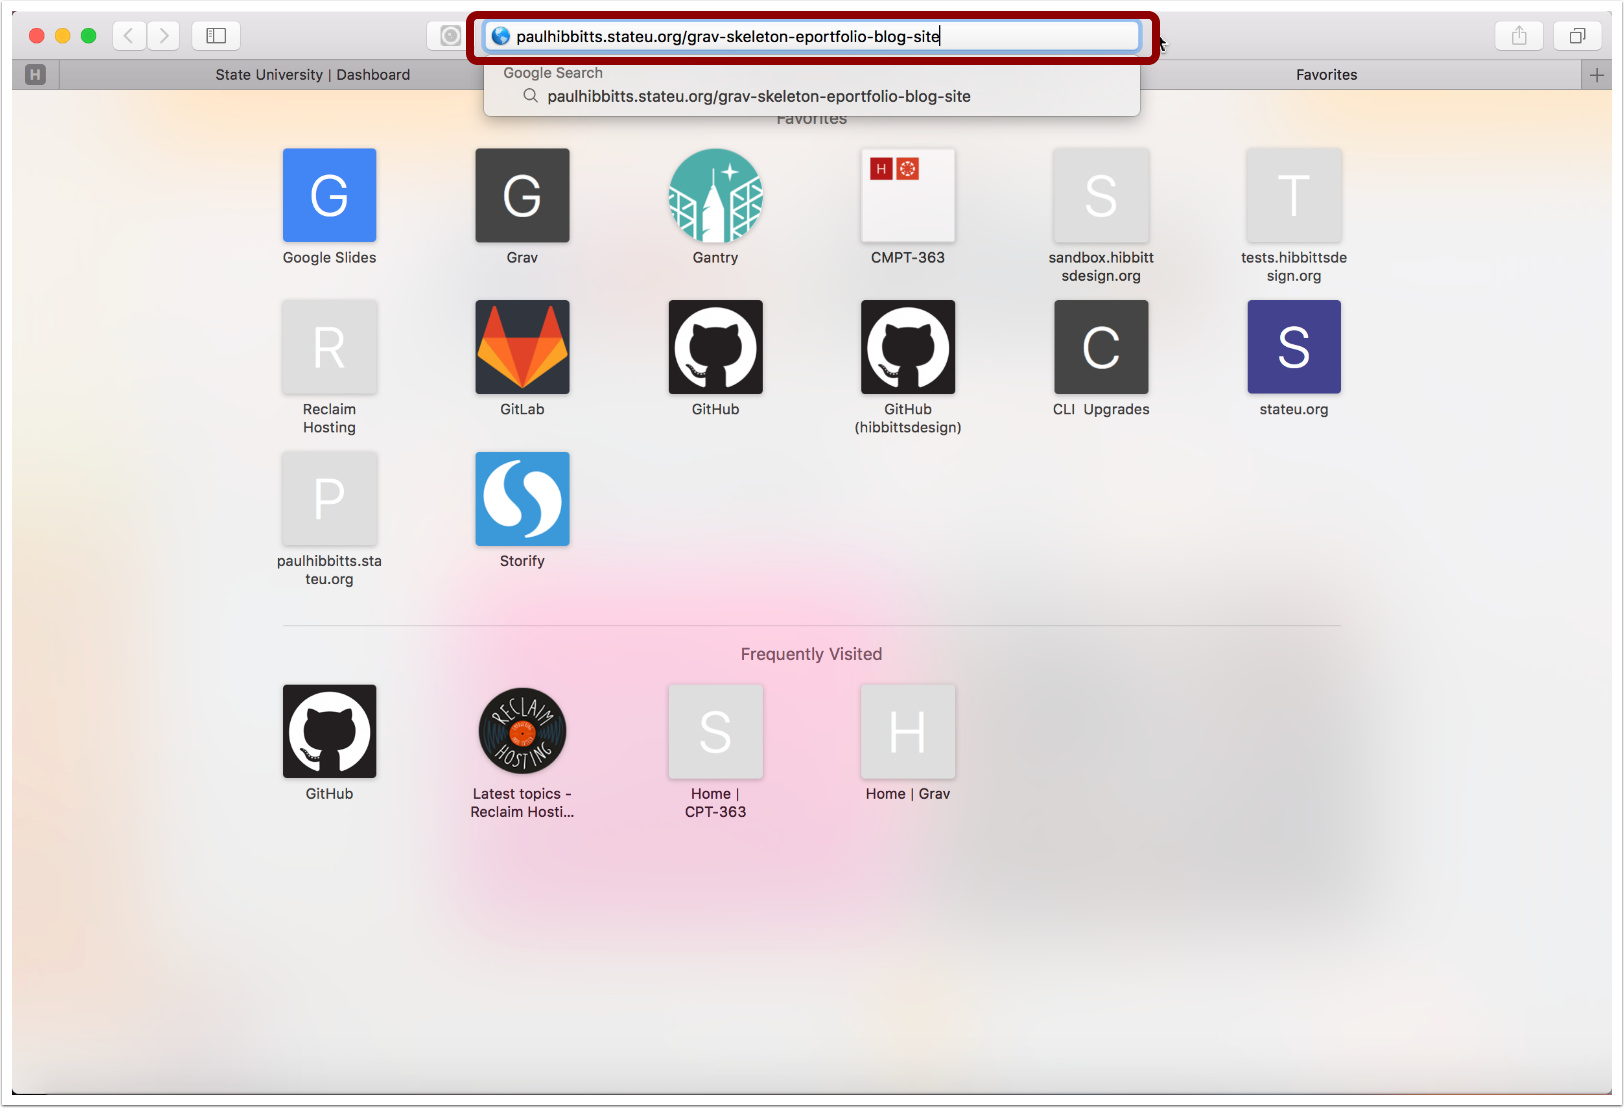
2.9 Enter the URL to your ePortfolio Blog
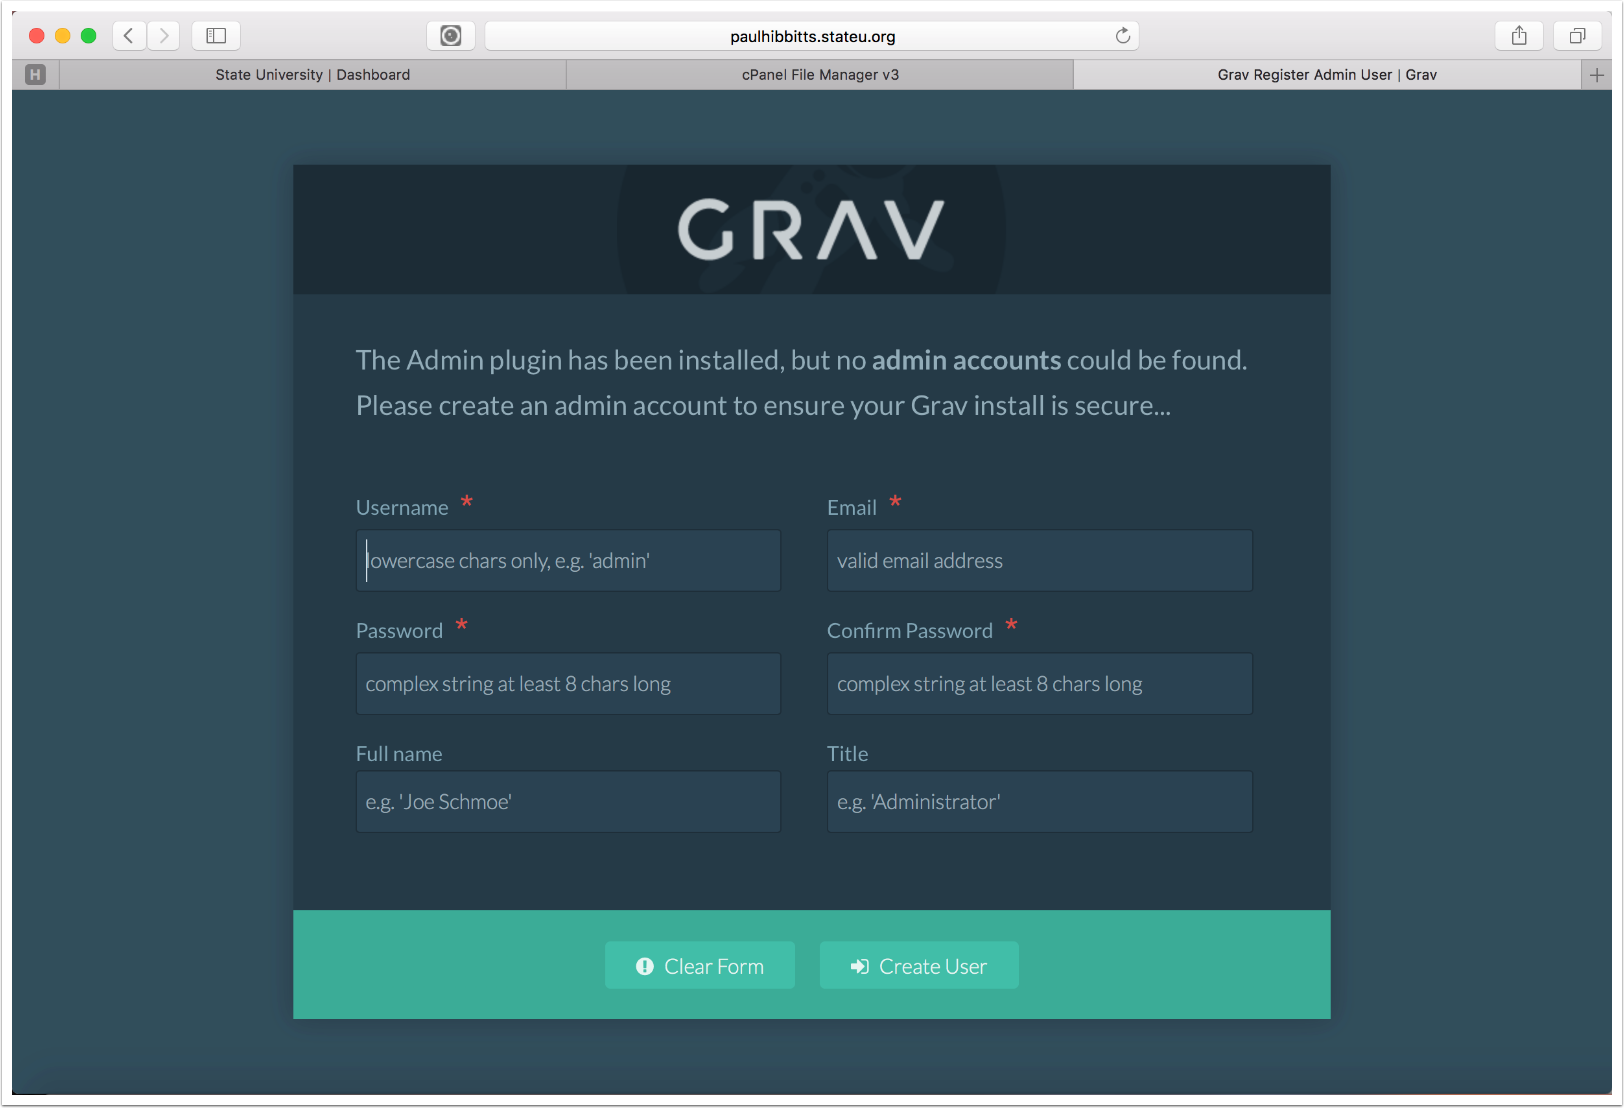
2.10 Complete the Admin config form
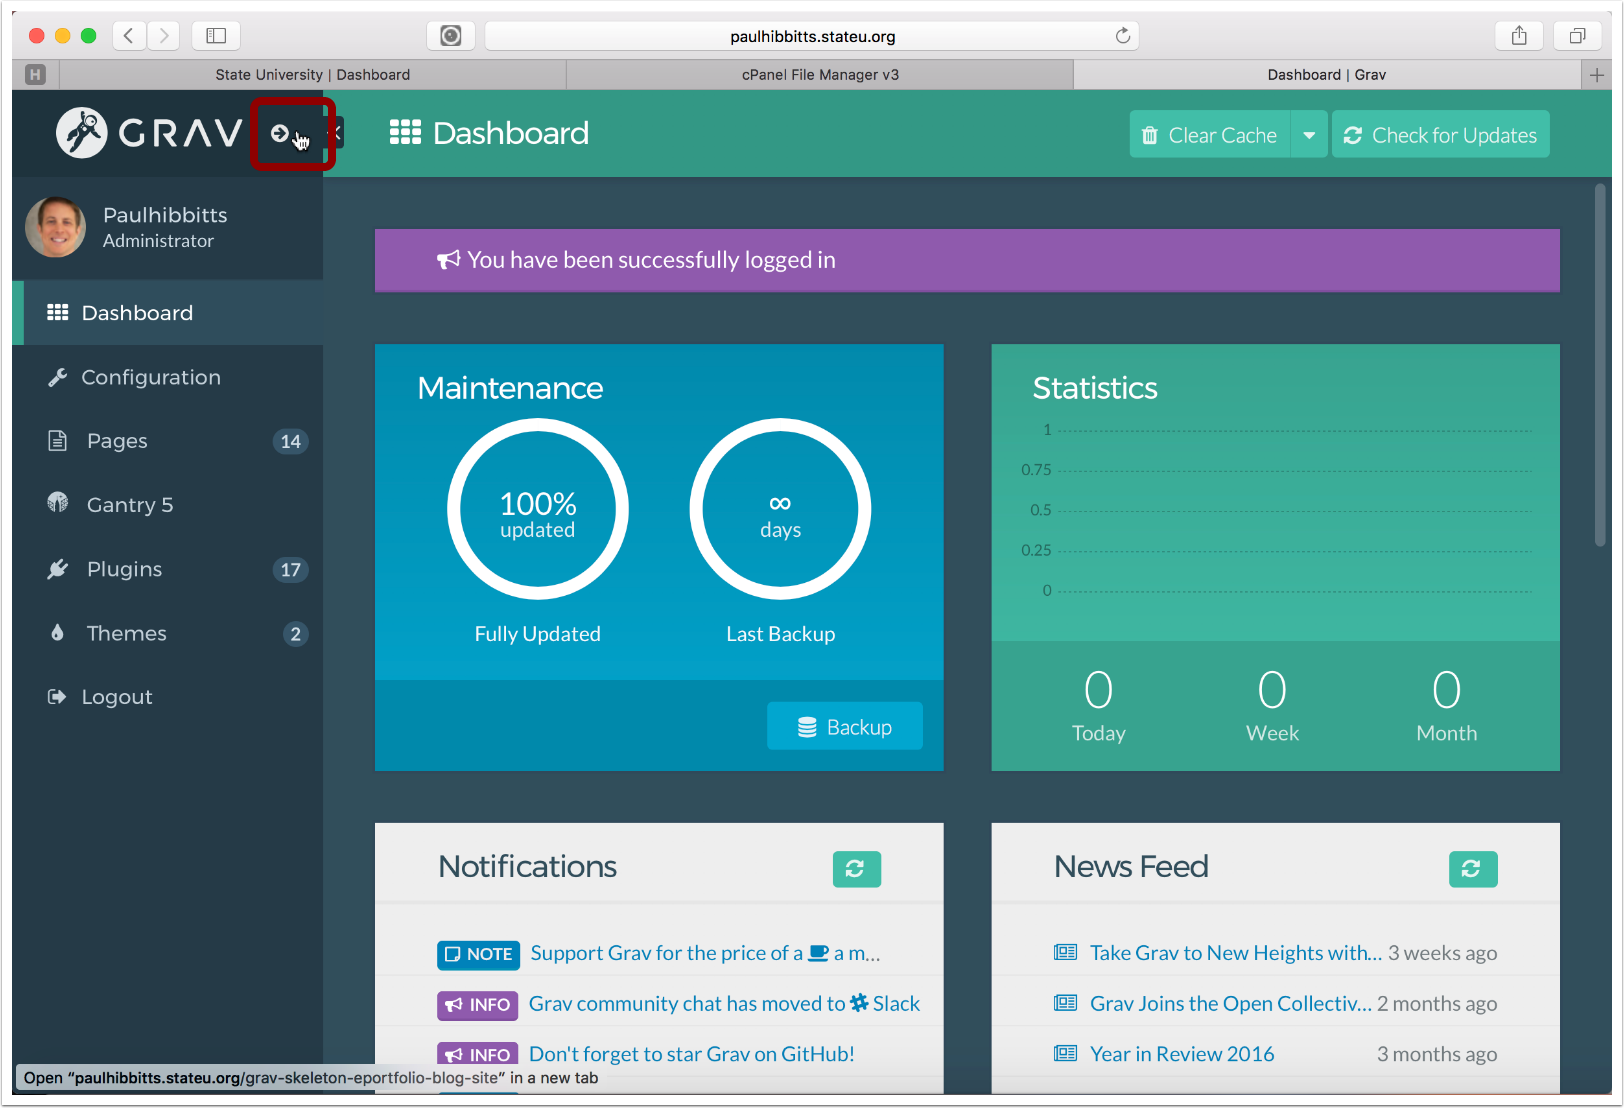
2.11 Tap on the arrow-circle to preview site
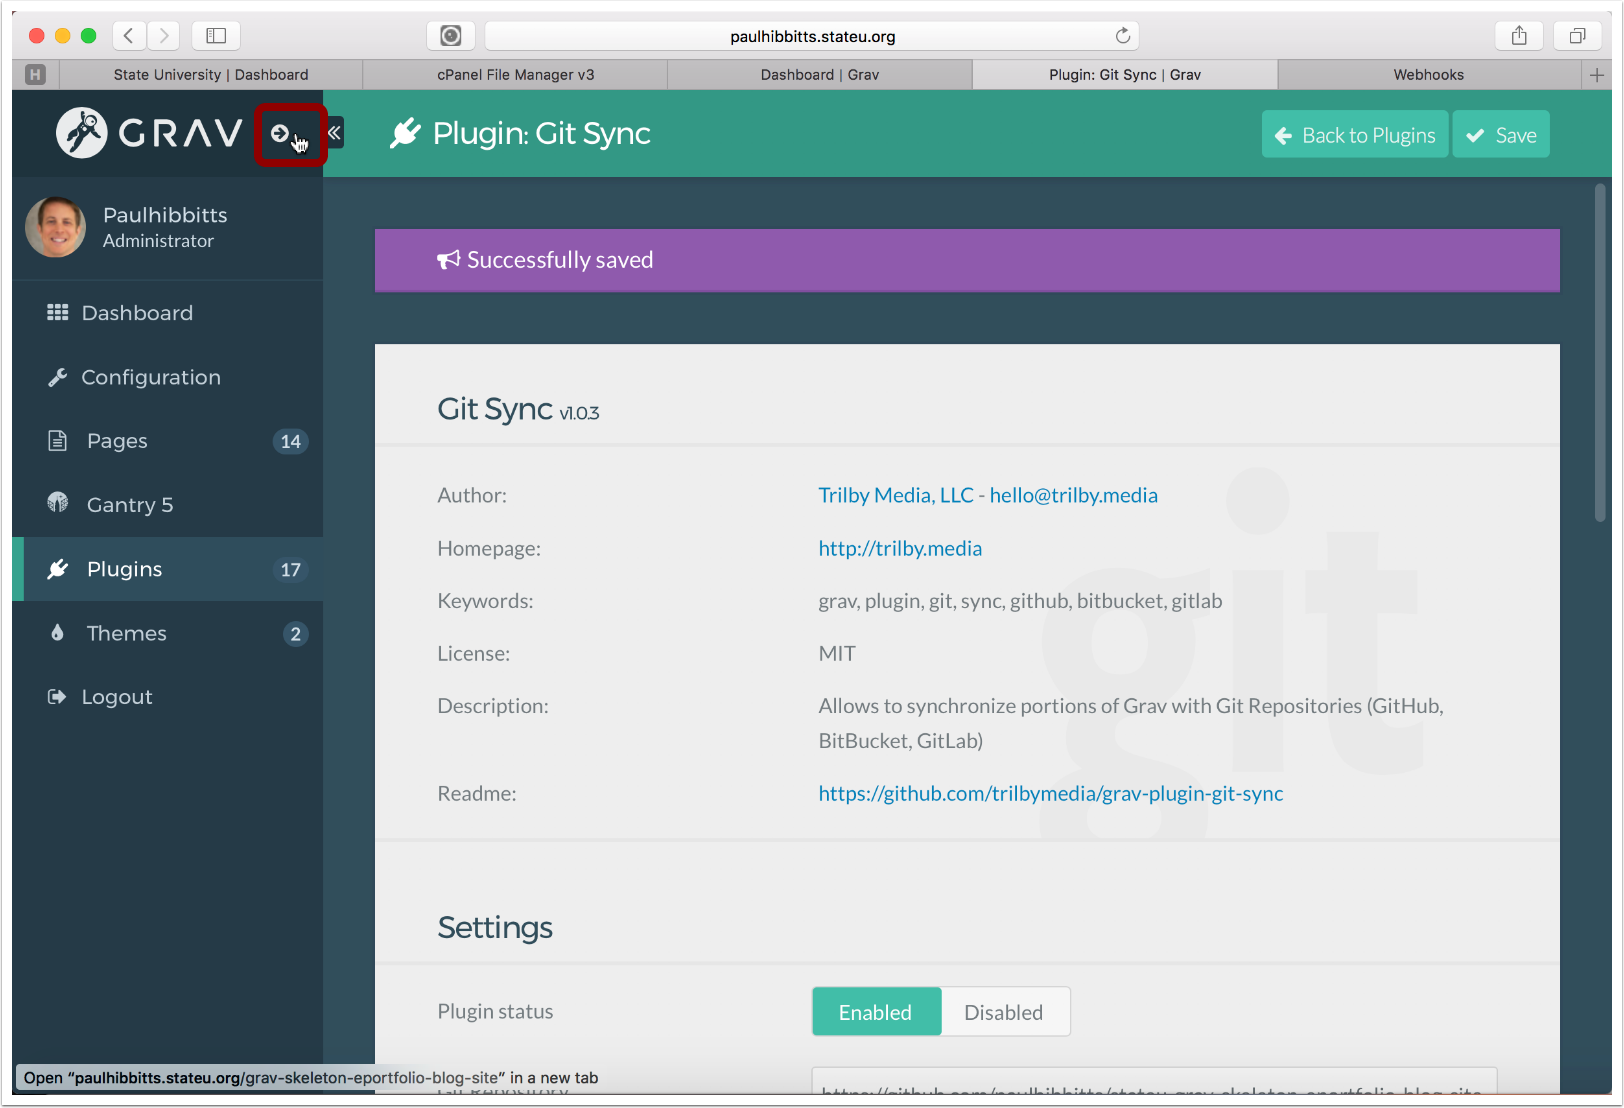
3. Configure Git Sync Plugin
3.1 Scroll down to the bottom of the page

3.2 Tap on the "Setup Git Sync Plugin" link

3.3 Tap the "Next" button

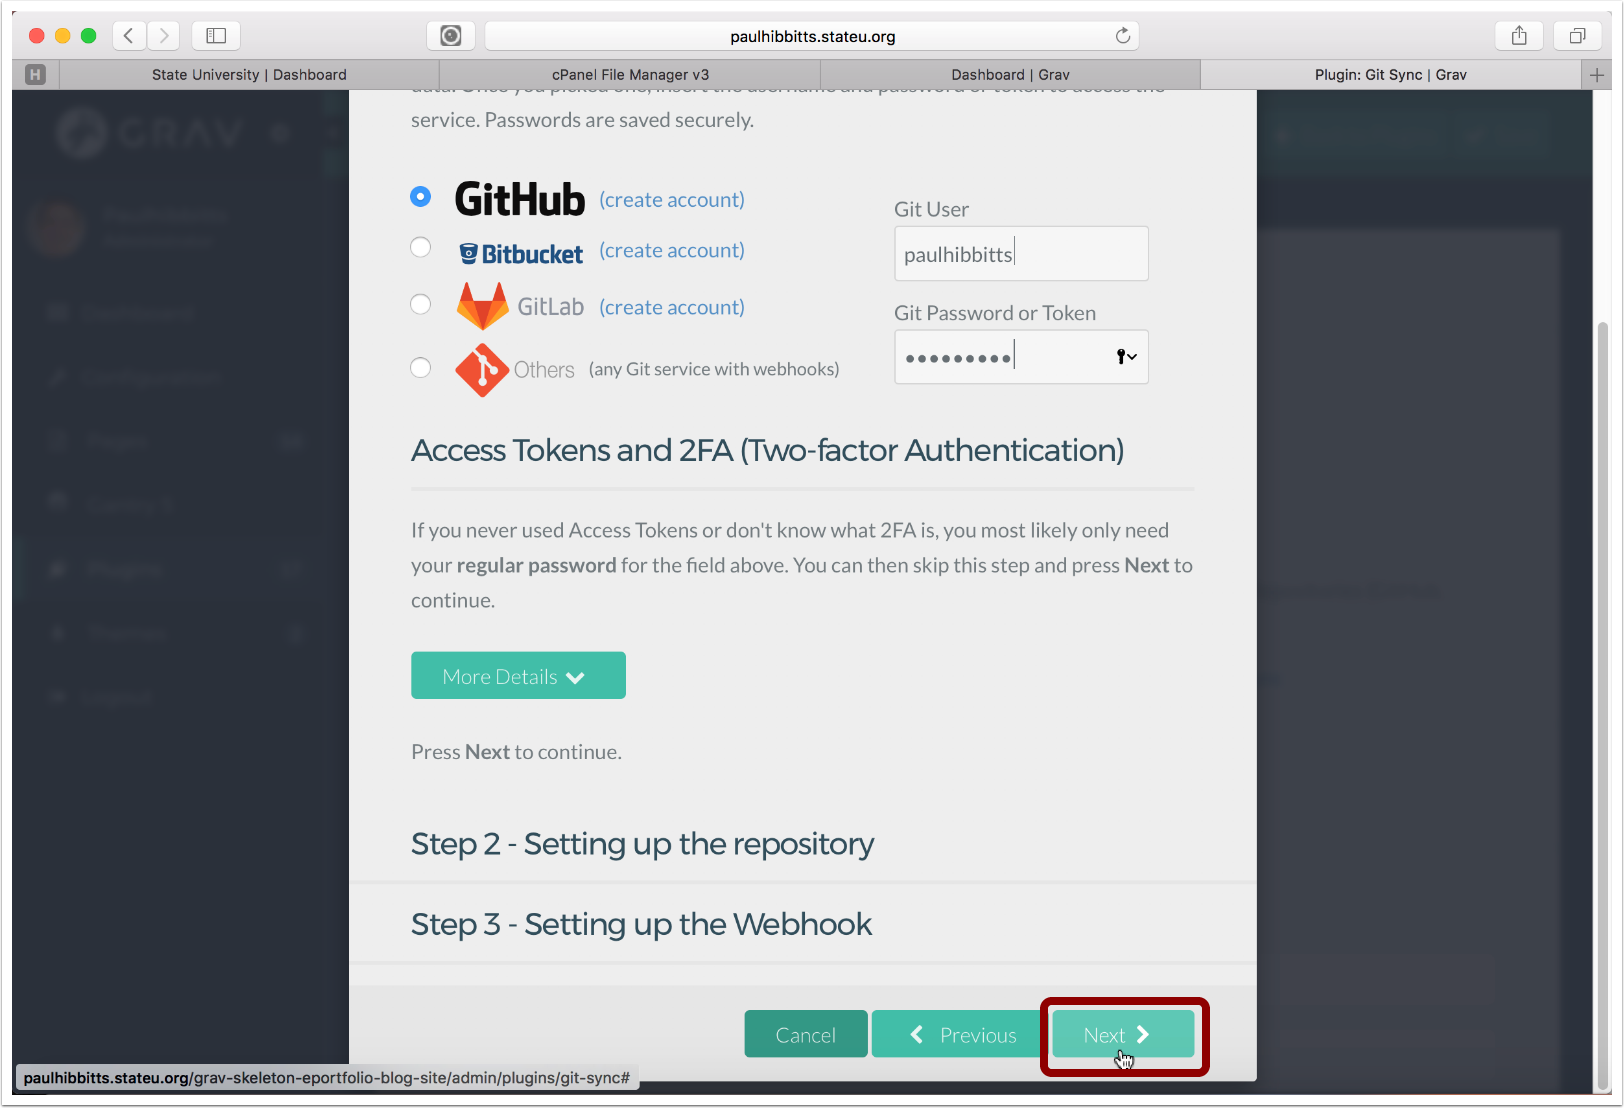
3.4 Choose the Git service and enter your username and password for it

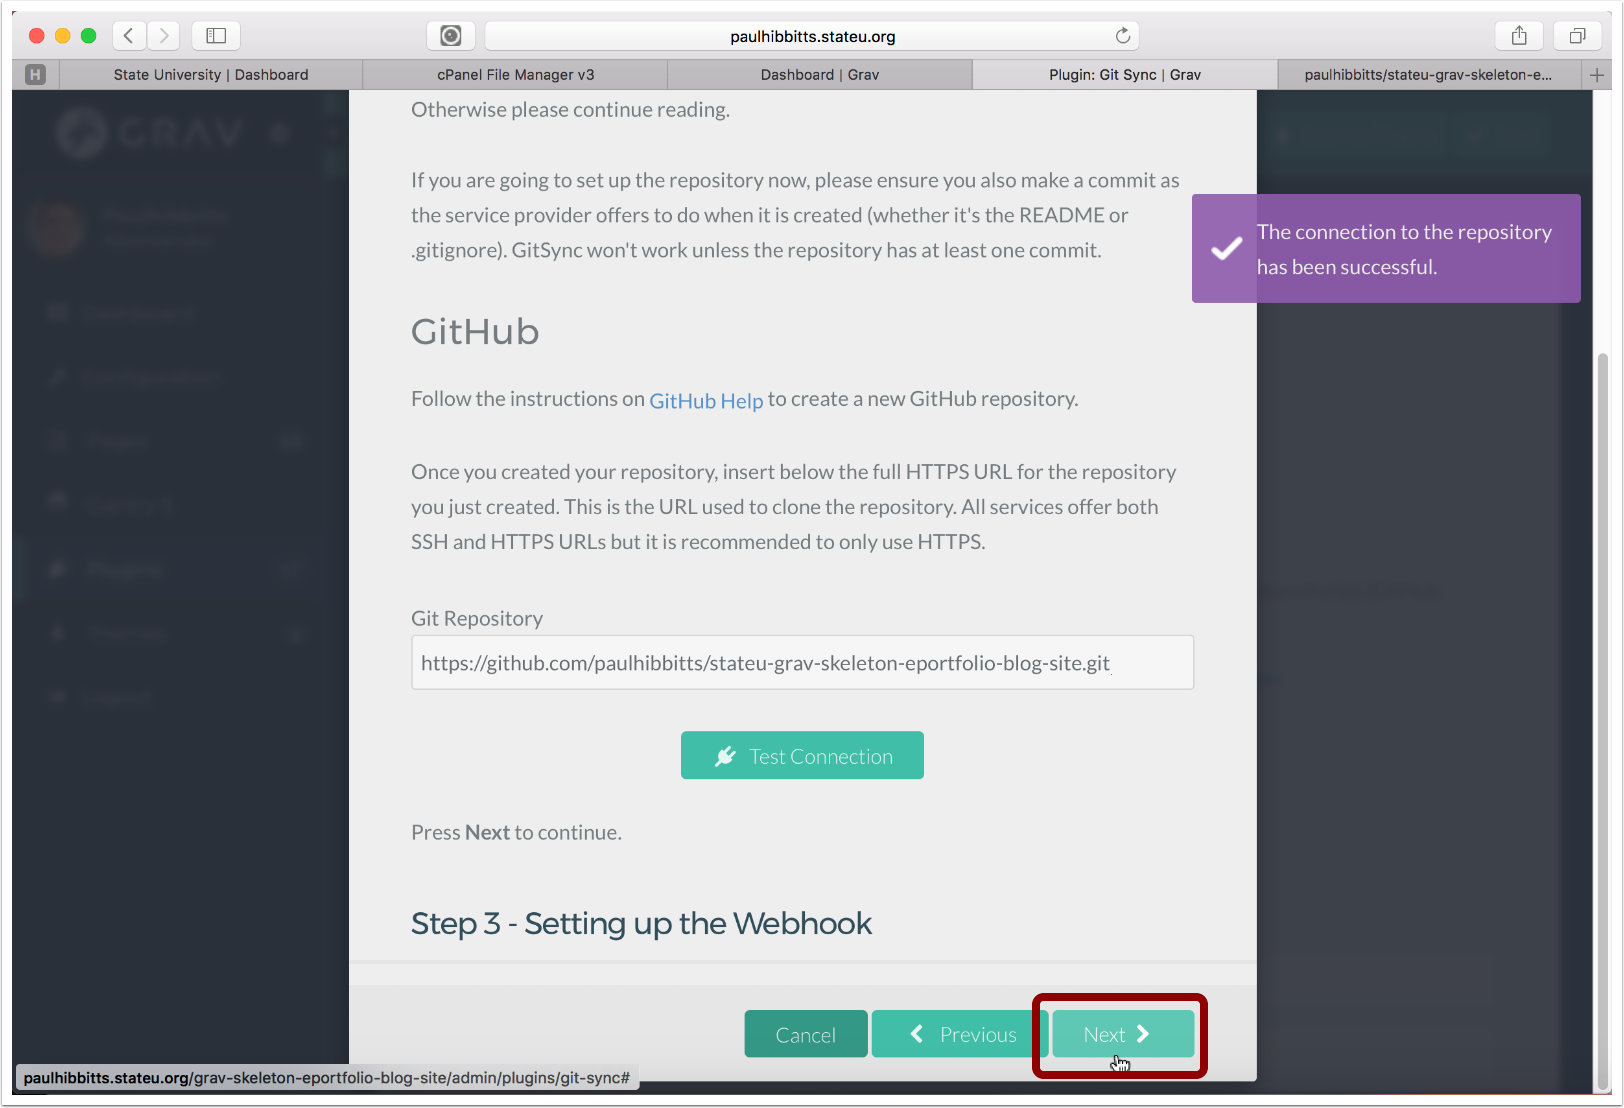
3.5 Scroll down (if needed) and tap the "Next" button
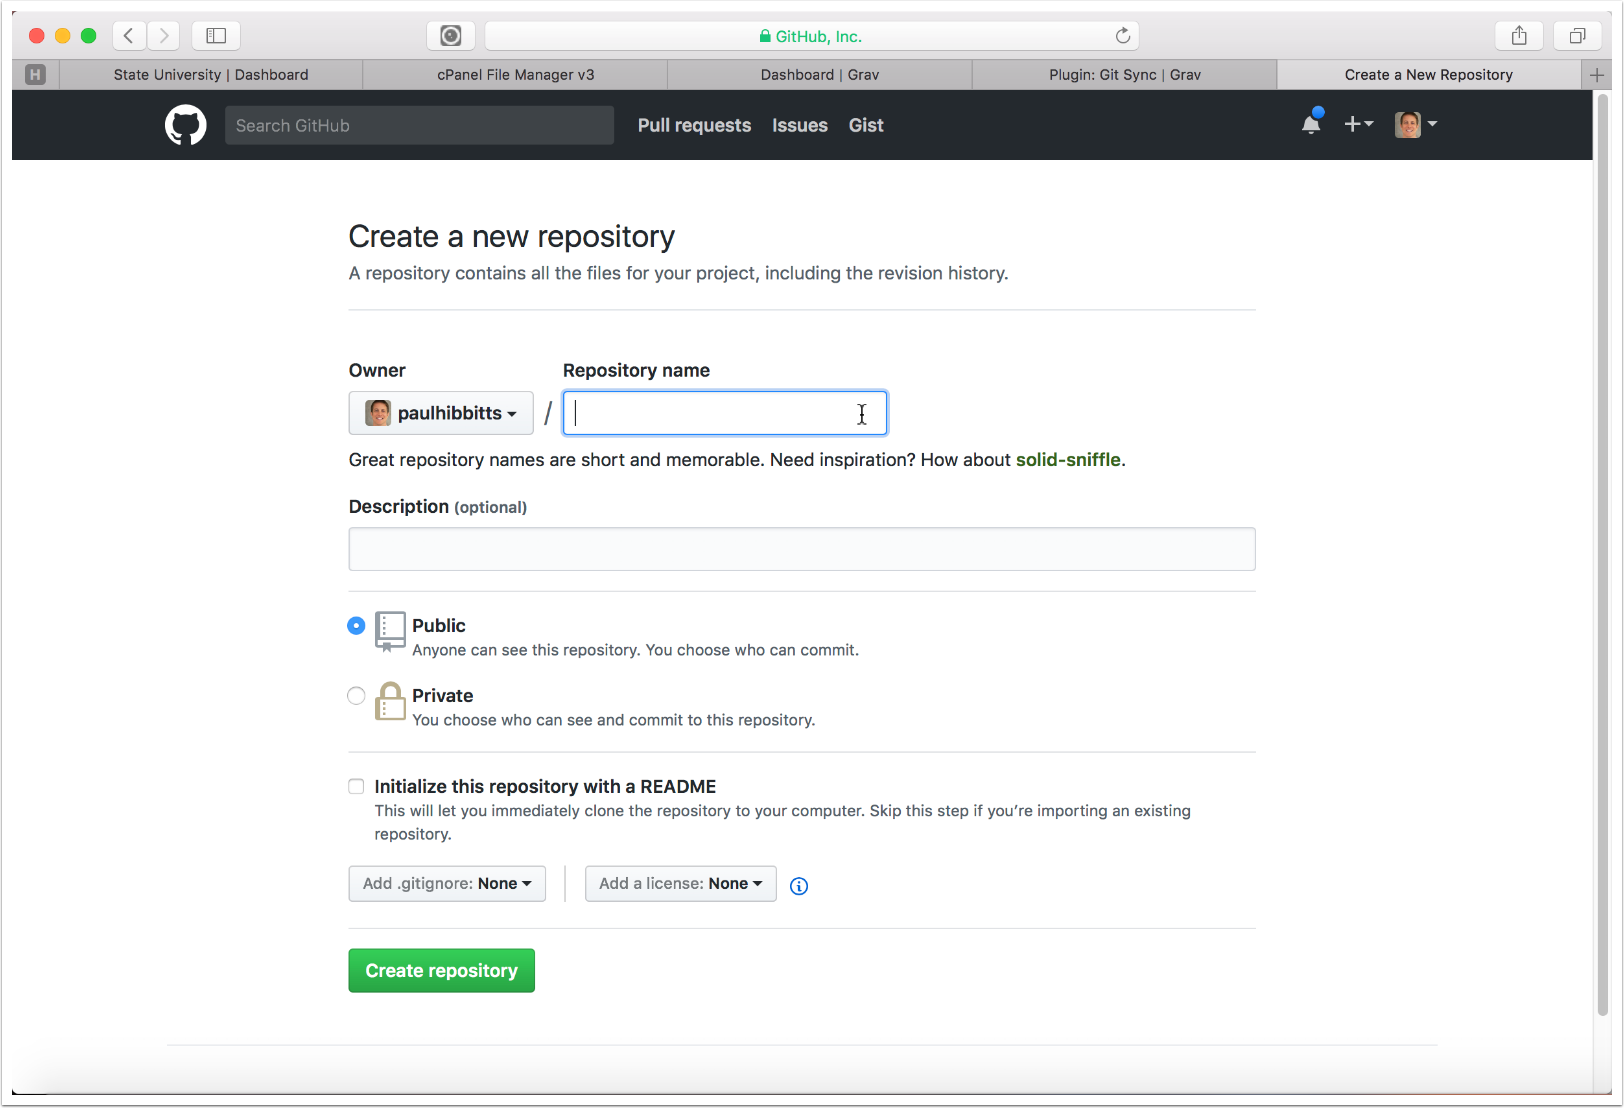
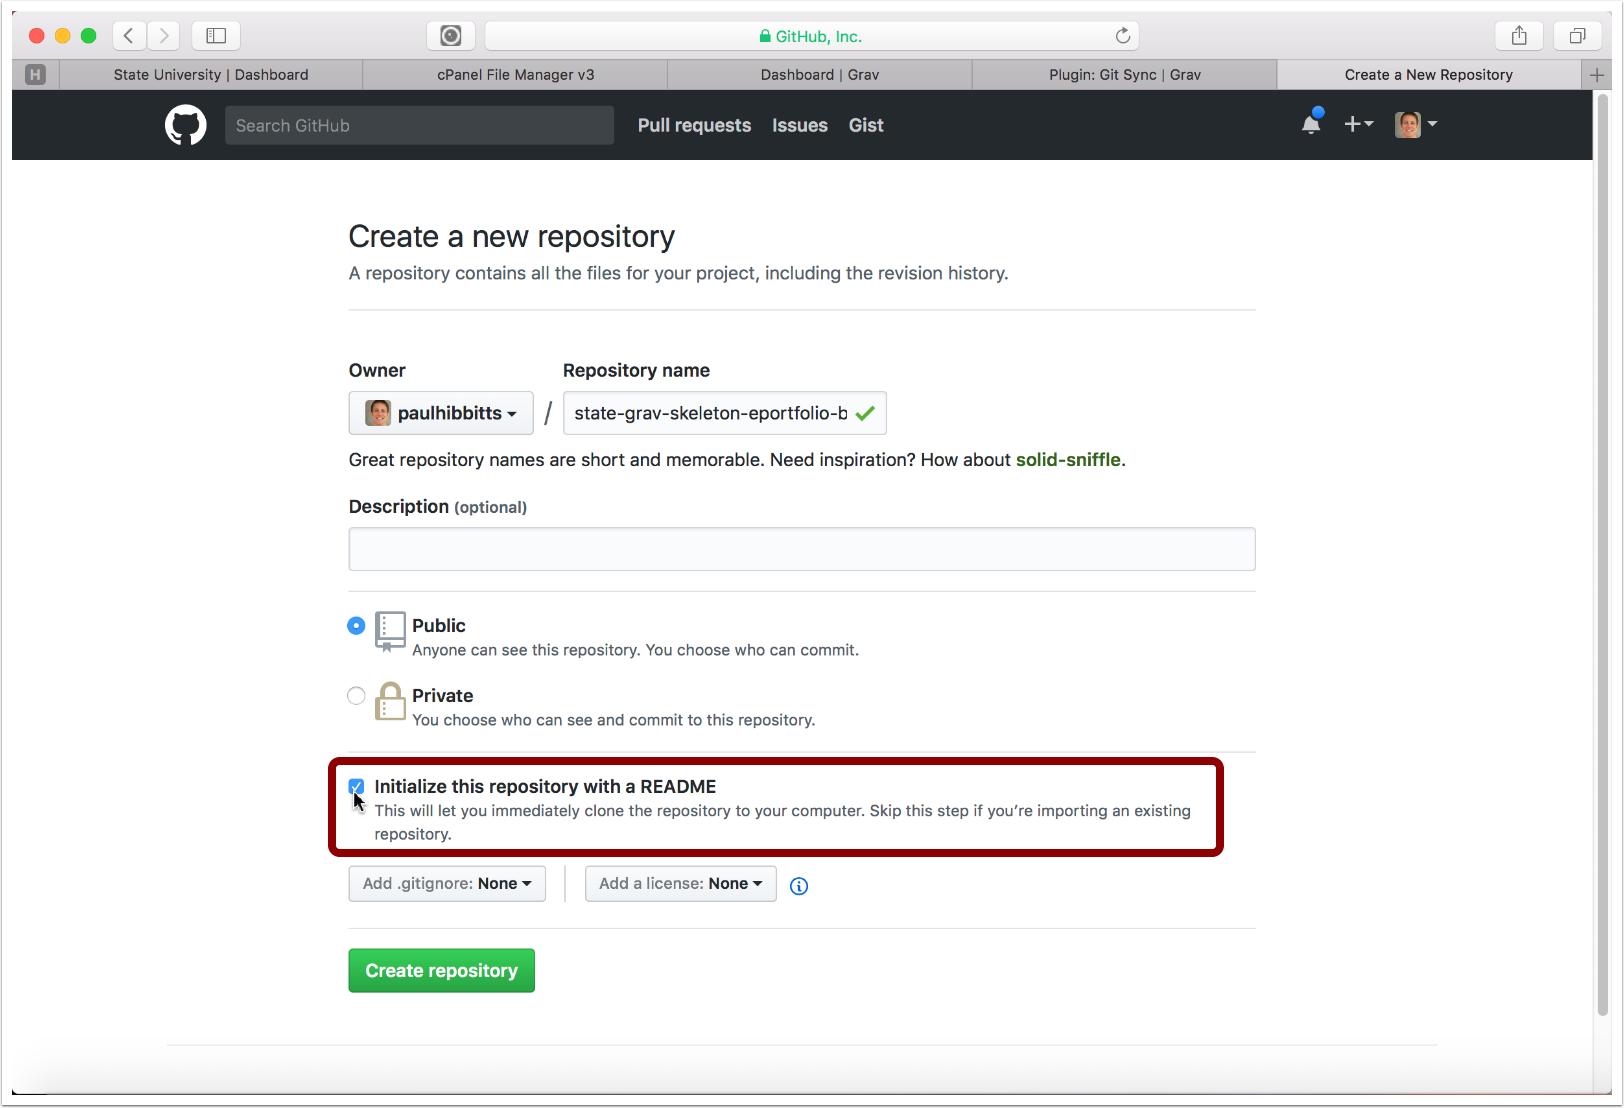
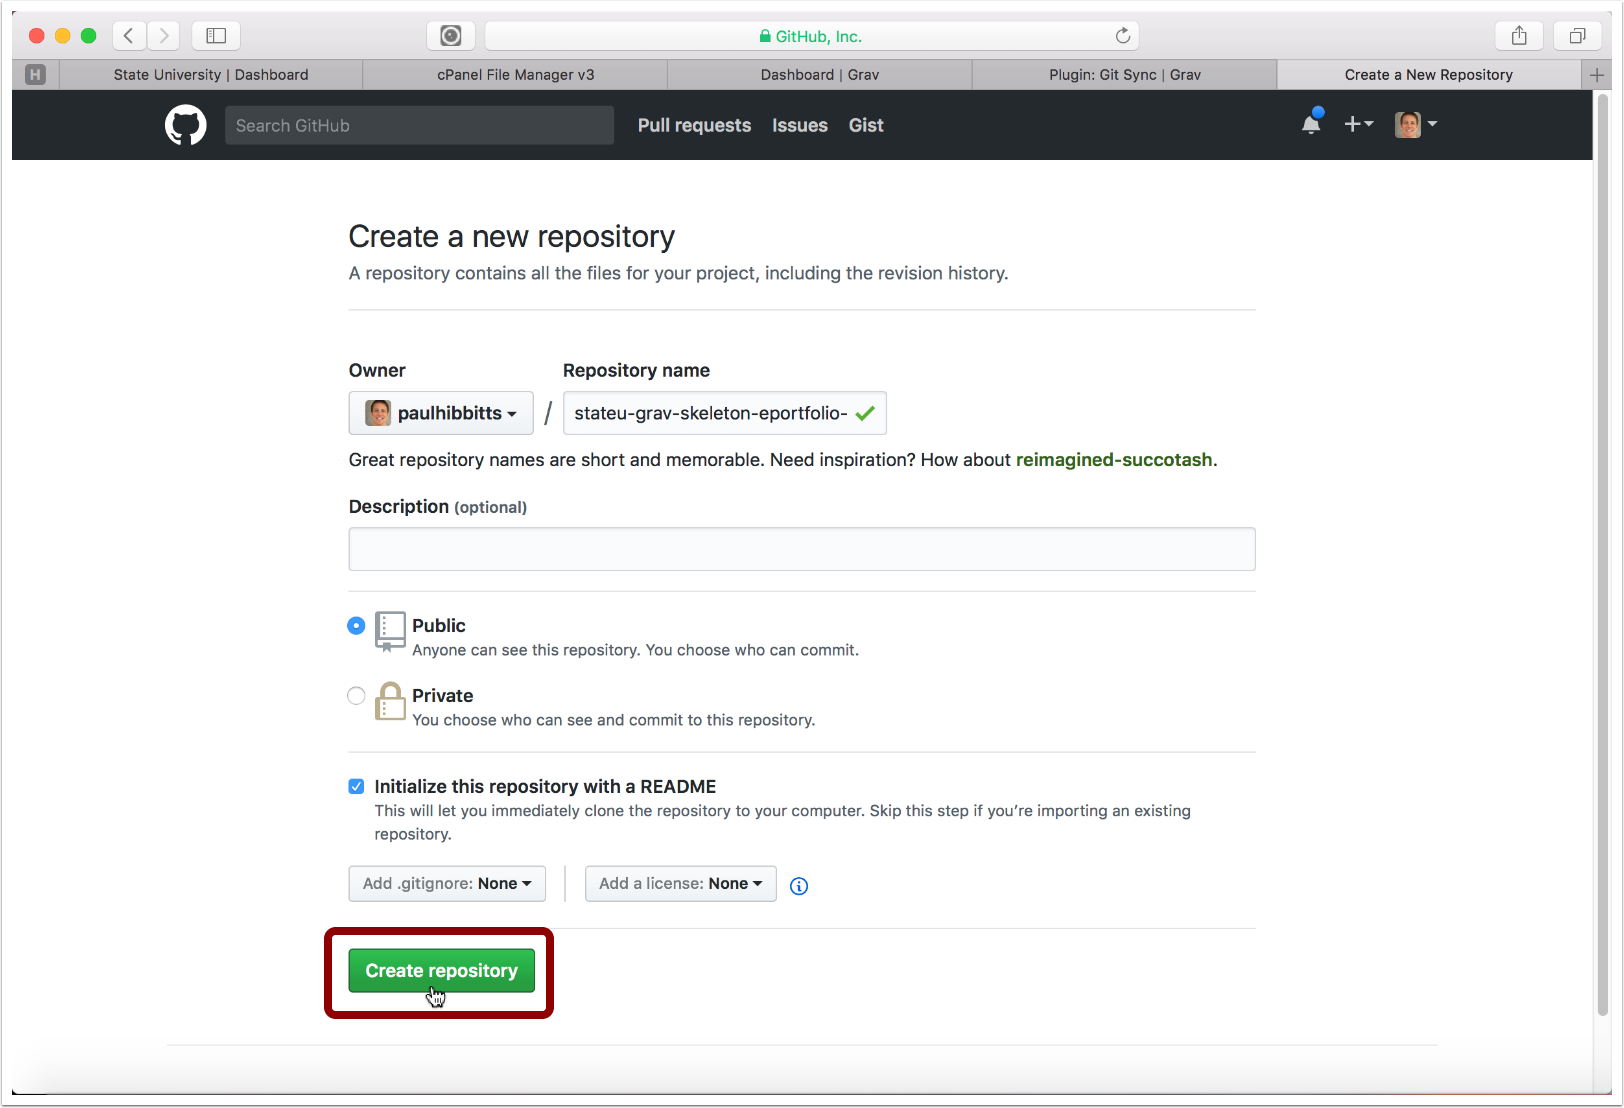
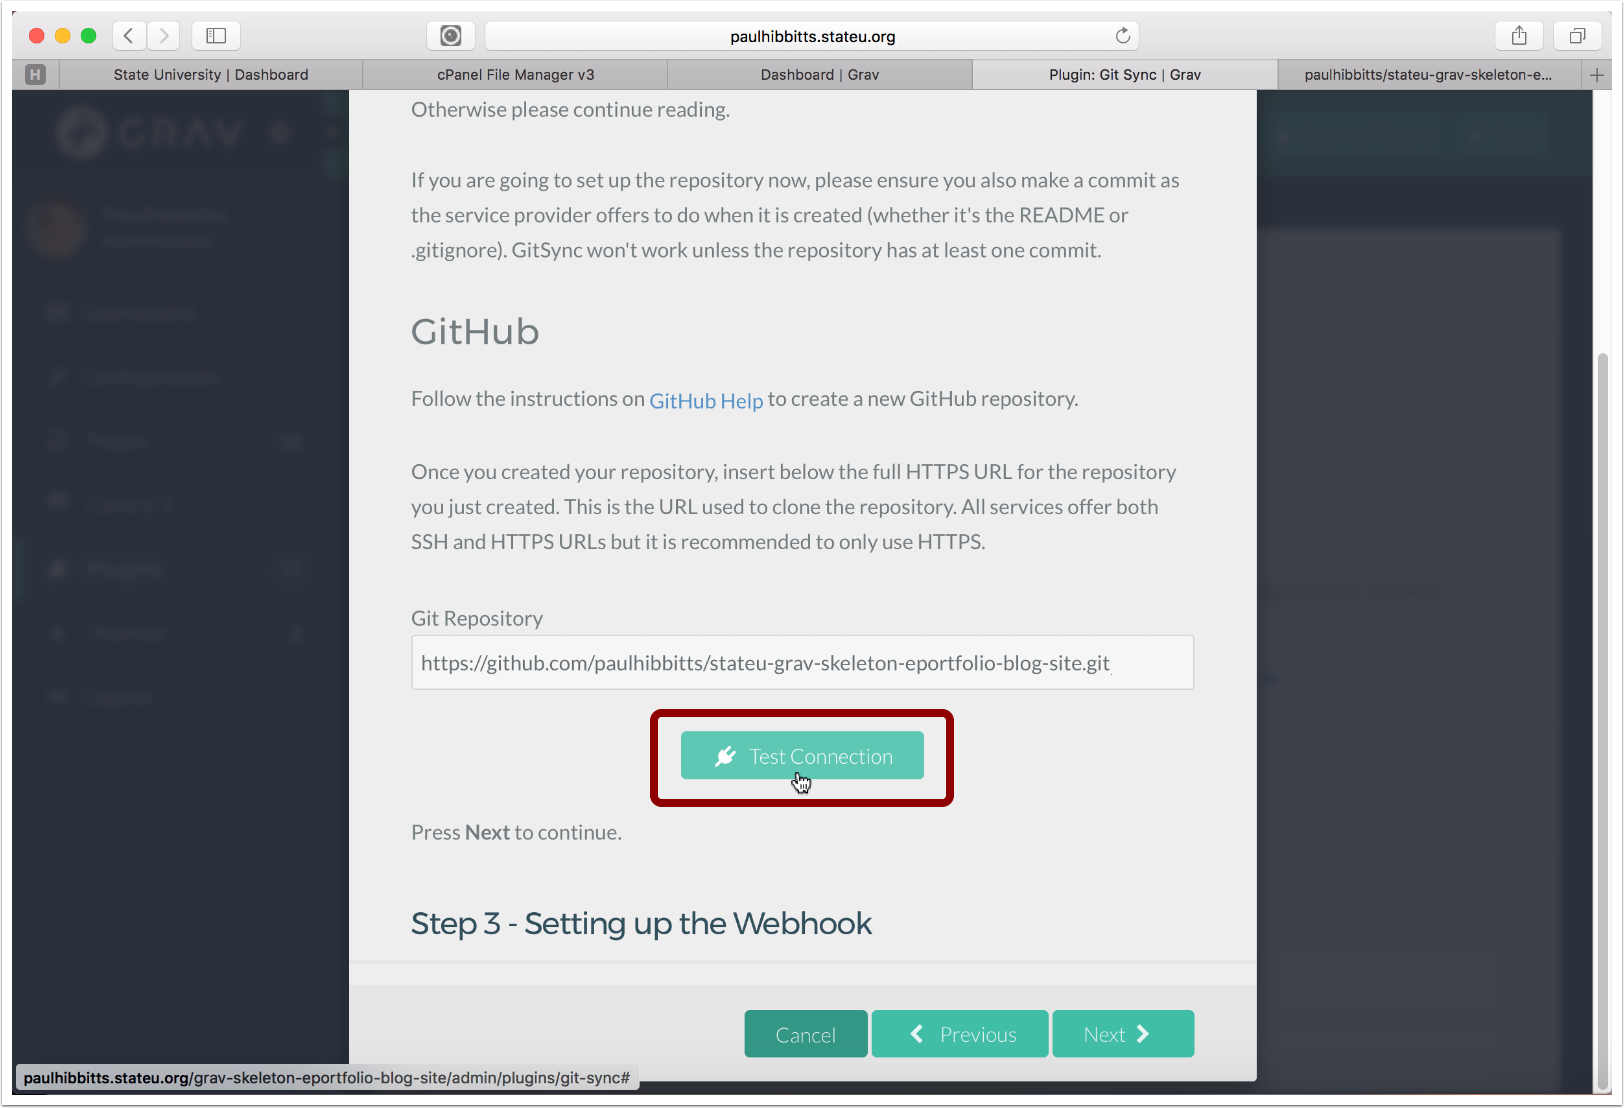
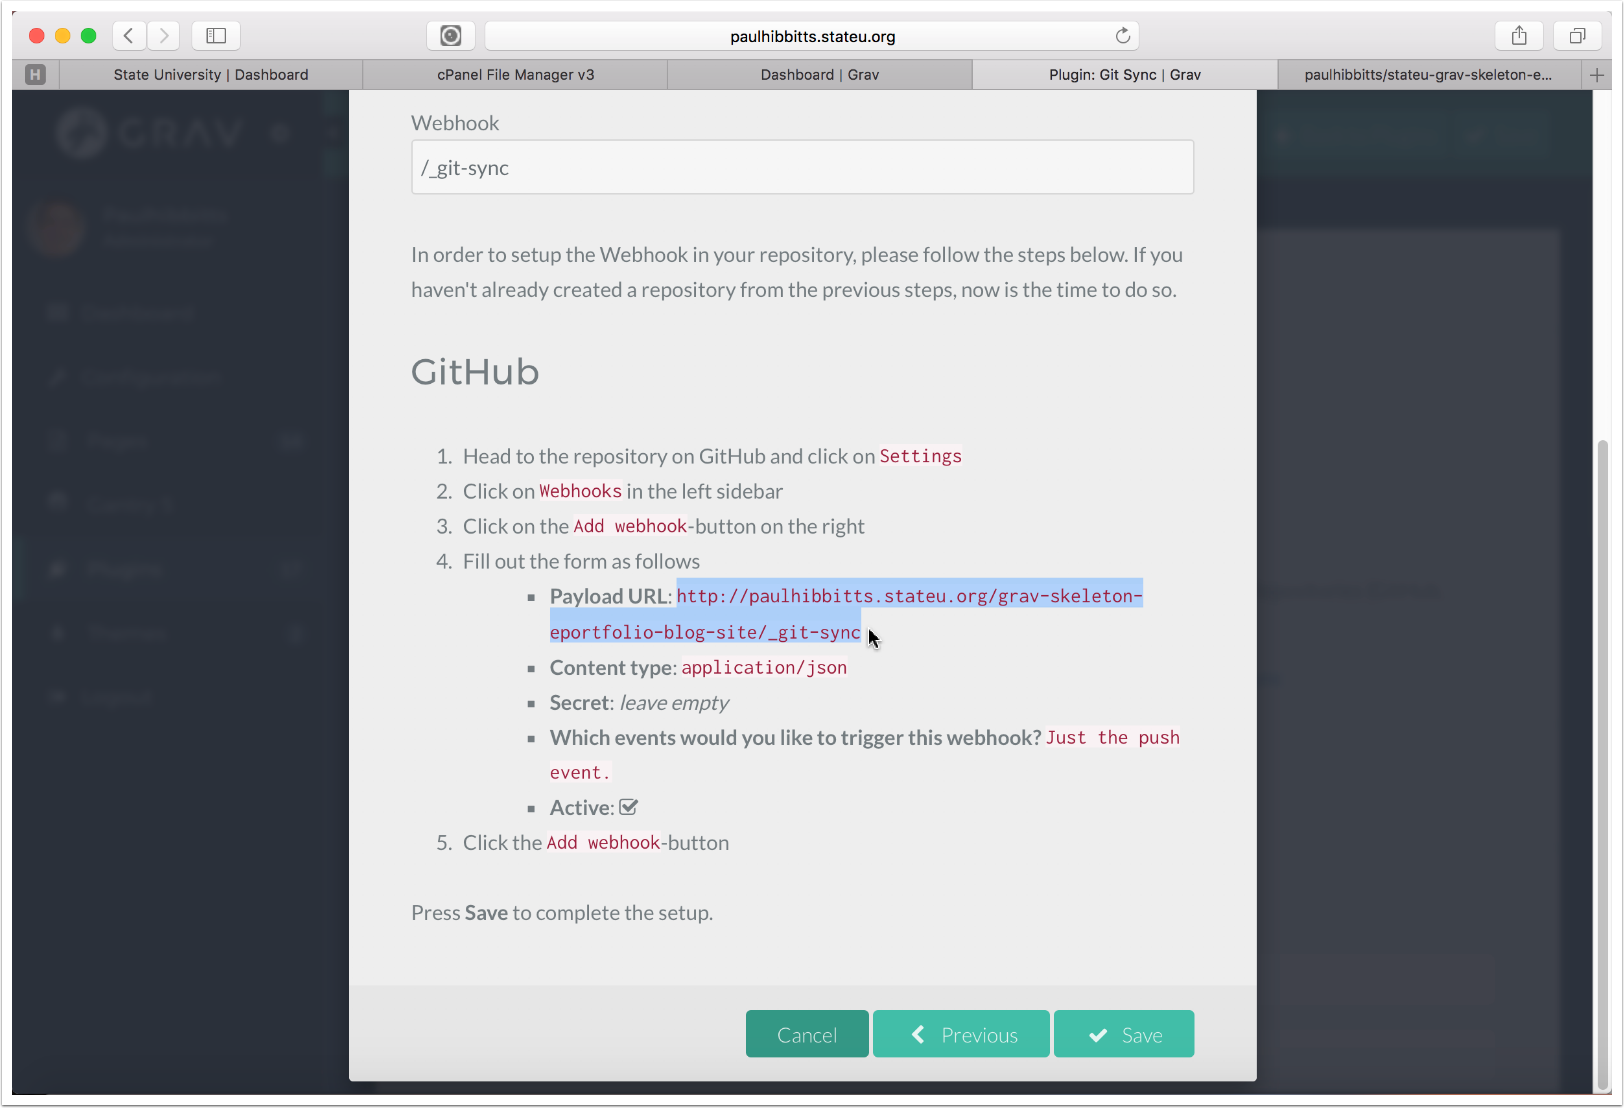
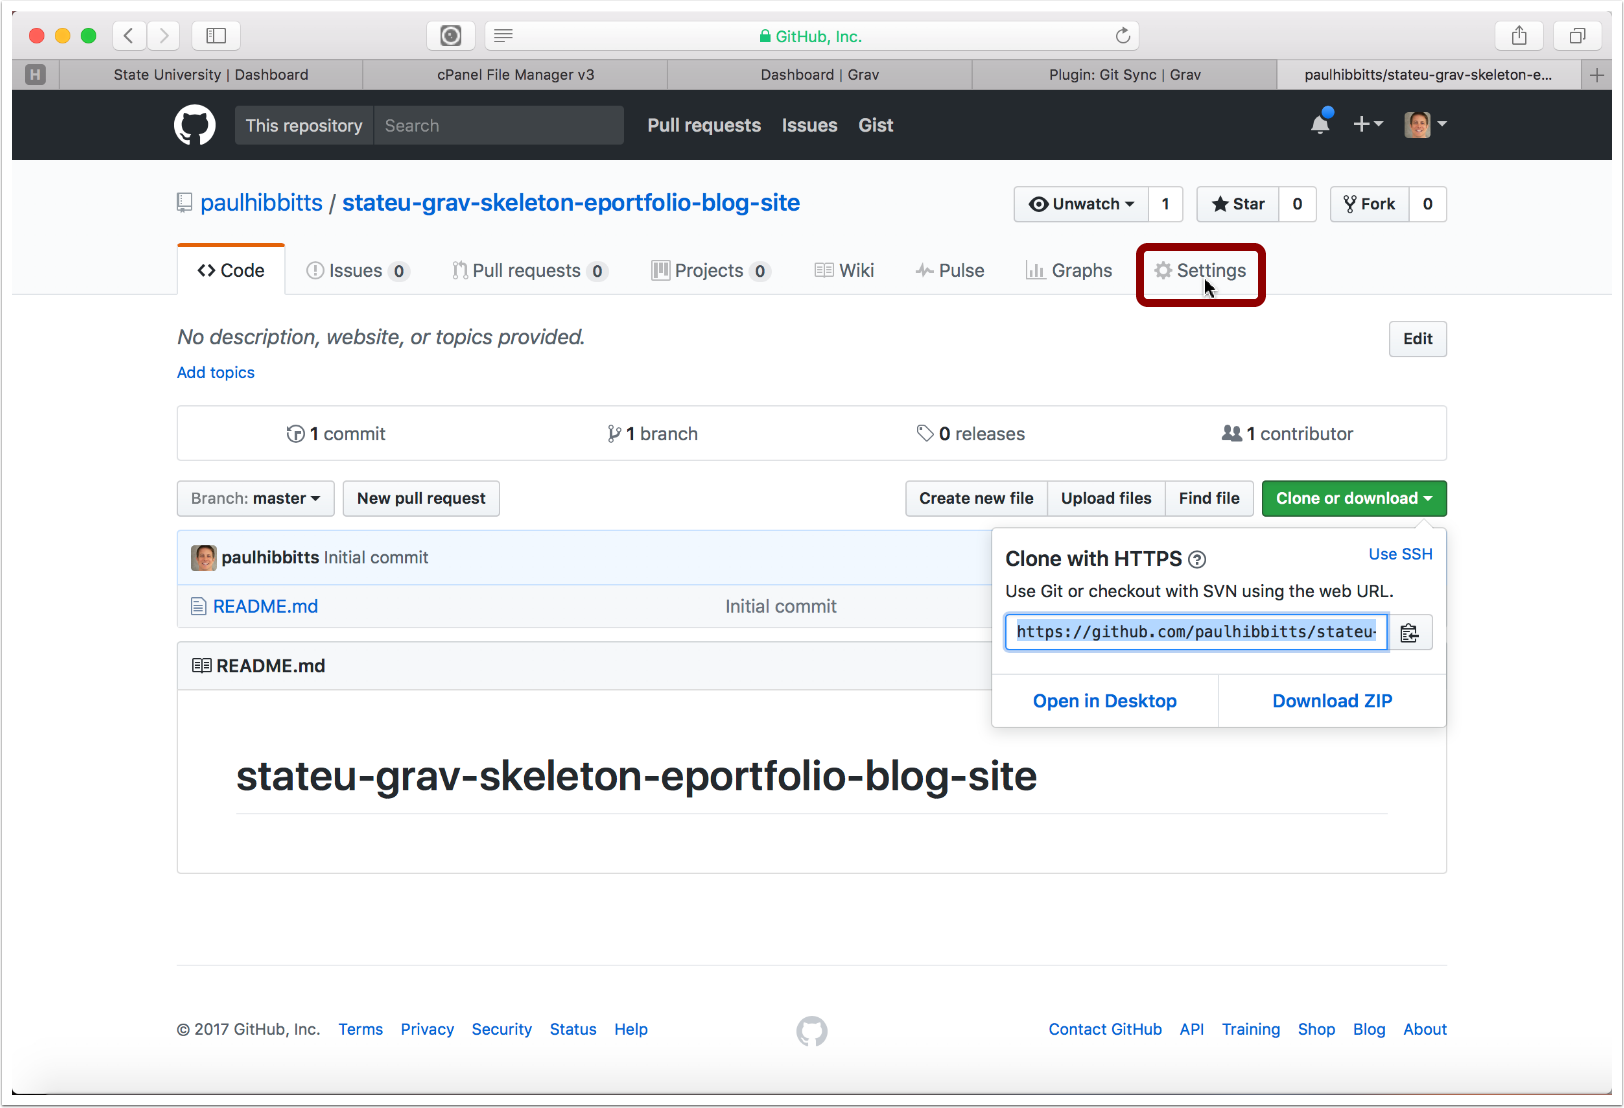
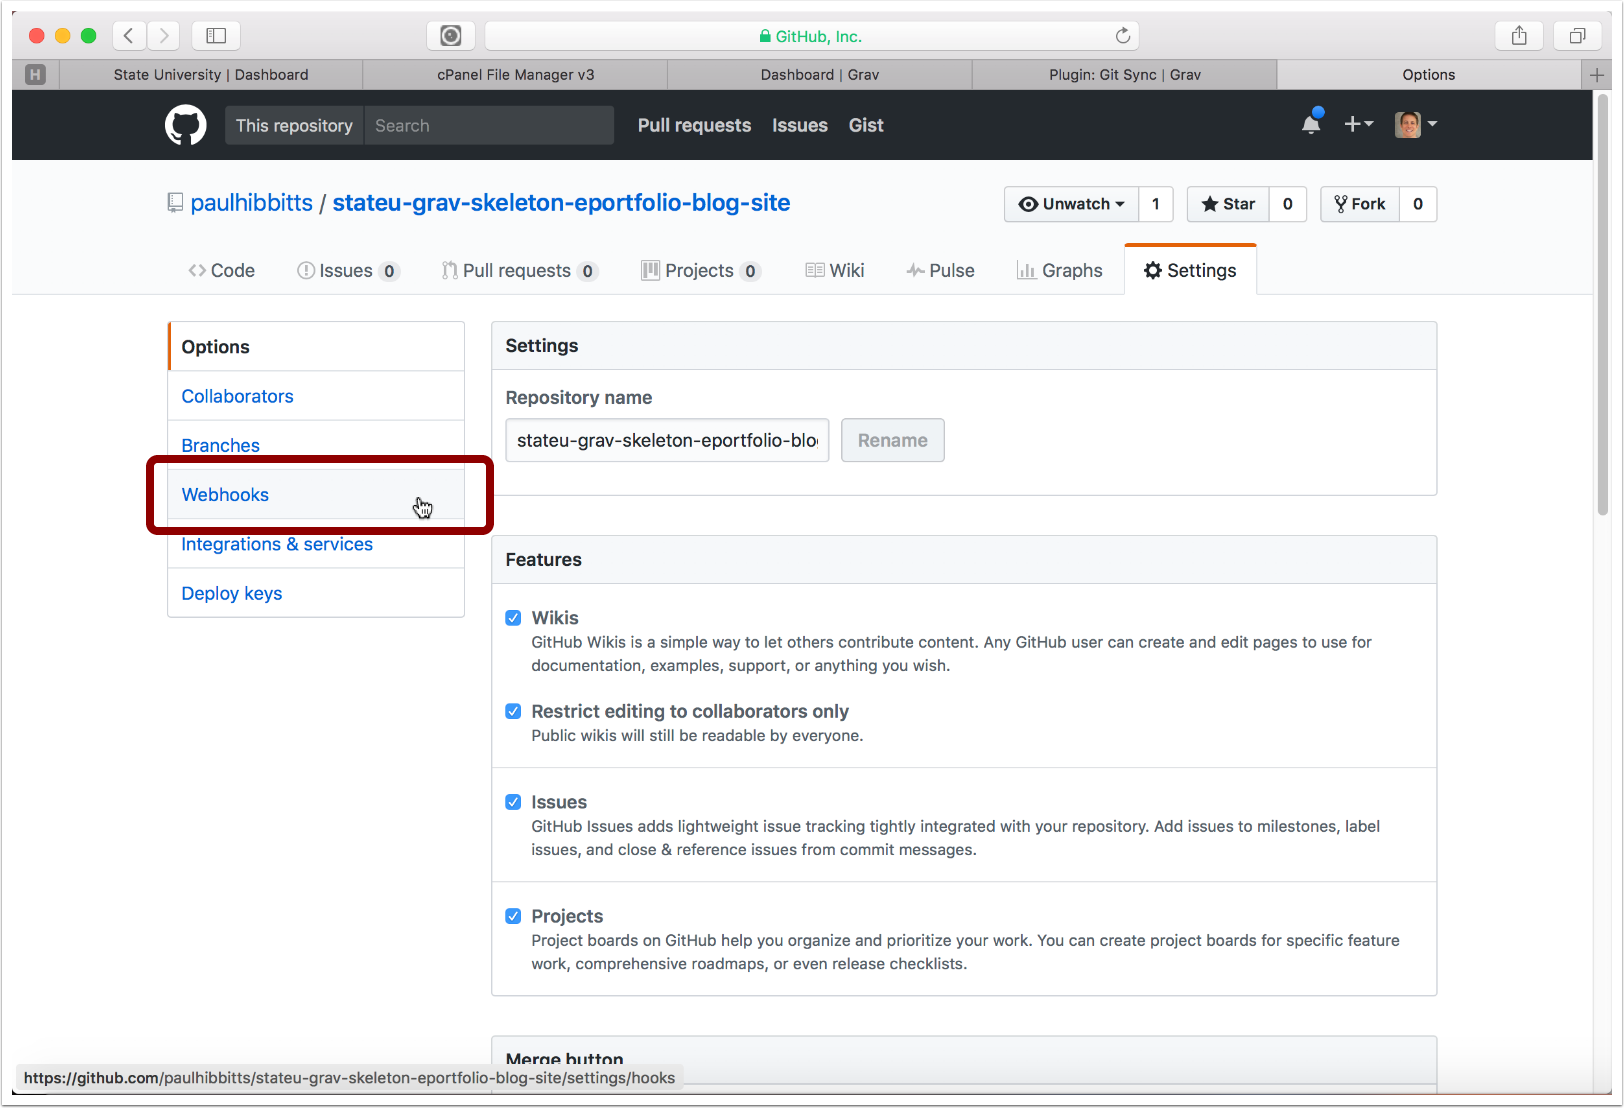
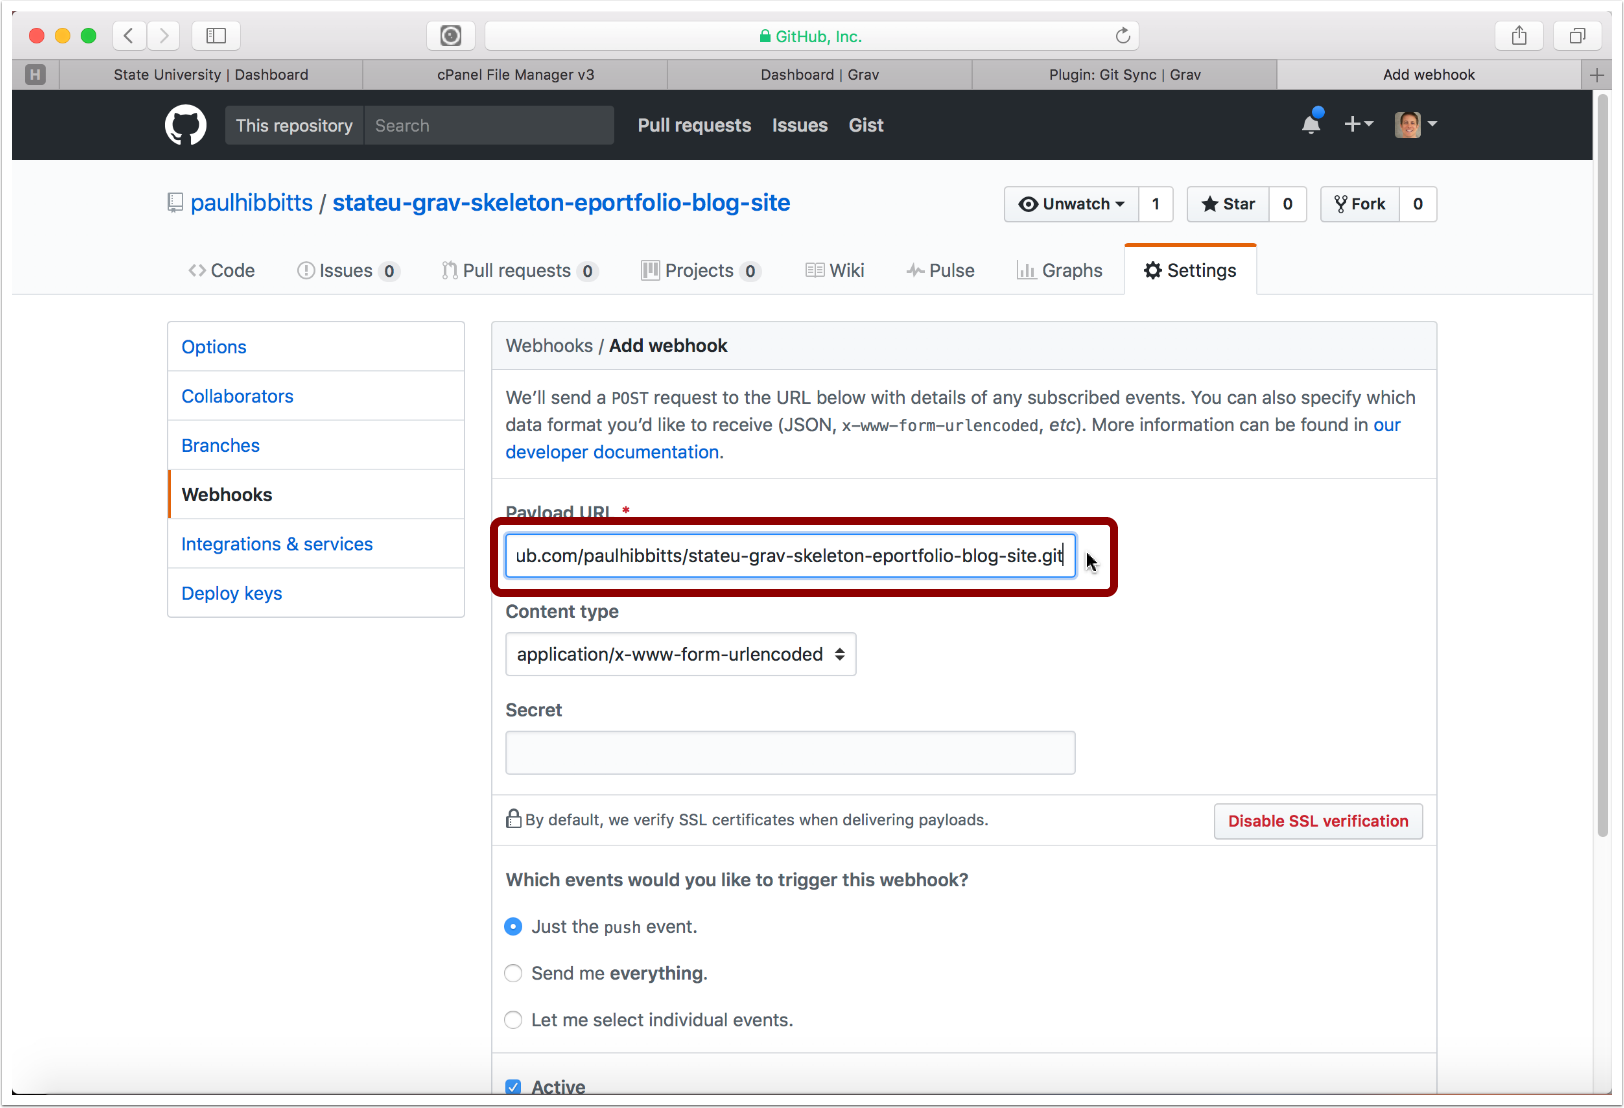
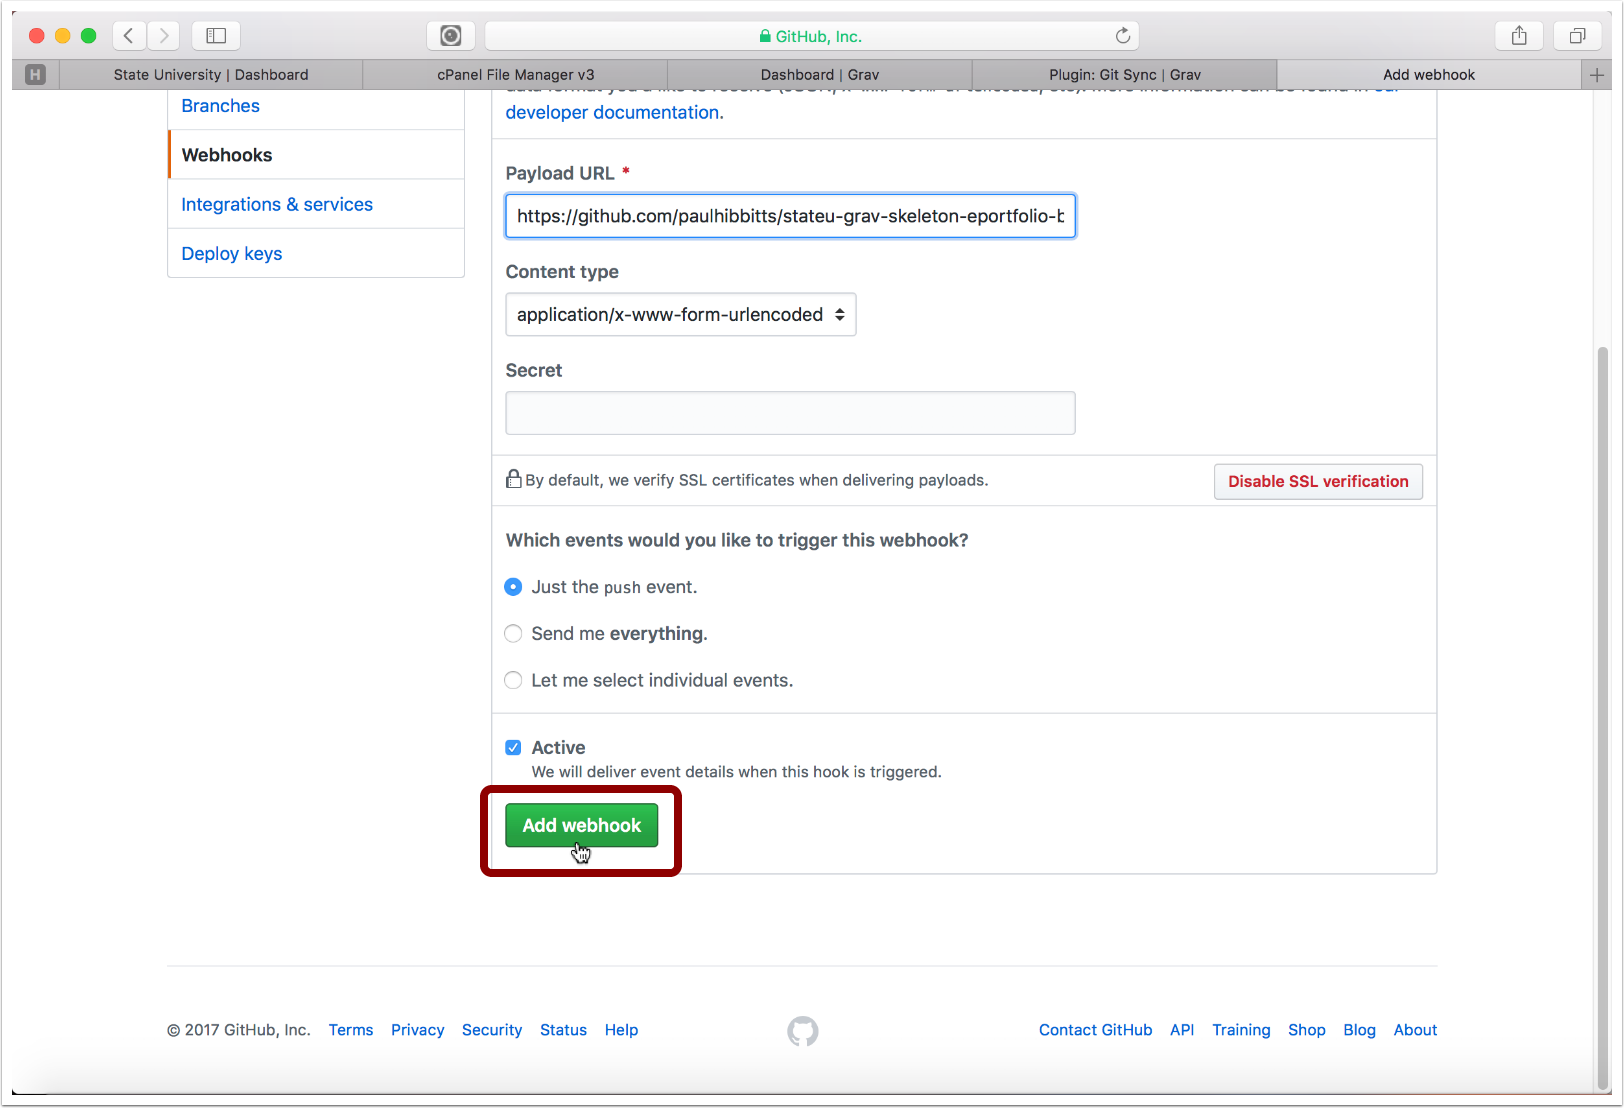
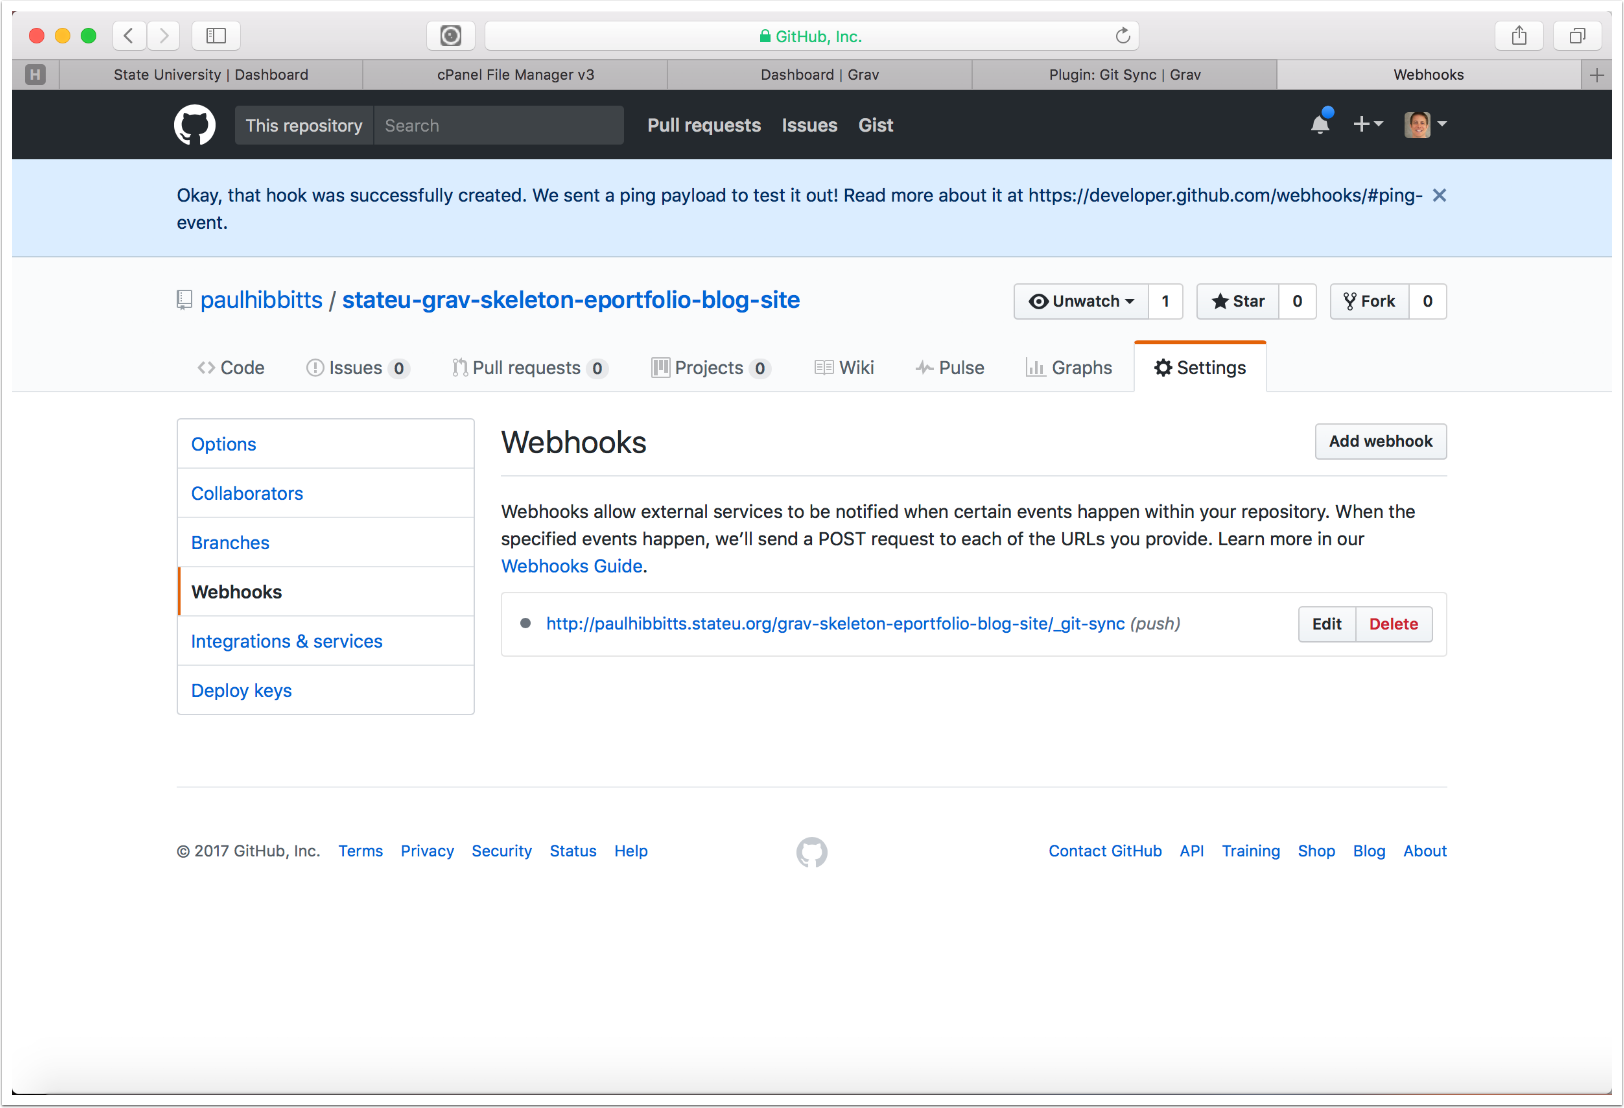
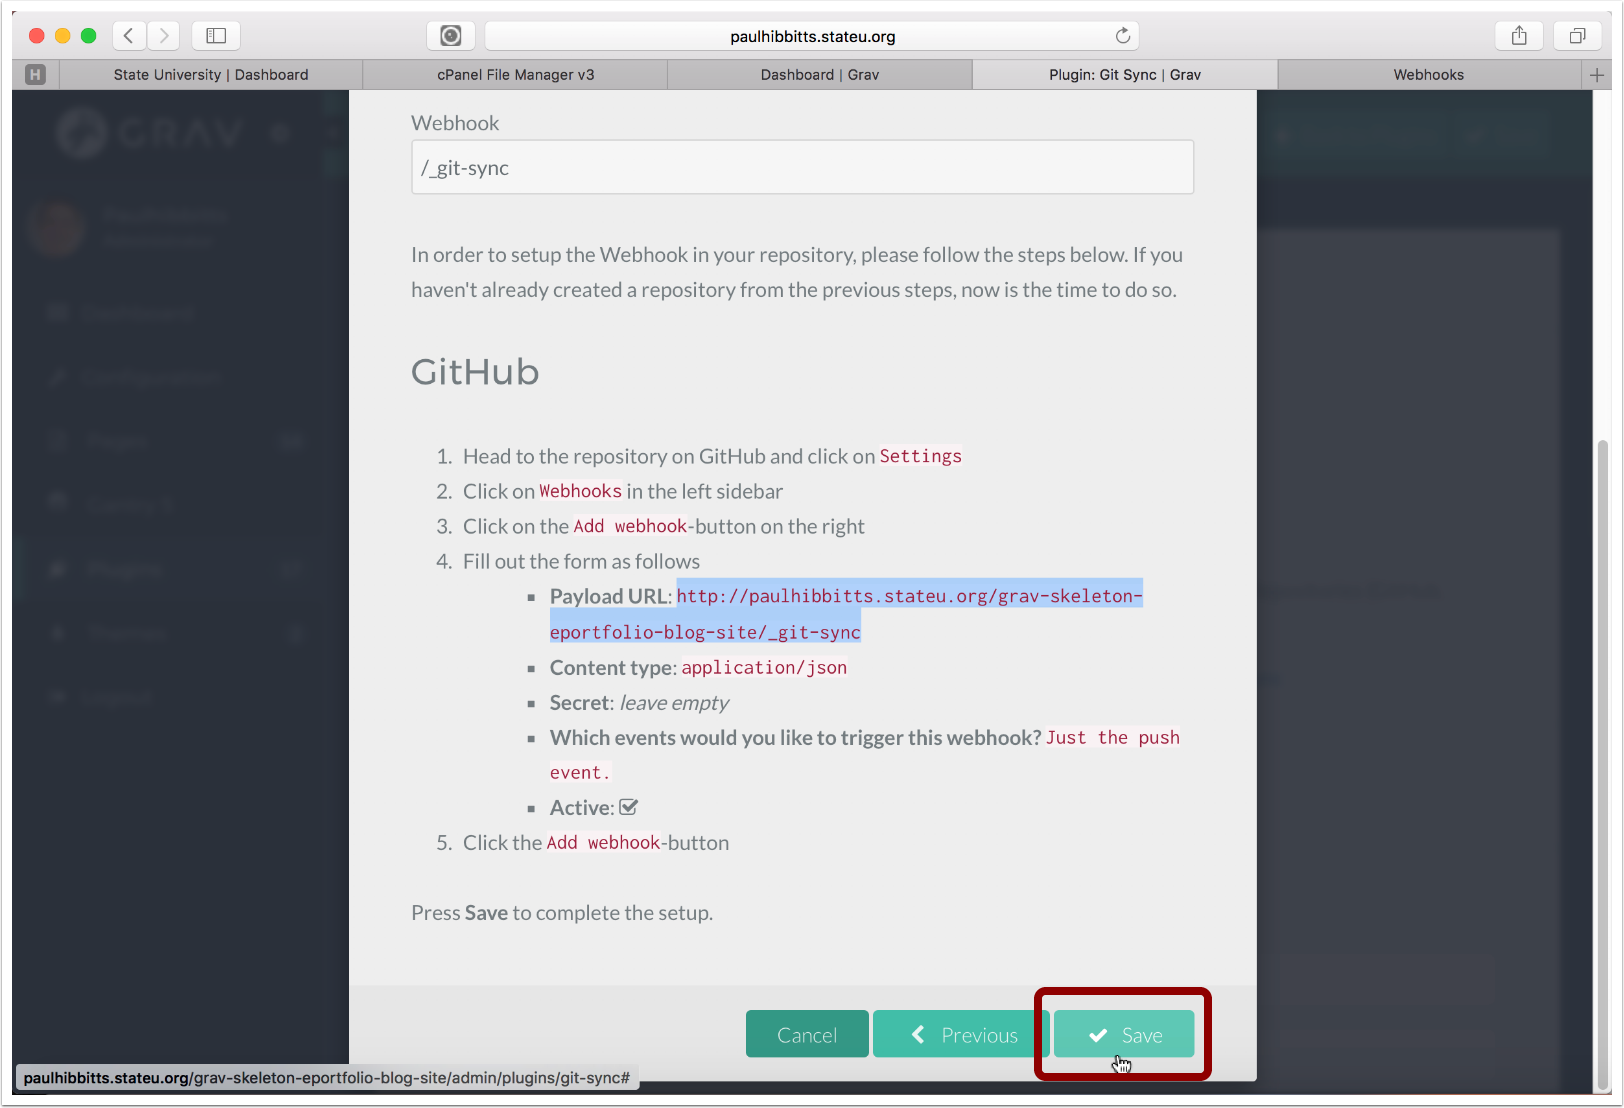
3.6 Before continuing, you will need to create a repository on your Git service.
If you have already created a Git repository (with at least one commit, for example a ReadMe file) you may skip to step 3.11