The purpose of this guide is to show the steps needed in migrating a WordPress site using the UpdraftPlus plugin.
Installing UpdraftPlus
The first step is to log into the WP Admin area of the site you wish to migrate. This can either be done via cPanel / My Apps or through a domain link if provided by the customer. For example https://mysite.com/wp-admin/

Once logged in we need to navigate to Plugins / Add New in the menus on the left-hand side.

Perform a search for updraft in the upper right search box.
UpdraftPlus WordPress Backup Plugin should be the first option available. Click Install Now
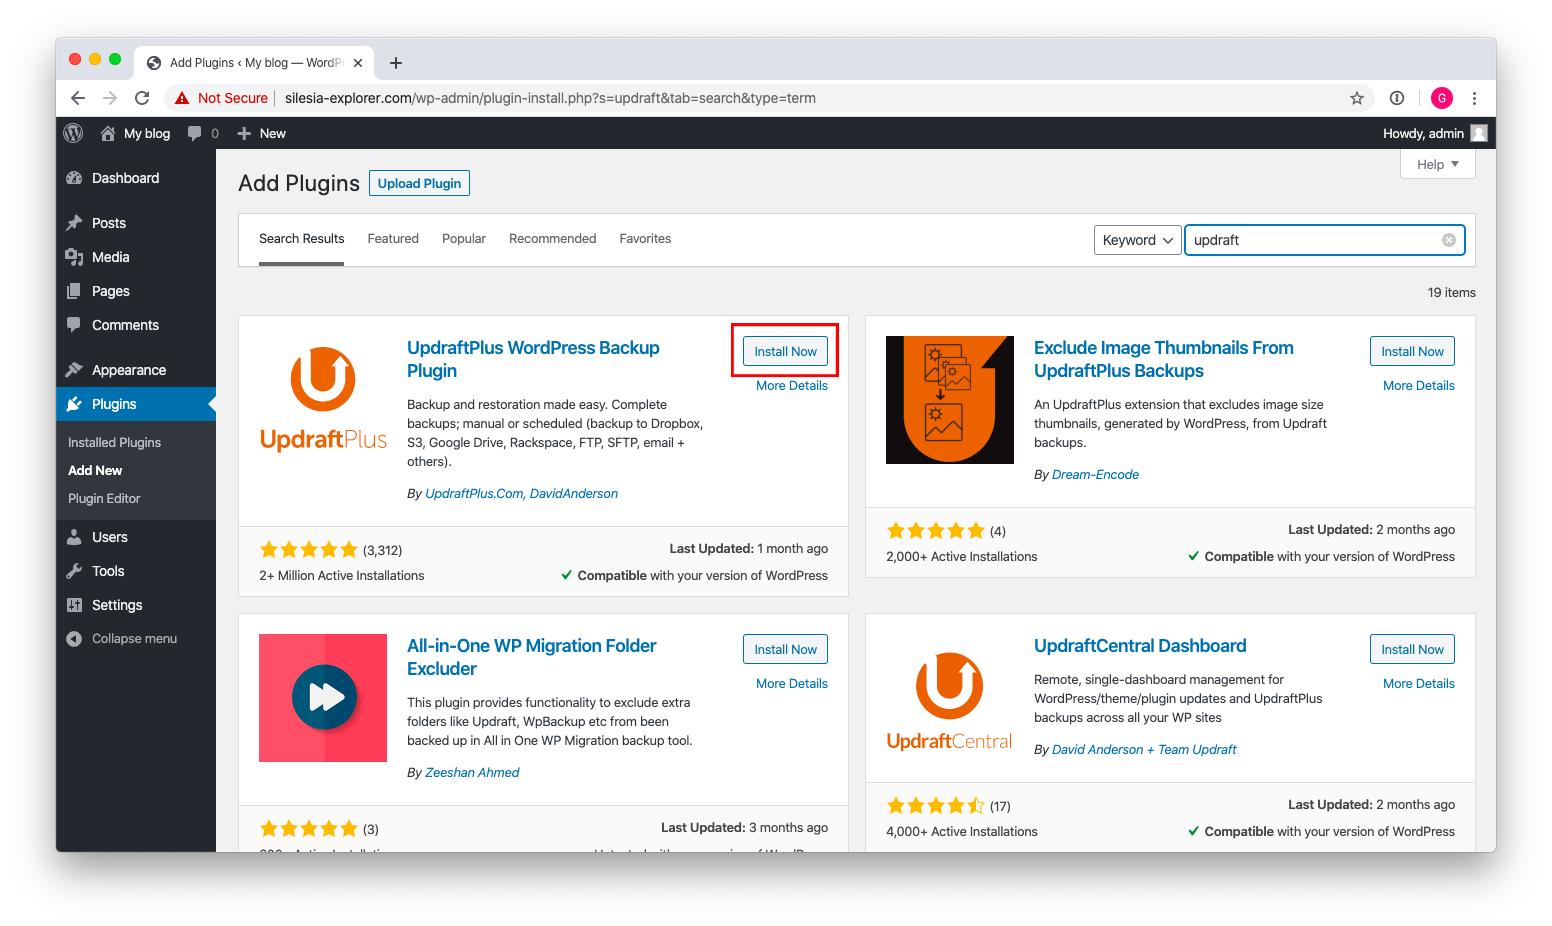
When it shows the plugin has been installed, click Activate

Generating a Backup
After activation, you will be taken to the Plugins screen. Locate UpdraftPlus - Backup/Restore and click Settings
![]()
Click Backup Now

In the next window make sure that Include your database in the backup and Include your files in the backup are selected. Click Backup Now
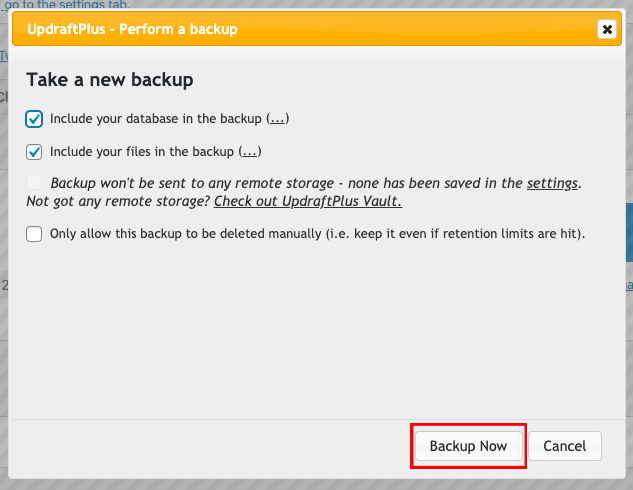
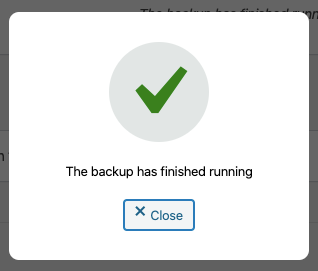
You will receive confirmation once the backup finishes. Please note that this could take a long time with large sites and closing your browser window or tab will terminate the process.
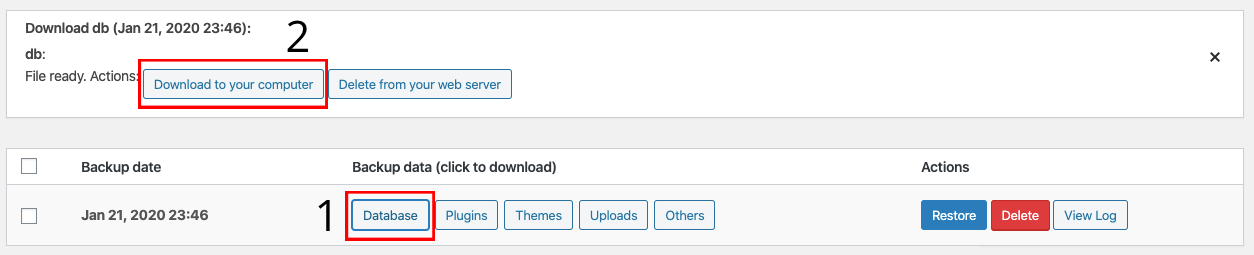
You will now be shown the different parts of the backup. This consists of the Database, Plugins, Themes, Uploads and Others.

Clicking on each backup part will allow you to download them to your local computer.
Installing WordPress
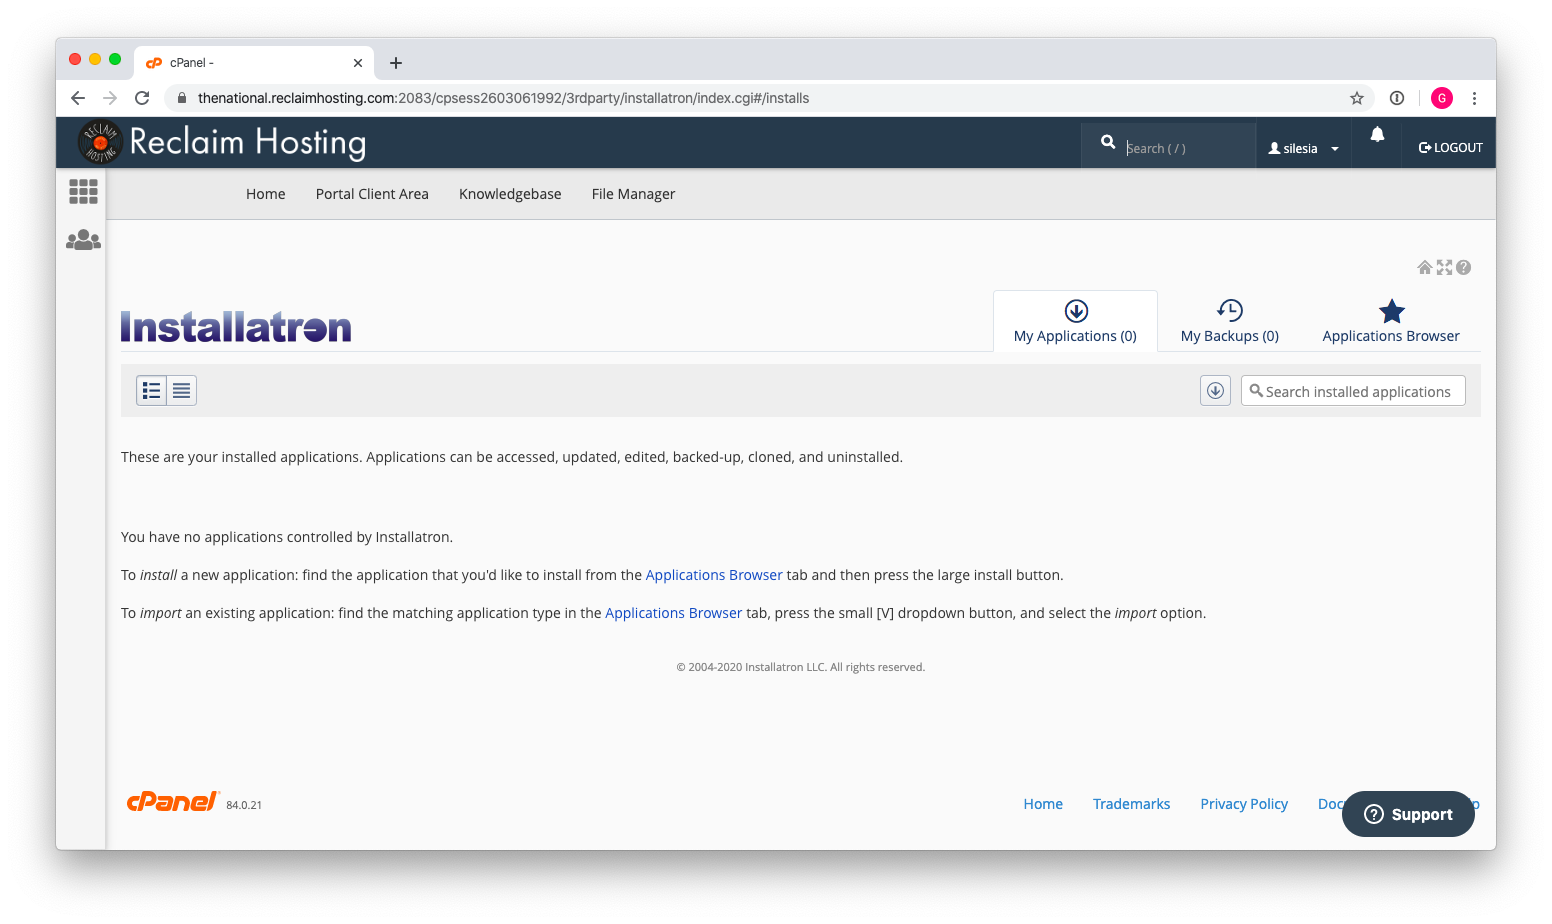
We are now ready to upload the backups to the new server, however, the first step is to install WordPress if it hasn’t been installed already. Once you are logged into cPanel, under Applications, click My Apps

When no applications are installed you will see the following screen.
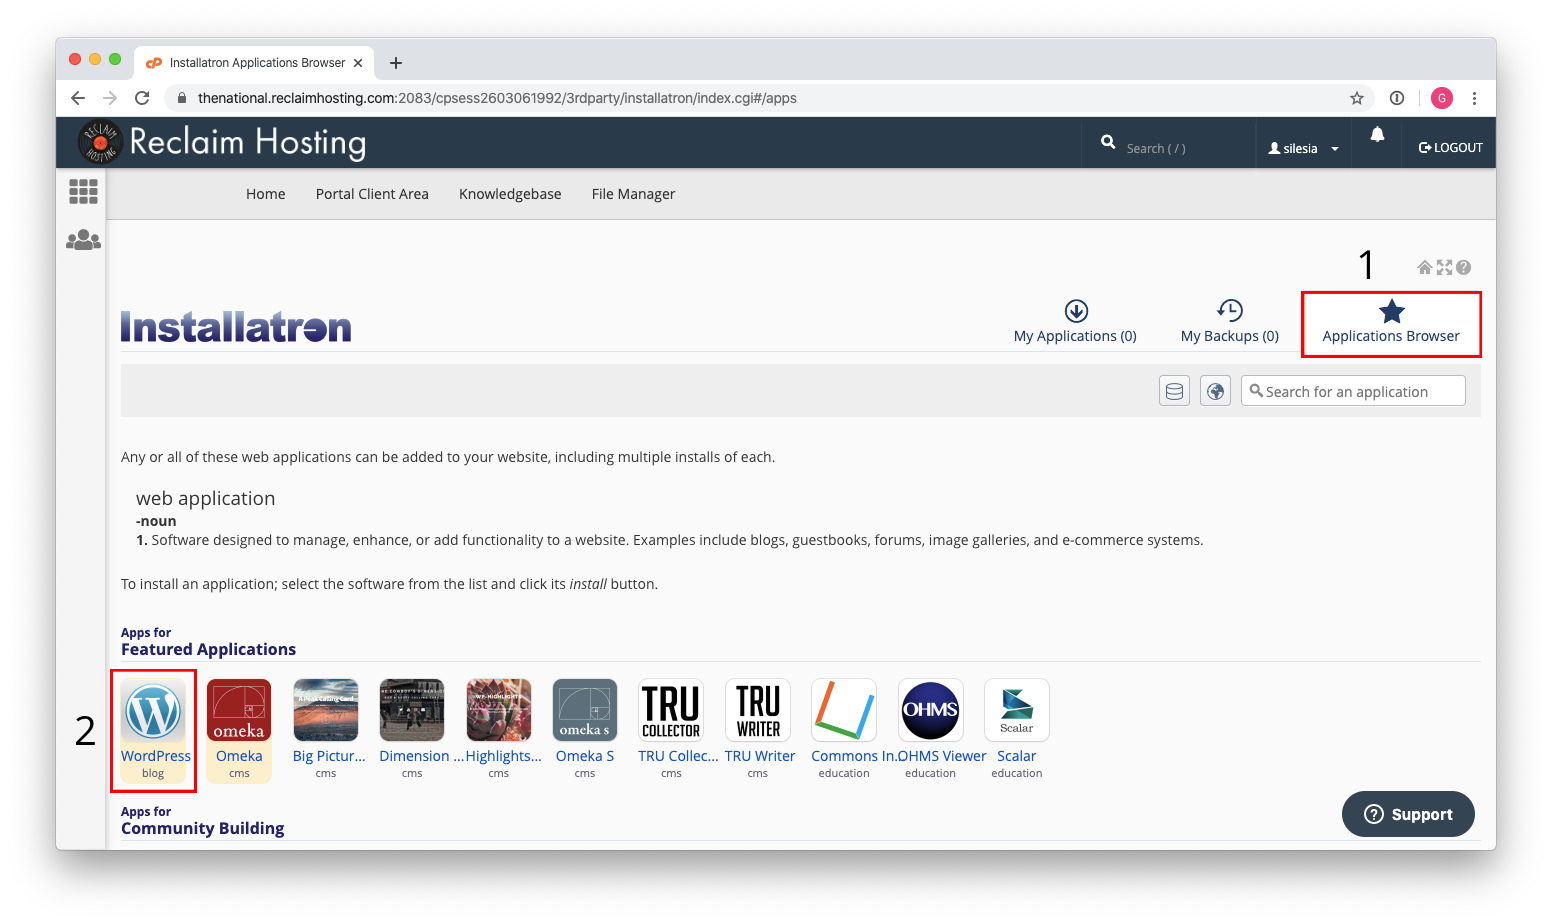
Click Applications Browser and then WordPress
Scroll to the bottom of the page and click Install
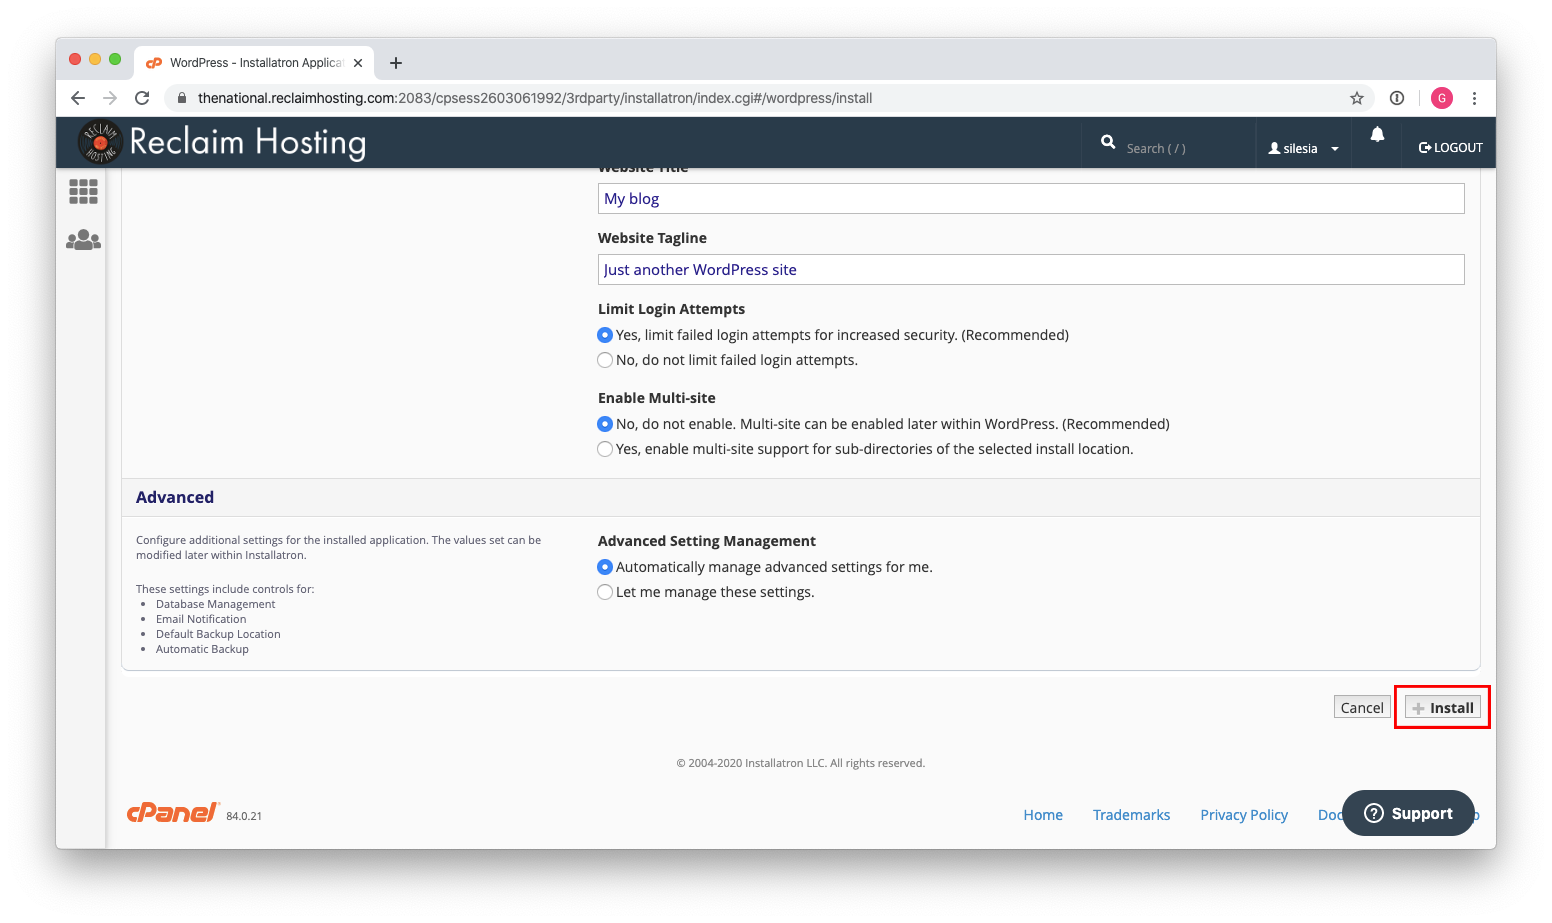
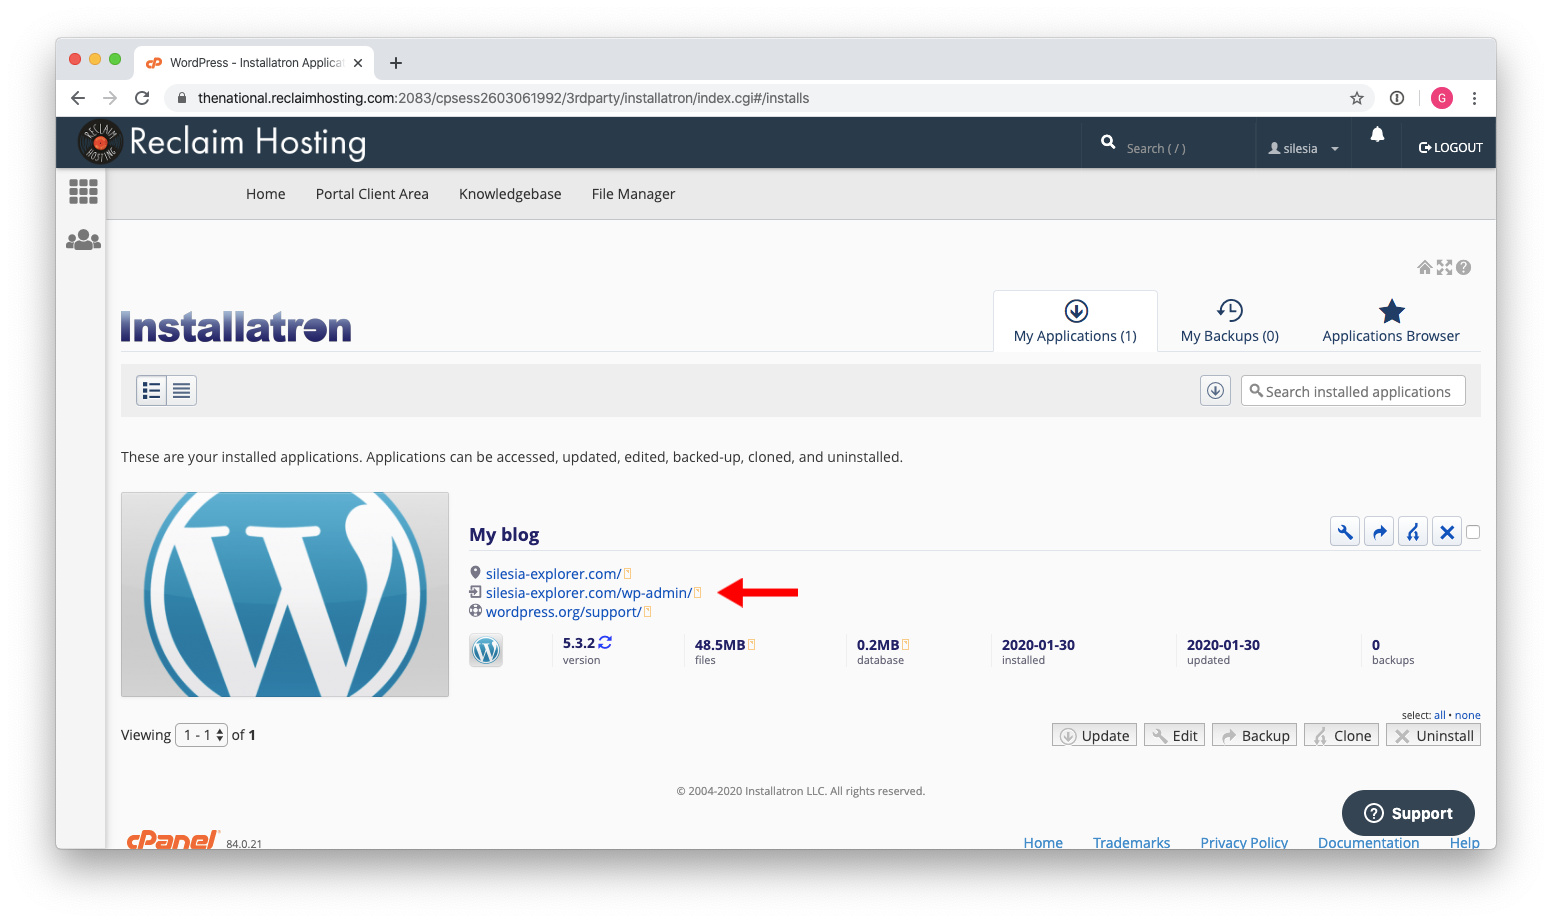
Once WordPress has been installed you can click on mysite.com/wp-admin/
Restoring Backups with Updraft
Follow the directions above for installing Updraft Plus and once activated, click Settings
![]()
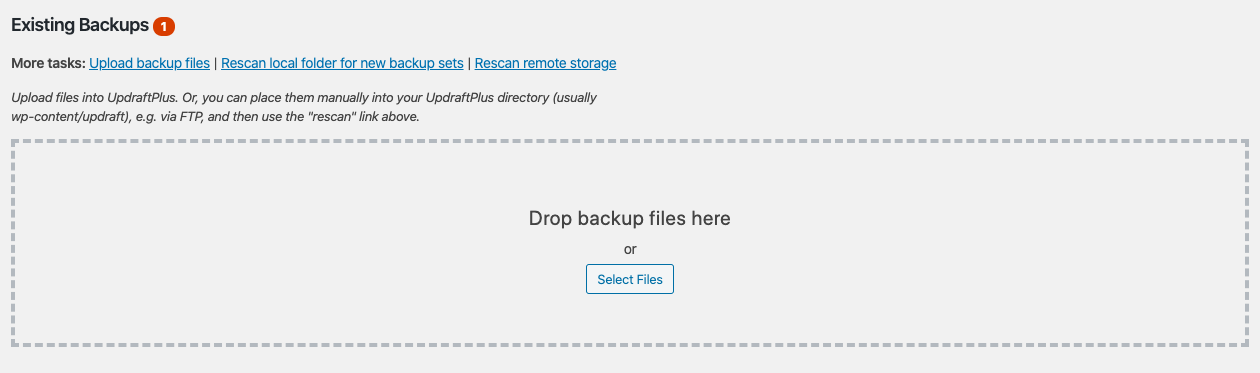
We can now upload the backup files from the old server.
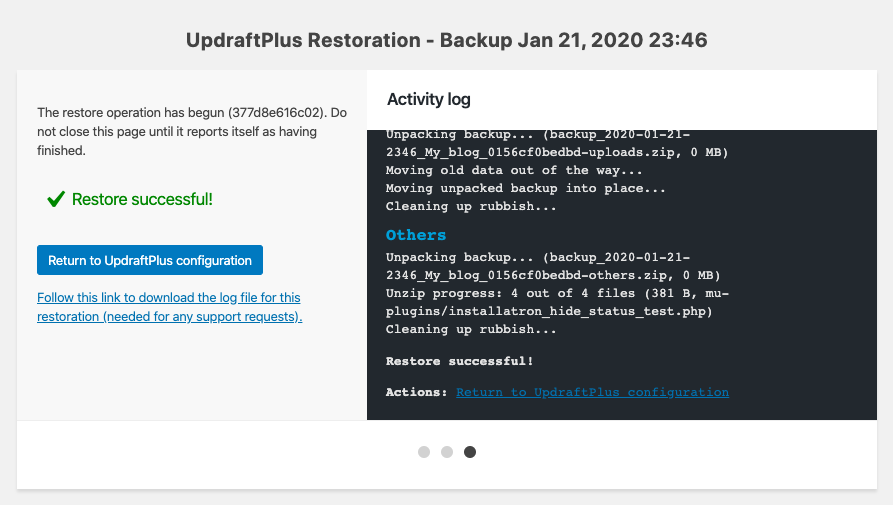
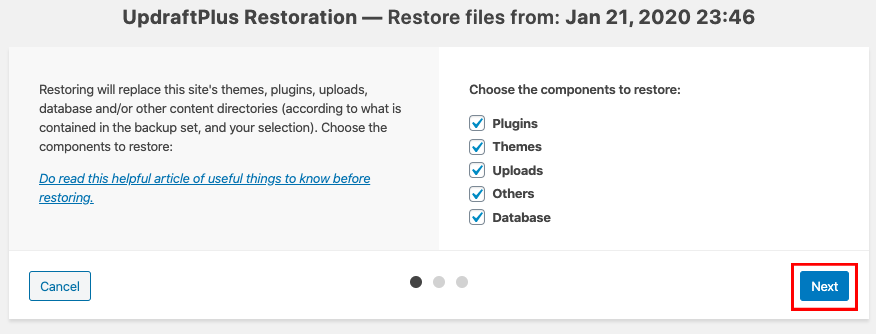
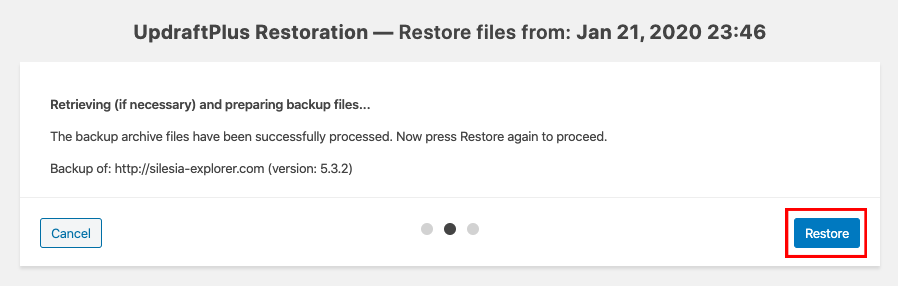
The next step is to perform the restoration. Click Restore

To restore the full site, make sure each component is selected and then click Next
On the second screen Click Restore
Once the restoration is finished you will be presented with a Restore successful! acknowledgement. You can then return to the UpdraftPlus configuration.