In another Community Guide we talk about file and directory permissions. In this guide we’ll cover how to change the default file and directory permissions via FTP.
How to change file/directory permissions using FileZilla
Using FileZilla, connect to your account via FTP. Once connected, navigate to the files or directories for which you would like to change the permissions.

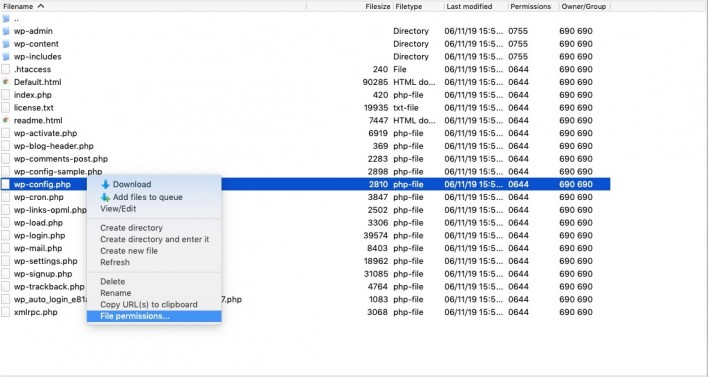
Right-click on the name of the file/directory you want to change the permissions for and click on File Permissions.
A new window will pop-up. In it, use the checkboxes to set the desired permissions or alternatively use the Numeric value text box and input the numeric value of the desired permissions. If you want to apply the same permissions for all files and directories inside the current directory, enable the Recurse into subdirectories option. Once ready, click OK.

The process can take several minutes if you are changing the permissions of a lot of files.
How to change file/folder permissions using Cyberduck
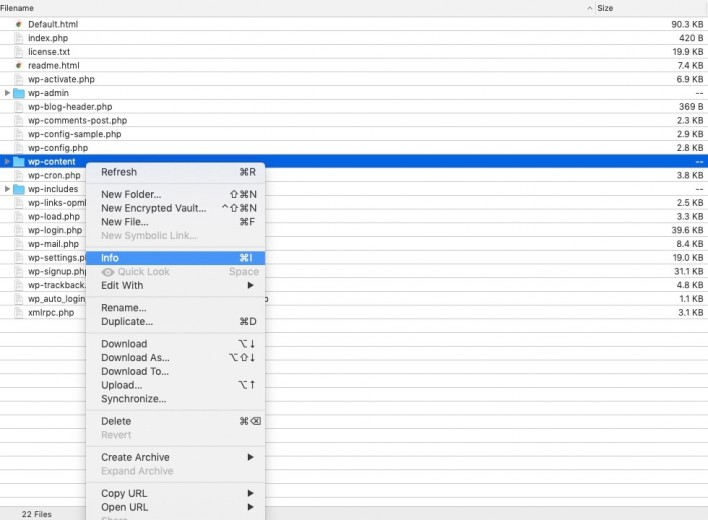
To change the permissions of files and directories on your account you must first connect via FTP to it. Once connected, navigate to the file or folder for which you want to change the permissions and right-click its name. Choose Info from the menu that appears.
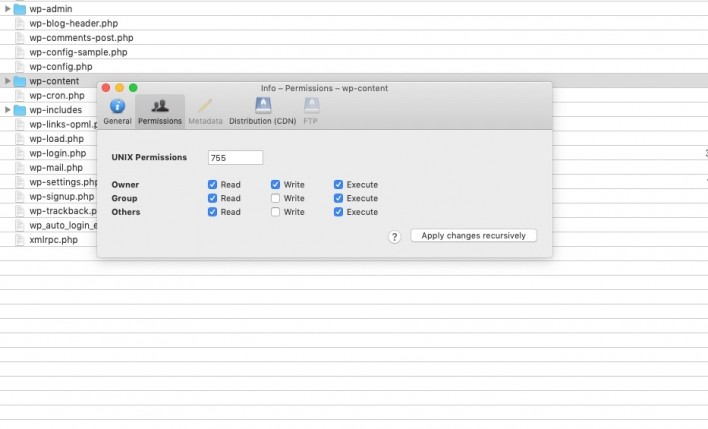
In the new window that appears click on Permissions. In it, you can use the checkboxes to set the desired permissions or alternatively use the UNIX Permissions text box and input the numeric value of the desired permissions. When you change the permissions Cyberduck will automatically apply the new ones to the file or folder in question.
If you want to apply the same permissions for all files and directories inside the current directory, set the permissions and click on Apply changes recursively.